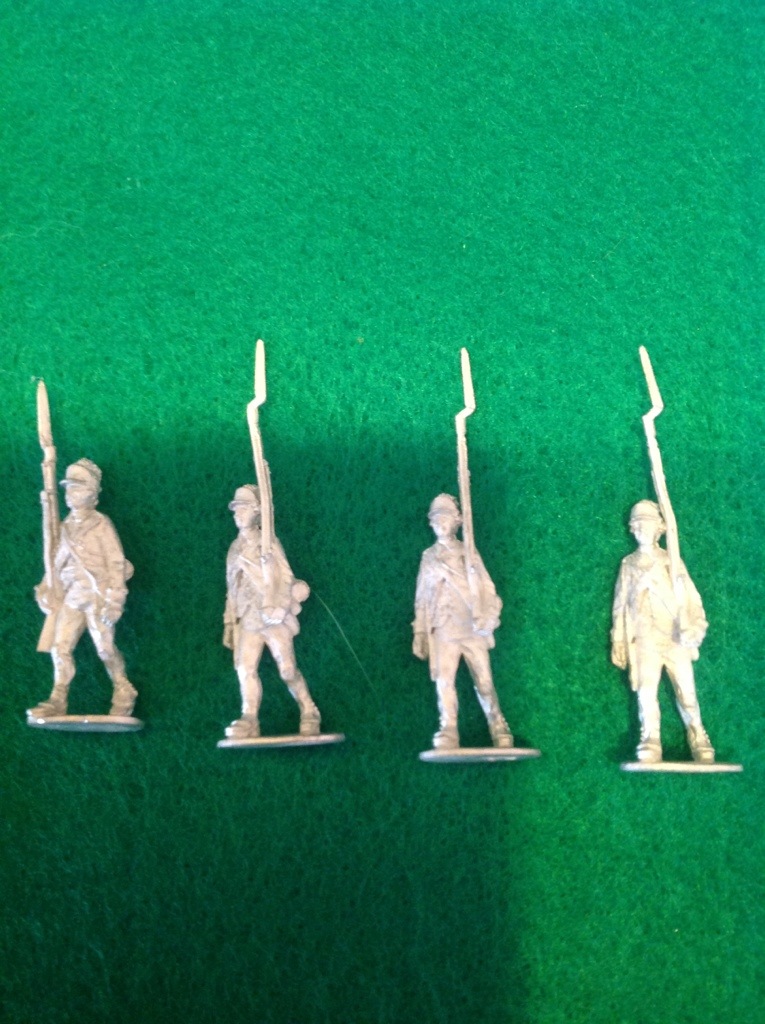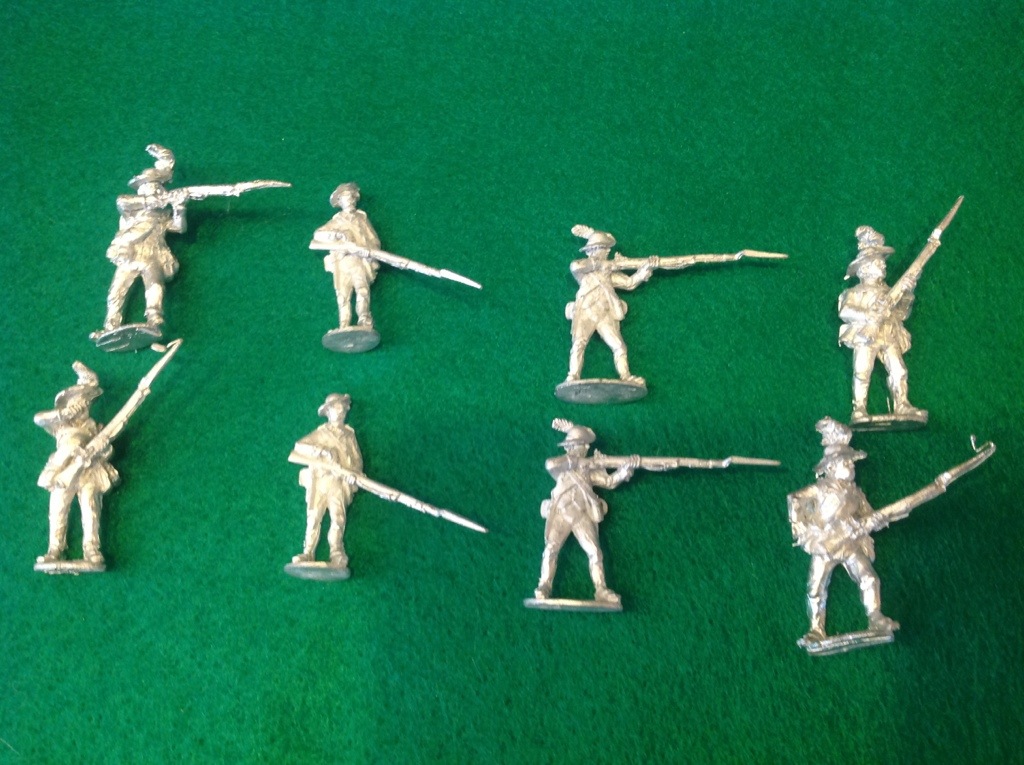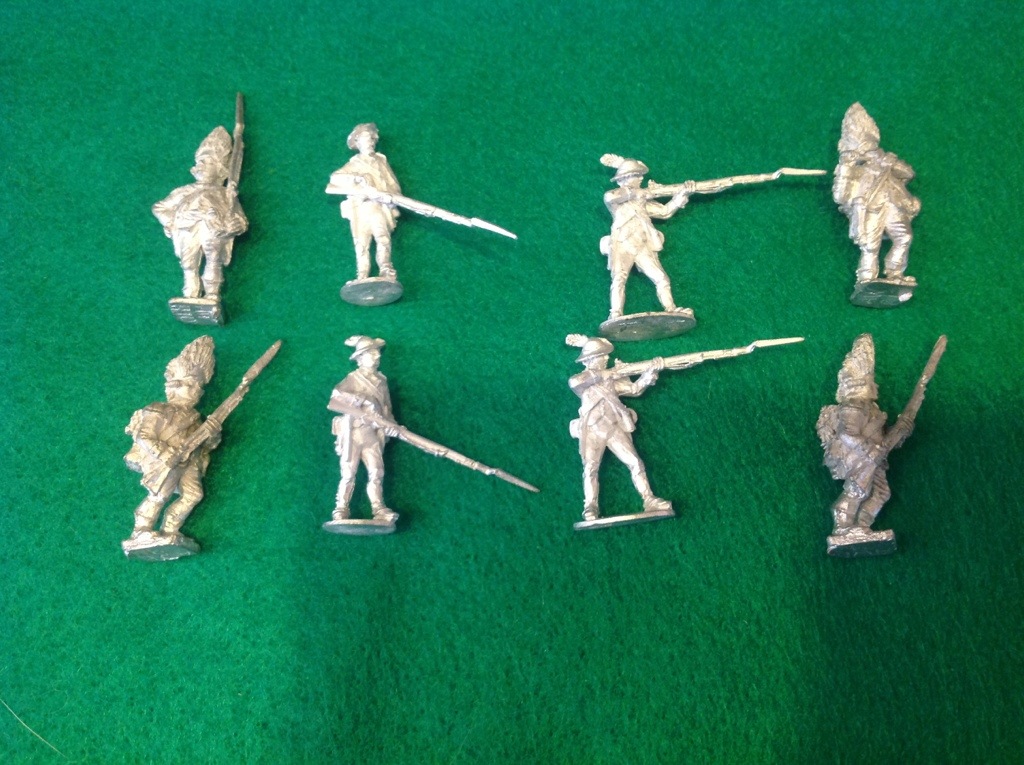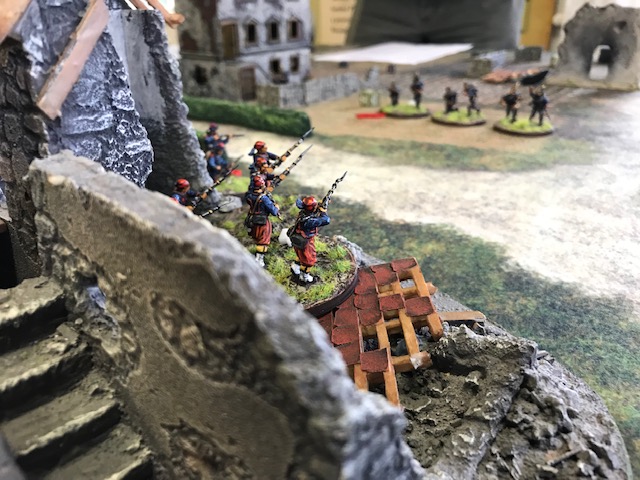
Burning Hesselberg Pt. 2: The playtest

Yesterday we did the first playtest of the game.

The Cascadia Tabletop Gamers held their monthly meeting yesterday at the Panther Lake Library across the parking lot from  Wizard’s Keep because of a game conflict-which unfortunately wasn’t actually a thing.  The one real complication with the move to the library was the size of the table space. I was planning on something close to 8′-6′ and I lost about a foot. Not catastrophic, but I would have loved a tish more set up space.

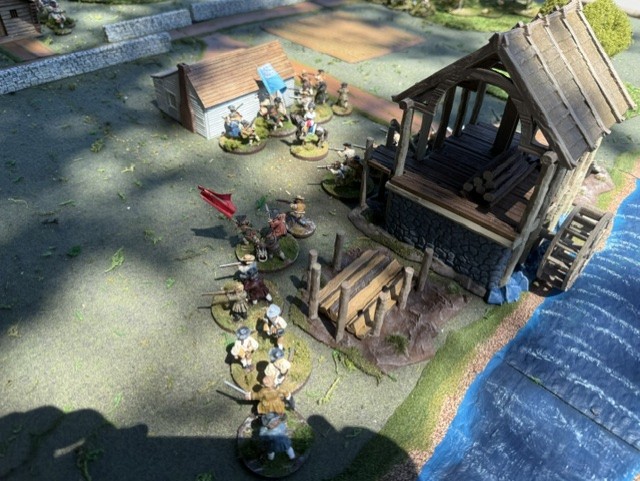
In the scenario , the British have the onus of being offensive.  They have to burn houses, and forage from gardens to punish the town for its support of the Continentals during the winter/spring of 1777.  The most valuable of the landmarks is the Sylvester Sawmill.  The Americans have fewer troops, but their mission is more defensive: defend the mill and kill British.  Both sides played well, especially not knowing the rules.

Wes Rogers effectively used his provincials to fend of the Patriots while gathering forage.

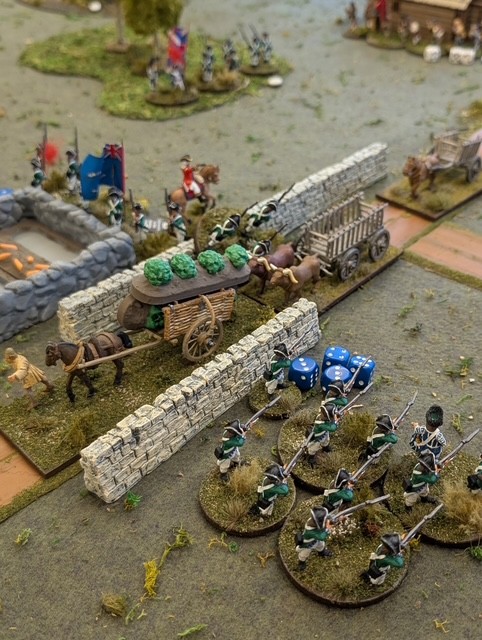
The Americans were allowed to plunk their three militia units in the town before the British set up and deploy six markers including three dummies to represent potential positions.  The British were also able to deploy one of their commands, the three units of Loyalist Provincials in the town with wagons for removing forage.  The remaining British, a command of three loyalist militia and a command with a unit of light cavalry and Hessian Jaegers came in on one end of the board.  An American command with two units of Continentals and a unit of Continental riflemen came in at the other end of the board.

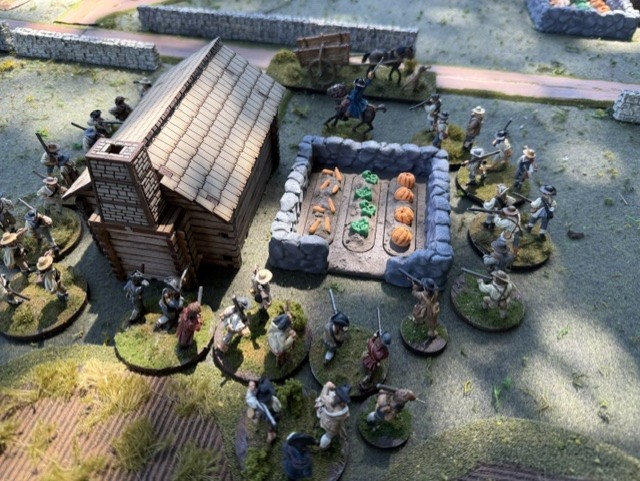
The Americans used the woods and the house to anchor their defenses to limit the British advance into Hesselberg. The building became known as “Hesselberg Alamo.”

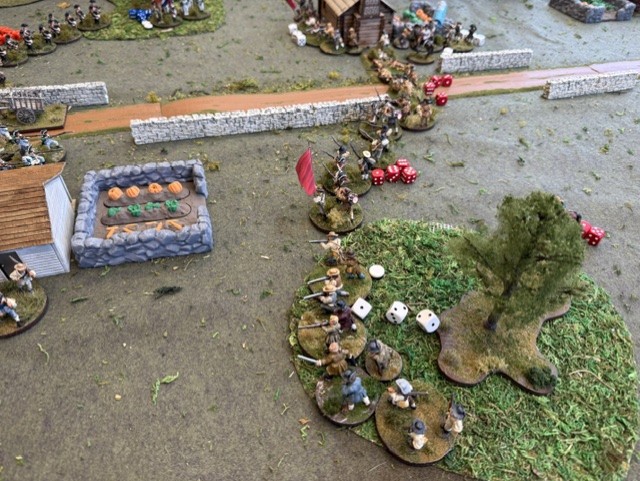
The British, in addition to dealing with the Americans, had to put up with my in-game shenanigans.  They had limited torch markers to burn things with and had to make my silly die rolls to get things to burn and they rolled phenomenally badly, so it wasn’t easy.  But in the end three of the seven buildings on the board ended up ashes.  The Jaegers and the militia were also subject to a “become looters” rule.  No harm, just time wasted.  Only one of George’s militia units fell into the spell of ransacking a house they should be burning.

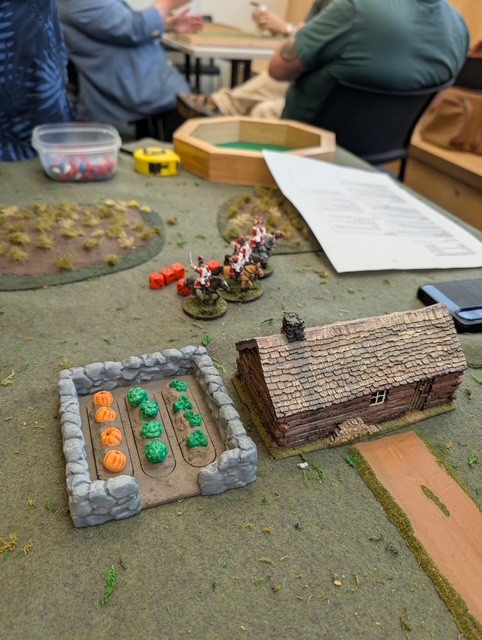
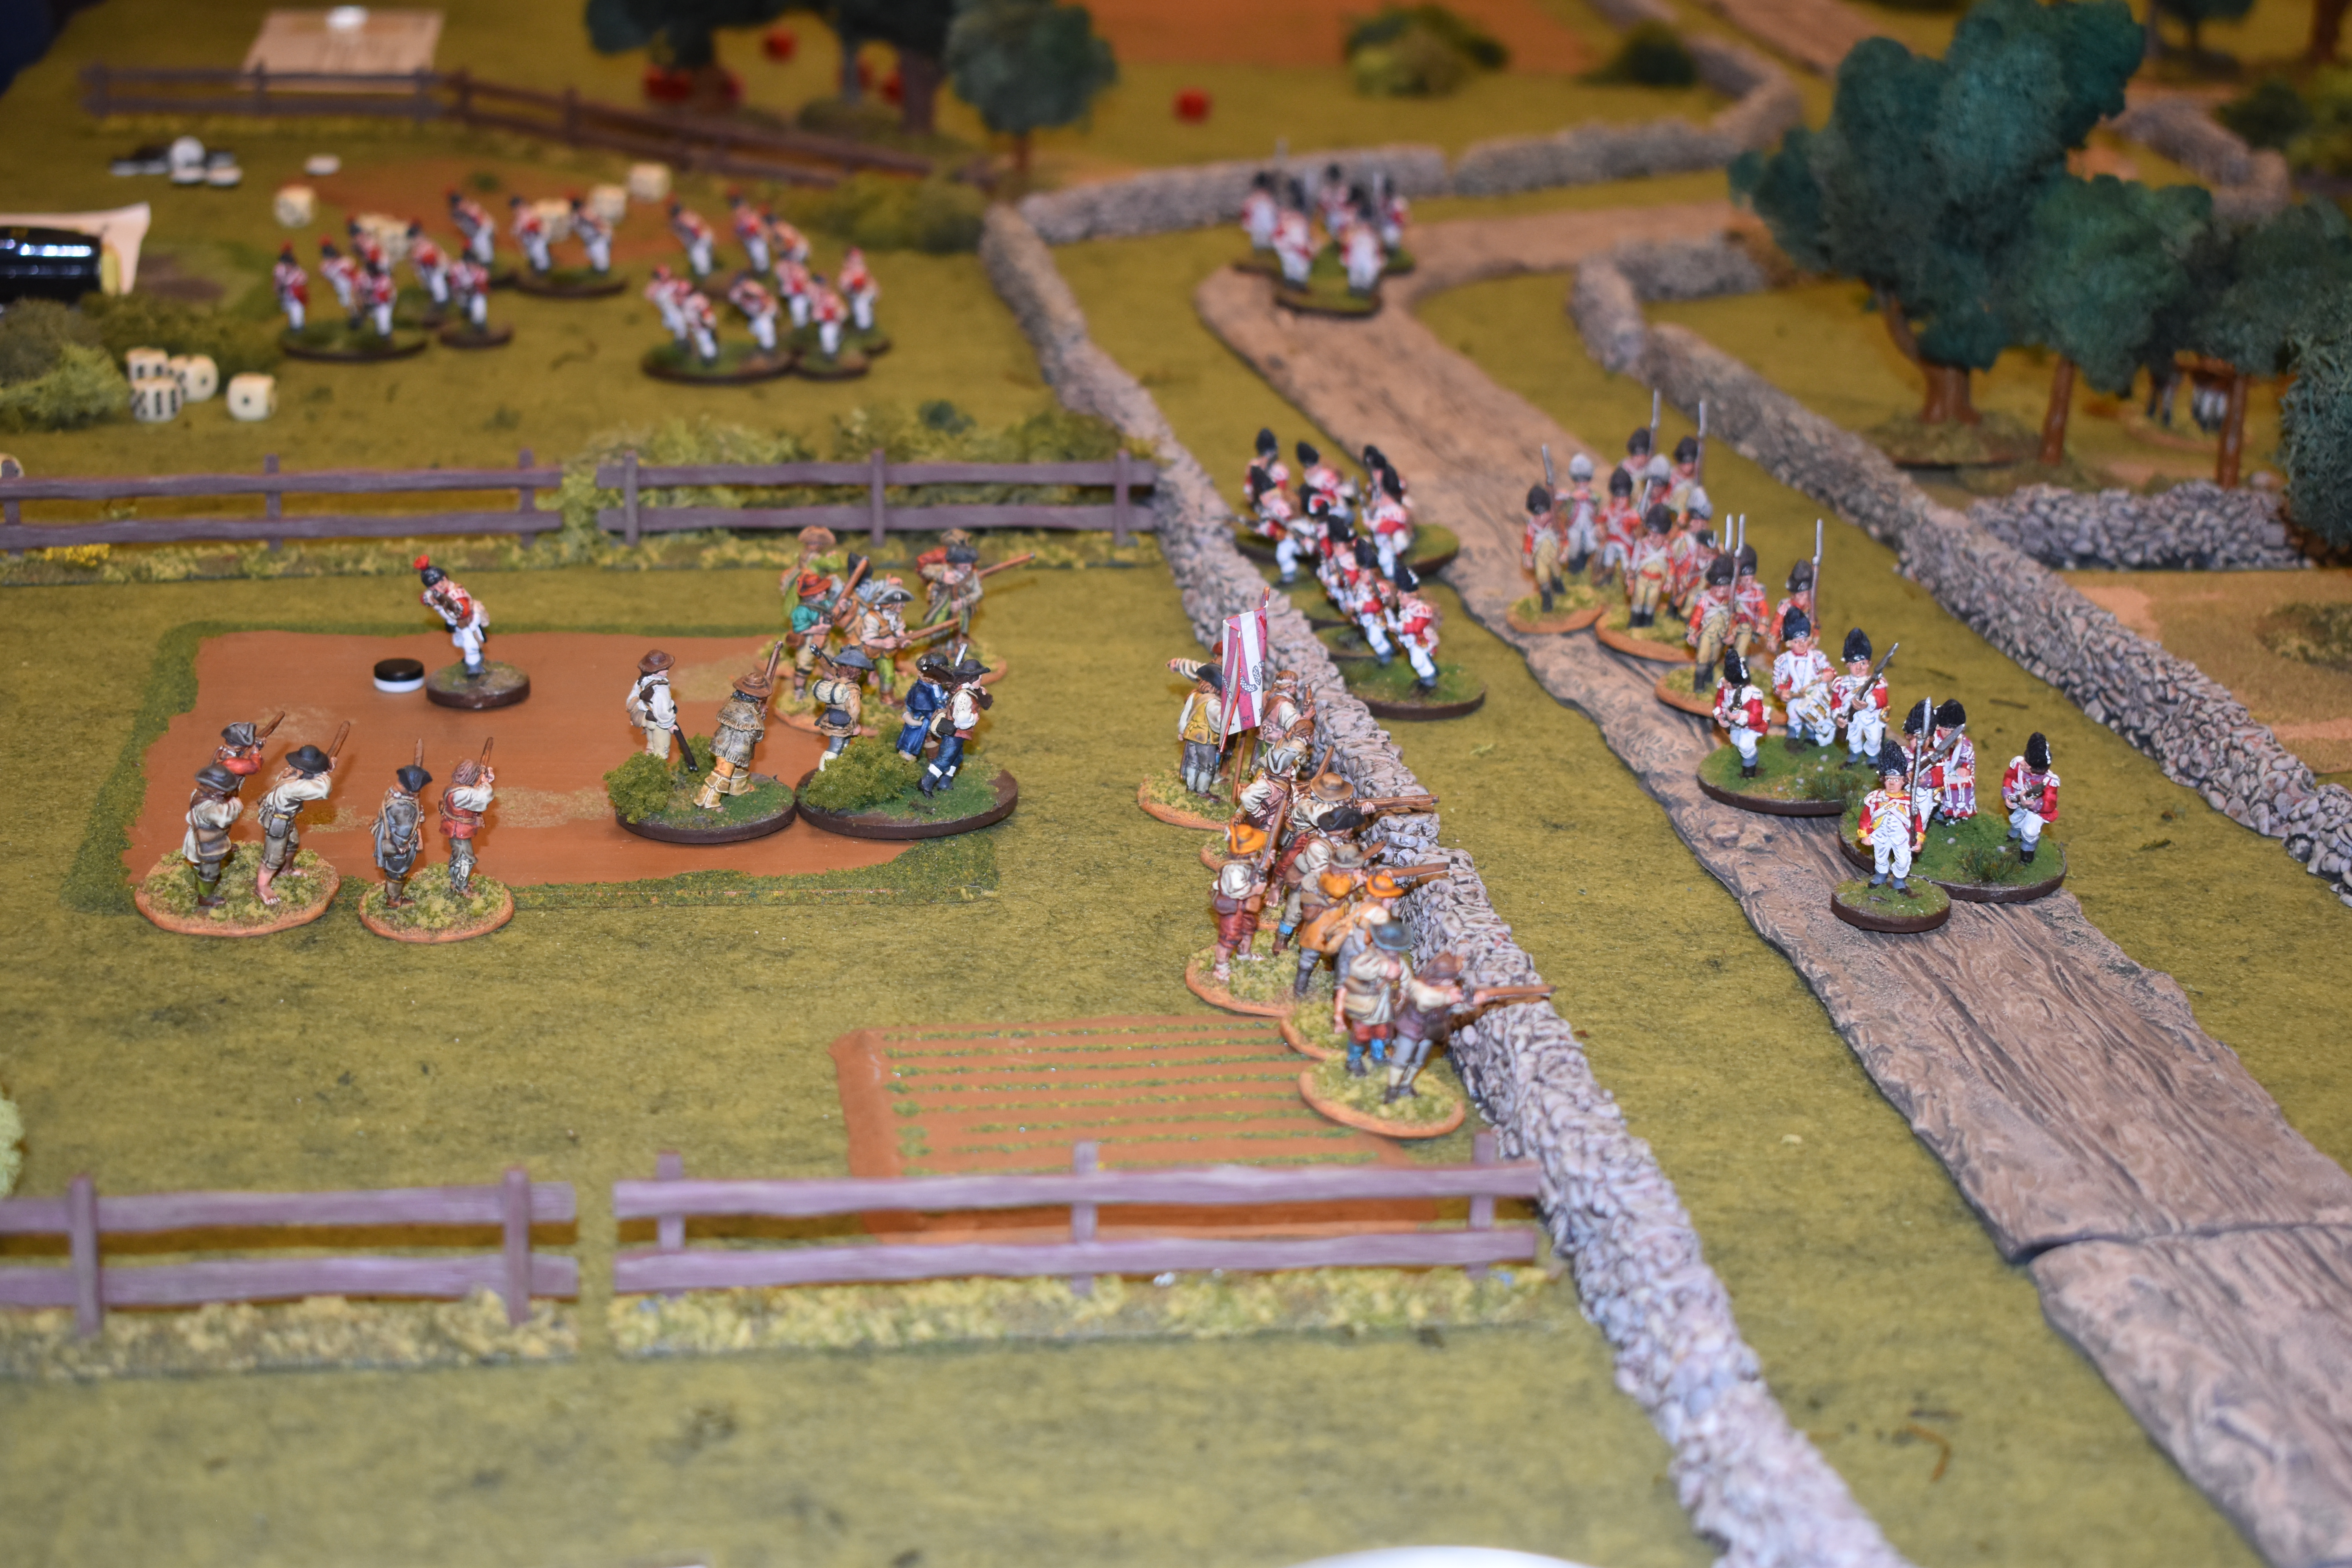
One of the factors holding up the British advance was the “looting” shenanigans I pulled on some British units. Thankfully only one of George’s militia units was snared by the looting die roll. This is them piled up outside the house instead of burning it.

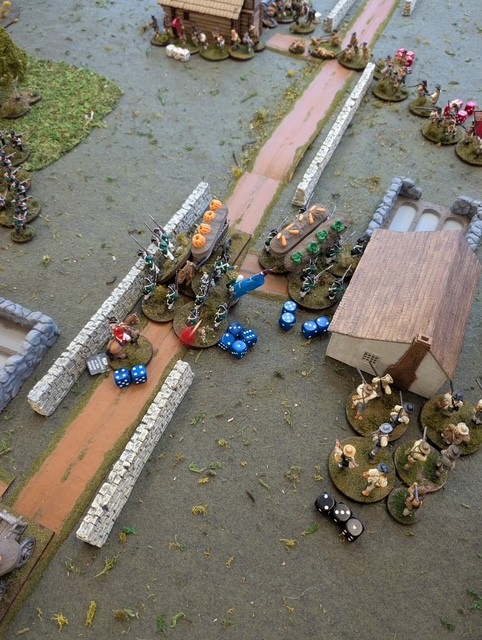
The real game, however was in the two battle lines that formed in the middle of the table.  The Americans seized formidable positions that they defended well, inflicting damage on  the British usually from cover and regularly made saving throws.  One of the houses, occupied from the beginning of the game by one of Joe’s militia units, became known as “Hesselberg’s Alamo.”

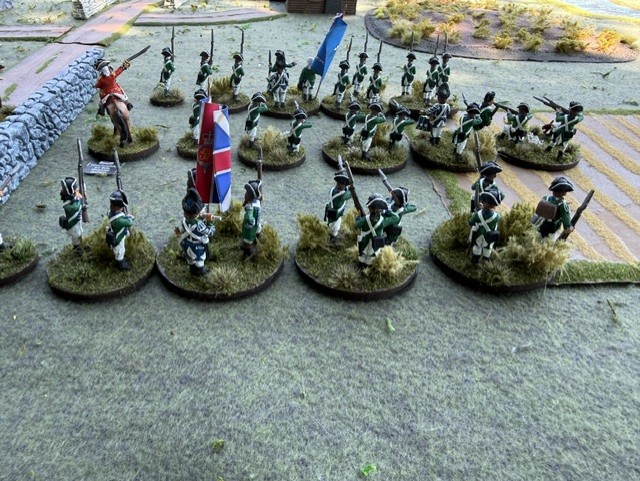
The battle lines form from the American POV.

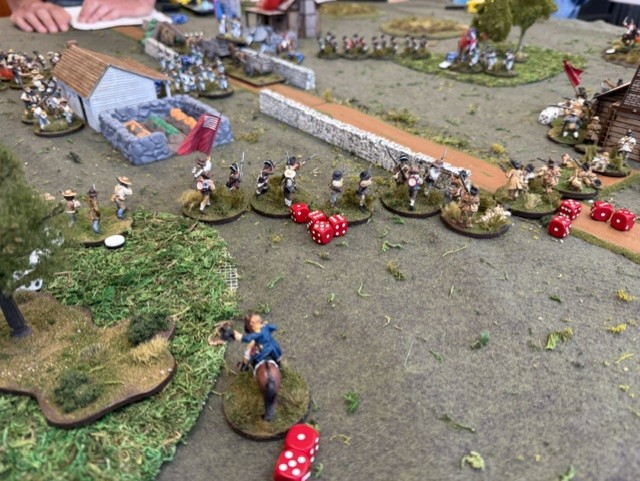
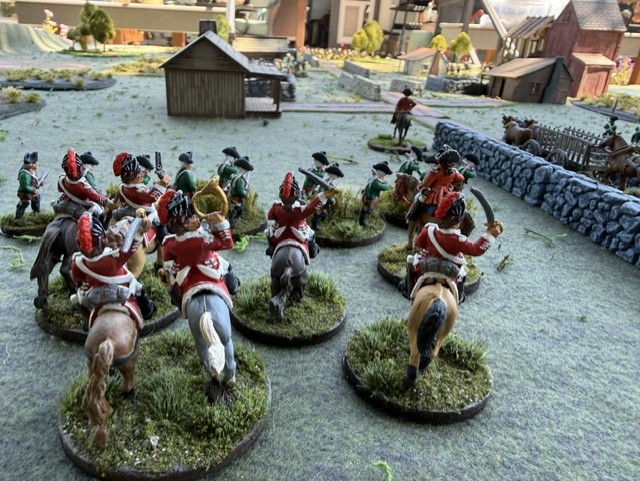
The final gambit was Bruce using the speed of his dragoons to ride around the flank and rear of the American army to seize the valuable sawmill, but Americans, seeing the danger were able to bring fire on horsemen and inflict significant damage.  We ended the game shortly after. 

Bruce’s dragoons ride around the American army as they attempt to capture Sylvester’s sawmill. They were thwarted as the Continentals diverted units to target them with damaging fire.

Based on the victory conditions I wrote for the game, the British received points for burning and removing forage, but the Americans held the vital sawmill and dished out a fair number of casualties.  It would have been a slight American victory.  But Hesselberg did lose almost half its buildings and half its forage, so I’m content calling it a draw.  The British had a difficult job and played well.  So did the Americans.  I was quite loud and had fun.  A few tweaks were suggested and they will be incorporated when I run the game again at Drumbeat South.

There are a couple of rules issues I need to work through. This was the first game I’ve played with cavalry. According to the rules it really takes two hits to kill a figure. That’s something I overlooked and it won’t happen again. There was also a melee that didn’t turn out the way I thought it should, so I’m working through that. But the game was played with five guys who hadn’t played the rules before and I think had a pretty solid grasp of them before we were through.

The Burning Hesselberg playtest: Part One

Today is the day I’ll be running my first Burning Hesselberg game. Remember, this is my AWI playtest using the Take Action rules by Chris Leach. These rules fit my purpose as a semi skirmish game, similar to Daniel Mersey’s Rebels and Patriots game. It is an activation based game, but the players are offered a bit more flexibility than the Mersey rules. Burning Hesselberg is played in 28mm figures, with three British players and two American players.

In the game, the British have been sent to punish Hesselberg for their support of the Patriot cause. Their job is burn houses, forage food, and try not to get too shot up by whatever Americans are sent out to face them. They have some very good troops–light dragoons and jaegers, some middling troops-Loyalist provincial infantry, and some truly wretched troops-New Jersey loyalist militia. Their mission is to do their jobs and go home.

The Americans have some ties to Hesselberg and hope to save some of the buildings, particularly the big sawmill. Their job is to harass the British, minimize the destruction and drive off the invaders.

The game is scaled for the properly for the rules and the relative inexperience of the players with Take Action.

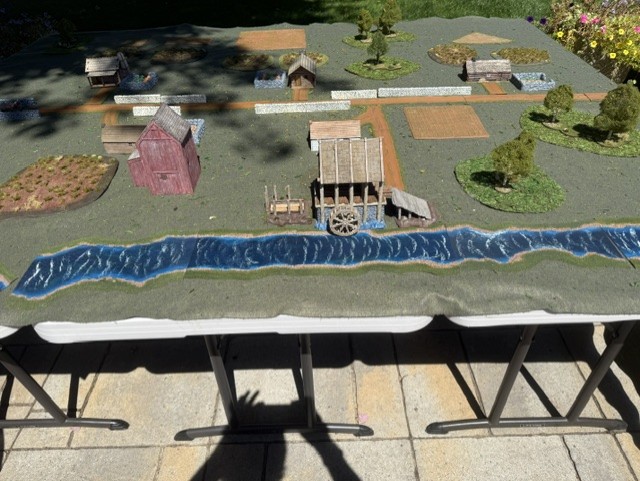
Running games is always a challenge for me. I really like developing scenarios. I want scenarios with a little bit of a twist, something more than two armies show up and have a battle. Especially for these lower level skirmishes, there’s usually a purpose in mind, but there are extenuating circumstances that make things interesting. And while I’m imagining all this and writing it down, its still important, at least for this game, that I see what the table can look like. Unfortunately, I don’t have a game table in my house. But yesterday it was very nice as it often is in summertime Puyallup, so I was able to set up tables on my patio to get a glimpse of what the board should look like.

I use a 6 X 10 felt mat for my games. Yes, I know it’s old school, in my case really old school. I’m guessing this mat is 30 years old. I do have some of the mousepad mats, but Ii don’t love ’em and prefer to use my felt that is well cured with residue from years of lichen and various tree shedding (plus a small but unsightly coffee stain.)

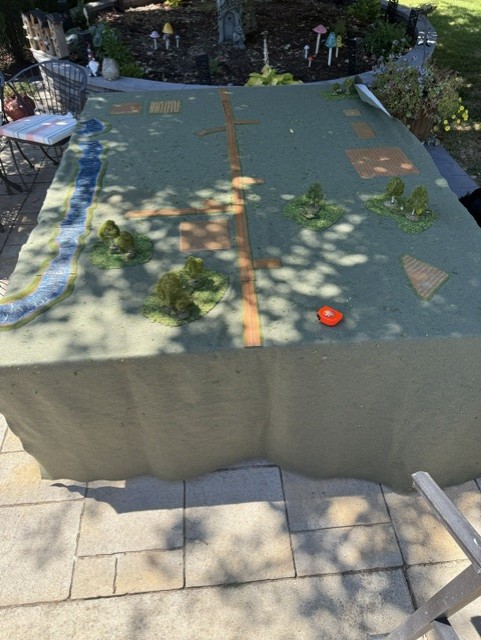
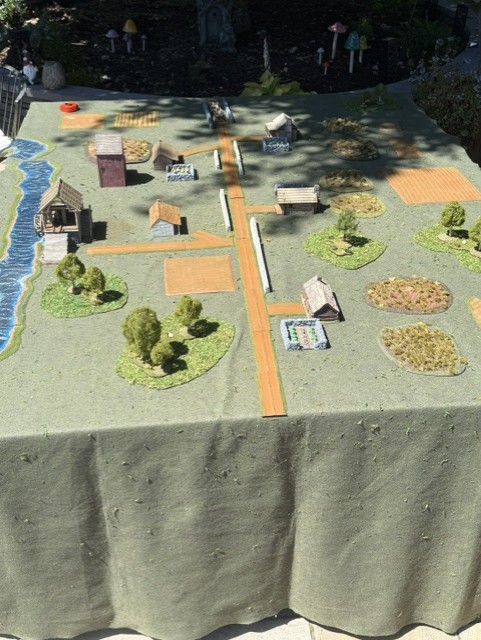
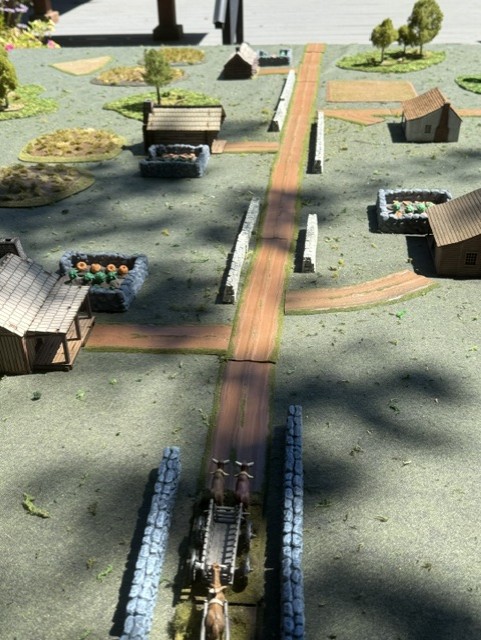
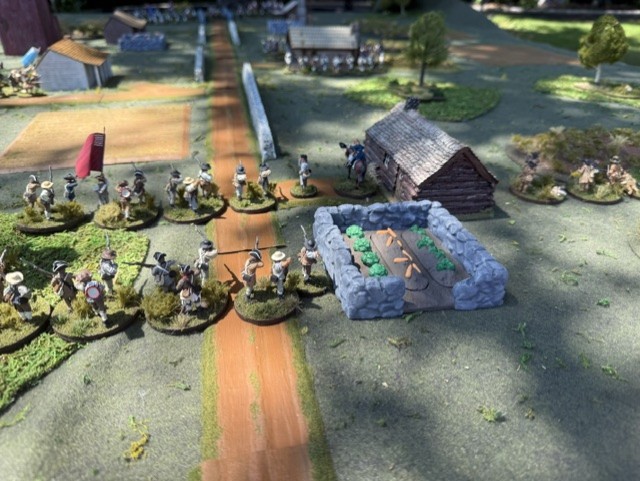
The first step was to put out the Hesselberg road. It has to run about 8′ down the center of the table. I have 2″ Wizard Kraft roads, but I wasn’t sure how much straight road I could manage. Thankfully there was enough. From there I needed to determine where British units would enter the board. I wanted them to start 12″ in from the “East” board edge. I plunked down a wagon to show where that would be. From there I could begin distributing the buildings that form the farming town of Hesselberg.

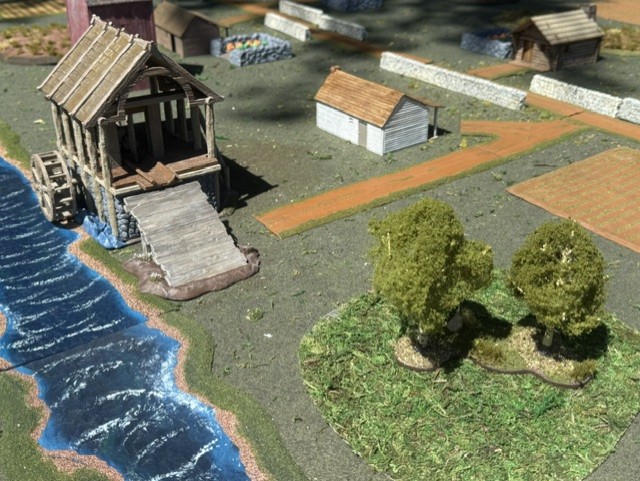
From left: This picture was actually taken as I was putting things away, but it shows the main road and the additional “driveways” I added to space out the buildings. Destroying the buildings is a British victory condition, so they couldn’t be too close together or too far apart. The large saw mill is an important victory condition for both sides. I added a few small woods to break up line of sight and fields for eye candy. The mill is water powered, so there had to be a river.

My goal with scenario development is to create a story. The British are sent to Hesselberg to carry off some needed forage. This will be represented by vegetable gardens scattered through the village that can be carried off. They are also ordered to burn the sawmill and other houses which have supported the Patriot cause. One British command will start in the village, the rest must move on to the board. There will be wagons which must stay on the road. There are rules for burning the structures and there are limited resources for effectively burning. Some British troops may be tempted to loot buildings rather than doing their jobs which might be a problem, chiefly a time waster.

The Americans have a different goal. Sent to Hesselberg by General John Sullivan, New Jersey militia with men from the town will begin in the town so early opportunities for combat exist. They won’t deploy their three units immediately, but will have six counters including three dummies to confuse their enemies. Three units of Continental troops will set up at the west side. They win by saving the saw mill, and as much of the town as possible, and by killing British.

The British definitely have the tougher job.

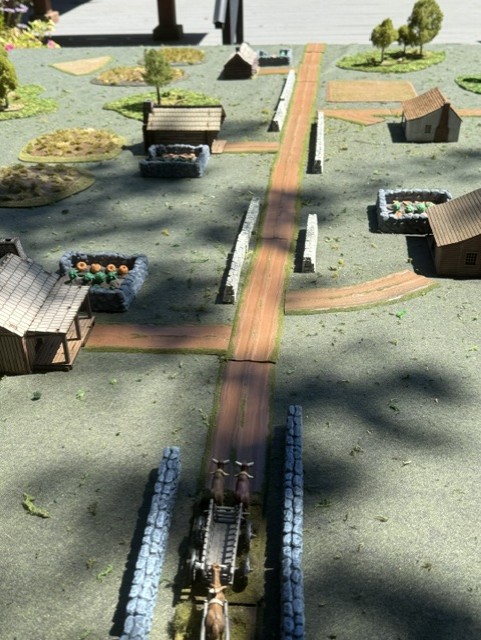
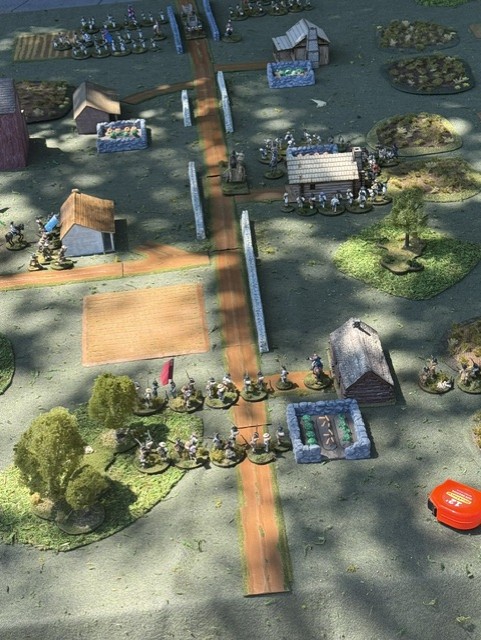
The set up for the game will look something like this.

From left, an overall picture of the battlefield. In the foreground Connecticut Continentals head down the road from the “West” board edge. The British come in from the “East” with Loyalist militia ravaging a farmhouse in the middle of town. In the middle of town Loyalist militia surround a farmhouse. Will they forage and burn, or will they loot the place? 17th Light Dragoons and New Jersey Provincials enter the East side of town. New Jersey militia defend the mill. Connecticut Continentals and riflemen enter from the West.

I’ve done the best I can to create a game that isn’t symmetrical but should have some play balance. Looking forward to working through it. I’ll be running it again in Chehalis in a few weeks. It’s also a game that has Enfilade potential.

My AWI Summer

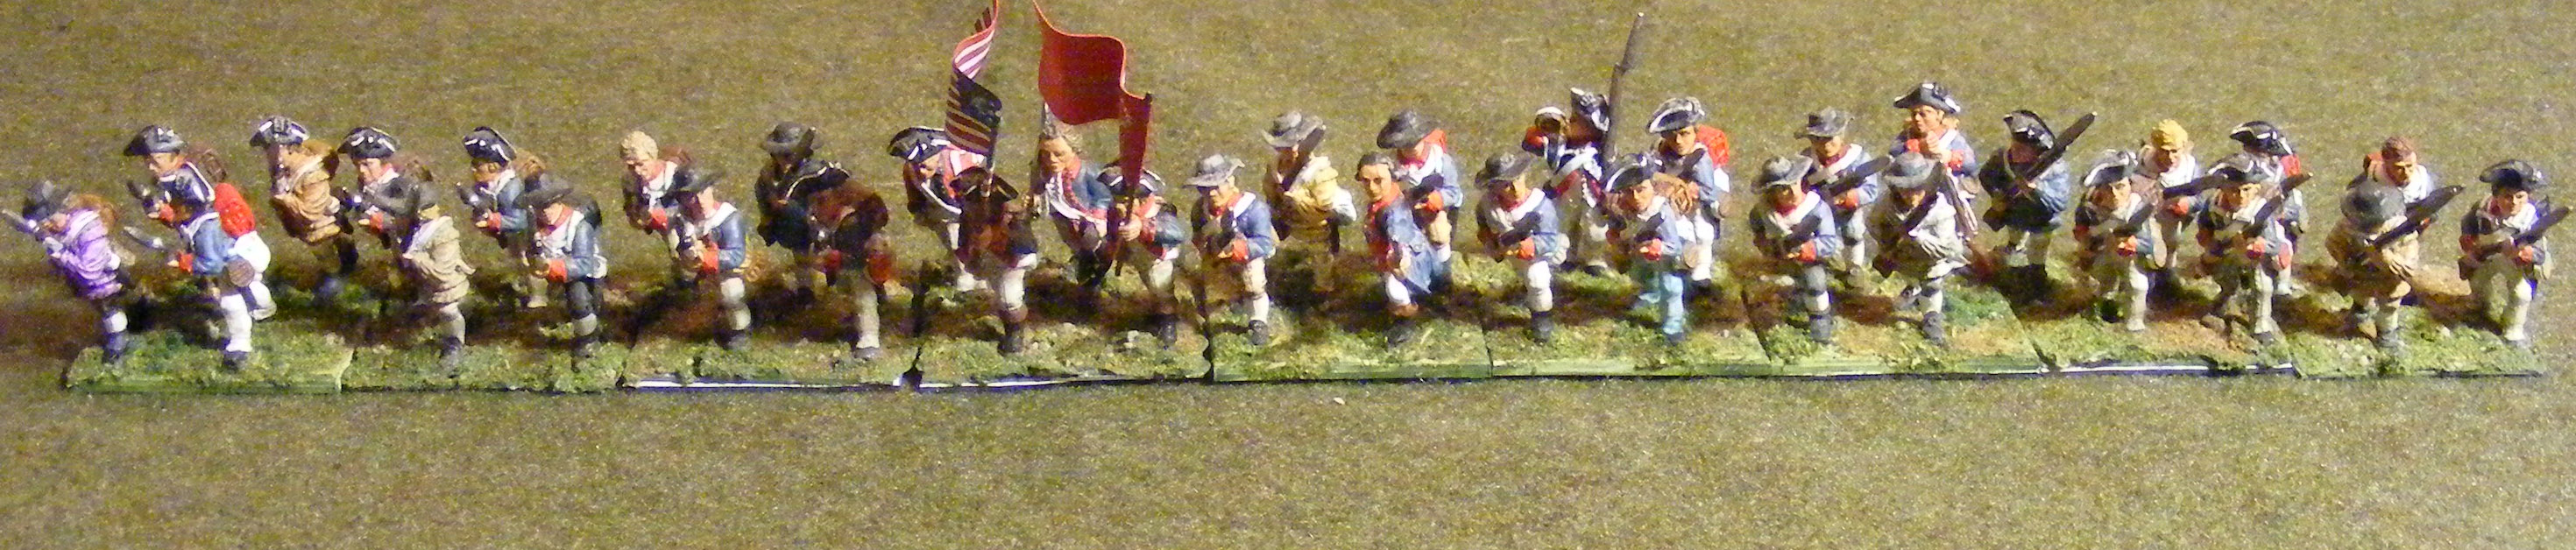
1st Connecticut Continentals ca. 1777. These are Perry figures. Only one figure has a uniform.

One of the things I really wanted to do in 2026 is paint my way through my giant pile of American Revolution figures. They’re all 28’s, metal. Some I’ve had for a number of years, mostly Perry figures, with some Old Glory and Front Rank/Gripping Beast figures thrown in for good measure. I inherited David Sullivan’s mega pile of AWI figures too, and they leaven my Perry/OG/Front Rank pile with more Perry figures and some nice Foundry figures.

How many are there? Really? You want me to count them? Let’s just say there is a lot. I think that since the first of the year with all my other projects I’ve worked on I’ve painted about 125 AWI figures. How committed am I to sticking with it? Well, I’m hoping that by the end of the week it will be closer to 150 figures.

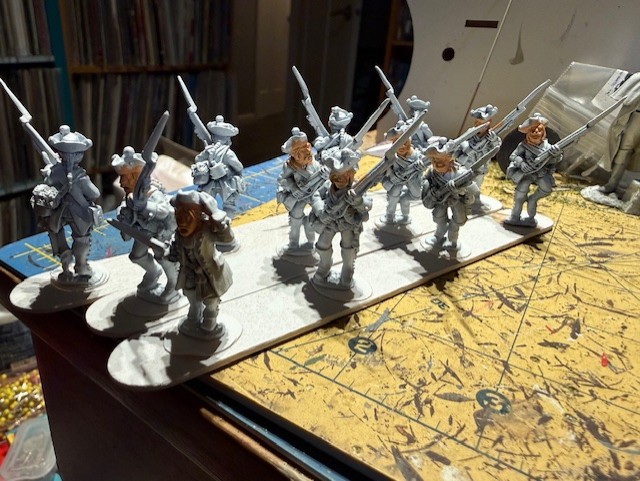
These figures are, I believe, Foundry figures and came from David Sullivan’s giant pile of AWI figures. And there are so many more. These are painted as Provincial regulars from the New Jersey Loyalists. This was a very large Provincial formation that raised six battalions and will appear in my Take Action game on August 15th in Chehalis.

As I’ve written before, my AWI Project, like my Hundred Years War project is torn between two projects differing in scale. I have my bunch of semi-skirmish units that I can do small scale actions with. I play these with Daniel Mersey’s Rebels and Patriot rules, or I can use the Take Action semi-skirmish rules under construction by my friend Chris Leach.These rules both use 12-figure units. A lot of the figures I’ve been painting are for these games. One doesn’t need a ton of units to play these games. Really a player should only command 3-4 units to manage them effectively. But it’s really important to have a nice mix of different unit types and that’s where I am now. I have lots of militia troops for both sides. I’m currently painting some New Jersey provincial troops for the British. I’ve done a pile of Hessians, with a few more to come. For these games I’m mostly considering the “forage wars” that persisted in New Jersey from 1777 to the end of the war. But I’m also really drawn to the persistent conflict between Patriot and Loyalist militias in the Carolinas and Georgia from 1779-81. The most important thing is to have the right mix of representative units . . . which admittedly could be endless.

I’ve painted a lot of troops for this skirmishy stuff, but have overlooked one of my bucket list projects–building the units for Nathaniel Greene’s southern campaign from Guilford Courthouse to Eutaw Springs. I’m not sure why I’ve let this slip. I’ve always had an interest. I continue to read a lot about this, but I haven’t added to the units I have. The American regulars stay pretty much the same with a few adds and subtractions, but the British change considerably. After Guilford, the first of Greene’s semi-victories, Cornwallis slips away with his army to Wilmington and then on to Virginia and its eventual doom at Yorktown. The remaining British commanders in Charleston are left to hold South Carolina with a handful of British regulars, provincial troops and whatever else they can get their hands on. I’ll play this out with Regimental Fire and Fury.

These are Lawson’s Virginia militia that were in the first line at Guilford Courthouse. These are Perry figures, that seem just a little too well armed with their bayonets. The remaining pile of southern militia are being combined with other figures for less well clothed regulars for the early war. See Connecticut infantry above.

Yes, I know Regimental Fire and Fury is considered kind of Old School, but I like ’em. I love the Maneuver Chart which is the chief play engine of the game. The firing chart seems to work fair and equitably. I would say the rules are of medium complexity, but not impossible to figure out by a newbie. Good stuff.

I just finished my first F and F unit in a long time. Just some Virginia militia for Guilford Courthouse, but there are a lot of them, so I gotta start somewhere. There are British Guards and line infantry, more Americans, lots to do, but it is all work I enjoy doing them.

I do have a game I’m planning. We have a game day scheduled for August 15th in Chehalis at the Veteran’s Museum (be there or be square.) I’m going to run a hypothetical game based on the burning of a Patriot town in New Jersey in the early summer of 1777. It will be called Burning Hesselberg and will include patriot militia and Continentals vs Loyalist regulars, some mounted and dismounted cavalry, and raw Loyalist militia. We’ll see how this goes. Will keep you updated.

Sometimes a Little Ken Burns . . .

I had the good fortune to have spent my working life doing something I really enjoyed. Before I retired in 2019 I was a school teacher. 36 years in the classroom. But it was so much more. I finished as a high school history and English teacher, which was my dream when I graduated from Carlmont High in 1973. The path there wasn’t easy. The Baby Boomers were aging out of schools and the vast demographic bubble that was inflated by a massive population of school age kiddoes was collapsing and there simply wasn’t a need for fresh-faced know-it-alls to share their truth with the young ‘ens. I was only able to become a teacher through a back door and for my first ten years in the classroom wasn’t really doing what I wanted to do.

But I did eventually make it into a traditional classroom and taught U.S. History, Washington History, and English to 5th and 6th graders, middle school students and high school sophomores and I loved it. I was able to do some super cool stuff with outdoor ed. I took students camping and we regaled in the wonders of the Lewis and Clark bicentennial here in the Northwest. I earned a Gates Foundation tech grant in 2000, and was able to bring computers into my classroom where students could do research without being limited to the library. I became a journalism adviser and took part in the wonderful community supporting journalism advisers here in Washington State and nationally. I had a wonderful career, and would never choose another. Unless, of course, I could just read, paint figures, play games, and have lunch with friends, which is sort of my current vocation.

Or if I could just be Ken Burns.

I love books. I don’t have a massive library, but I do fill my bookshelves. I read each day, not as much as I should, some time every day. I love interesting documentaries. But Ken Burns’ work I simply worship. I love his style-the inclusion of historians, the voices of David McCulloch and Peter Coyote, the variety of perspectives, the illustrations. Every Burns documentary makes me look beyond what I already know. After Baseball, I sought out Buck ‘O Neill, after Lewis and Clark I built a library many colleges would envy, after Vietnam, I acquired and read books by Vietnamese writers like Bao Ninh. A great documentary film maker should inspire us to learn more, read more widely, or at the very least seek out more documentaries and Ken Burns does that for me. He isn’t the final word, and he always inspires me to learn more.

The most recent Burns opus, The American Revolution, was another inspiration. I think I’ve watched every episode twice. It wasn’t that I didn’t already know stuff. I’ve read both the Rick Atkinson volumes he’s published on the conflict. Atkinson was the chief expert pictured in the doco. I thought broadening the focus of the TAR to include greater detail on the lives and views of women, Native Americans and enslaved people was perfectly valid and interesting. I’ve added Colin Galloway’s books to my Amazon want list. It has inspired me to read more deeply about George Washington, and I’m in the middle of James Flexner’s George Washington: the Indispensable Man, a book I’ve owned and not finished since, well, forever.

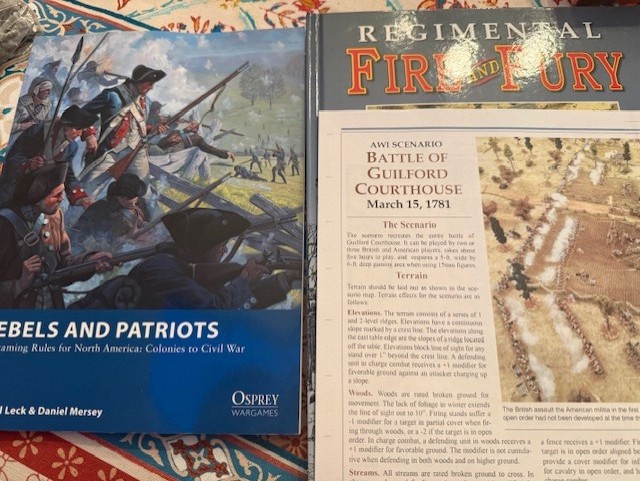
Rebels and Patriots is from the Daniel Mersey pile o’ rules published by Osprey. I like ’em and use it for a variety of periods from the Horse and Musket era. Reasonably available and relatively inexpensive. Regimental Fire and Fury is hardcover, more costly and harder to get. There is an excellent Fire and Fury website with variants for AWI, War of 1812 and Mexican War with some handy rules for specific battles.

More importantly, from a gaming standpoint, Burns and TAR have fired greater interest in returning to my two (!!!!!) American Revolution projects. I have over 1300 painted 28mm American Revolution figures. Yes, I know, it’s absurd. What’s even more absurd is that I have plenty of unpainted figures. Compounding that problem is that I took on all of my friend David’s unpainted figures when he passed away last spring. They do live in the house, taking up a huge bunch of storage area. I swear, while I’m sitting at my desk painting and watching something terrible on television, I hear them whispering about their place in the painting queue. I’ve actually put some on the painting calendar, with Hessian units for Rebels and Patriots up next.

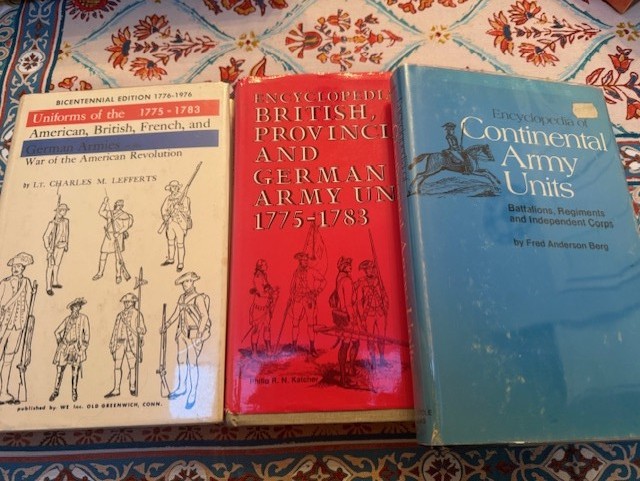
Lefferts, Katcher and Berg. Indispensable Old School sources on the AWI armies.

Do I have a plan? Well yes. The plan is to paint the damn things. Oh you mean, what will I do with them? One of my goals is to have the figures to do each of Nathaniel Greene’s battles in the south, 1780-81. There are four of these actions-Guilford Courthouse, the siege of Ninety-Six, the Battle of Hobkirk’s Hill, and Eutaw Springs. All of these battles were losses for the patriots, sort of, but each were costly victories British that caused them to surrender ground in South Carolina. I’ve already gamed Hobkirk’s Hill once. Perhaps some future Enfilade, I’ll run them all and see how it turns out.

The First Maryland mounted for Regimental Fire and Fury. This is my oldest AWI unit. Front Rank figures painted in 1992 for a Guilford Courthouse game at Enfilade 2. David Sullivan, Phil Bardsley, Bill Stewart and myself were some of the participants in that project. I think they’ve been remounted three times.

The Nathaniel Greene battles all involve a fair number of troops and units. Those games will be played with Regimental Fire and Fury. It’s an older game, but I love the mechanics. It was written for the American Civil War and chiefly for 15mm. However there is a super Fire and Fury website with rules to support variants including the American Revolution and 28mm scale. Greene’s battles are larger and often include a lot of militia The good news is that for the Americans, a lot of the units show up at all the battles, so they can be reused. Guilford Courthouse was the first of those battles and the British under Lord Cornwallis marched off to recover in Wilmington, N.C. and then made their way north to Virginia. Greene’s enemies changed with each of the succeeding battles. There is still much painting to do, but I seem to have the figures.

David Sullivan and I ran a Rebels and Patriots game featuring the Retreat from Concord April 19, 1775. It was the best game we ever ran together and was decided on the last turn of the game. Enfilade 2019.

One of the great things about gaming the American Revolution is the plethora of smaller engagements. These actions can be gamed using the Daniel Mersey’s Rebels and Patriots. I love these rules. They are looser and easy to learn. The New Jersey winter campaign of 1777 is replete with lots of engagements between New Jersey militiamen and British and Hessian forces attempting to forage, ie steal, food, fodder and supplies from New Jersey landholders. South Carolina is another theater in which there was intense fighting between Patriot and Loyalist militias that were very bloody and very important to the course of the war. I have tried to acquire a fair number of Perry militia figures so I can effectively recreate actions like Fishing Creek or Blackstocks Tavern.

These Hessians are in my painting conga line. I’ve had these for some time (like more than five years) and to be truthful, I don’t know the maker. Could be Hinchcliffe, could be RSM, but they’re old school one pose dudes. They’ll do for Rebels and Patriots.

I’ve generally tried to avoid the major actions of the war–Brandywine, Germantown, Monmouth. Part of it is the size, part is just personal interest. I am fascinated by the Southern campaign of 1778-81, and its political and military difference from the northern campaigns. It is far more of a civil war than the war in the north, they exist in both places. The northern war, however is fought more with ideas, prisons and seizure of property, while the southern war is fought with bullets and battles. Burns did a great job of emphasizing this when he pointed out that the only British soldier at the Battle of Kings Mountain was the Loyalist commander Patrick Ferguson, but all his soldiers were Loyalist Americans. There are also fascinating personalities in the south from Daniel Greene and Lord Charles Cornwallis to Banastre Tarleton, Daniel Morgan and Thomas Sumter (and those are just a few.)

In any case, I am hoping 2026 is a year when I can make a lot of progress on this project, and Ken Burns is definitely helping my level of motivation. Now if Burns could only do a documentary on the Hundred Years War, perhaps I could make more progress on that project.

A Productive January

It’s been a great painting month.  I spent lots of time focused on those Enfilade projects I’m working on.  I’m kind of a procrastinator about most things in my life, but not about getting convention games ready.  I’ll never forget watching some guys painting figures at their table for their weekend-long Battle of Gettysburg game.  That is not me.

I began the month working on figures for the Rebels and Patriots game David Sullivan and I are hosting.  It’s based kind of loosely on the retreat to North Carolina across the Dan River, leading to Guilford Courthouse.  Sort of like Weitzel’s Mill.

Two of the units I wanted to paint were light companies of the Grenadier and Coldstream Guards that are part of the British pursuit. The figures for both units are Front Rank, from their Light Infantry in slouch hat group.  It’s a pretty thin batch of figures, so there’s not a big mix to choose from.  As I’ve stated before, these figures are very fun to paint, very easy to paint because they’re large and kind of blocky.  They remind me of working with a coloring book, because the lines are so clear. No facing colors or lace to speak of.  I did give the officers Scarlet coats instead of the Vallejo Flat Red, so they could be in regulation dress and be better targets for the American riflemen.

Front Rank Light Infantry in southern dress.  These are painted as the light company for the Coldstream Guards.  Their device is painted on many of the figures’ backpacks in the photo upper left.

Though there’s not a lot to dress them up, I decided to paint their backpacks with crests for each of the different regiments.  The Coldstream Guards were pretty straightforward.  The Grenadier Guards not so much.  Every guardsman was not a recipient, but the majority of figures have their respective crests.

Grenadier Guards light company.  Their devices were more of a challenge to paint and I skipped trying to paint the royal script inside the garter.

I also painted Kirkwood’s Delaware light infantry.  These are Front Rank figures in 1779 regulation dress.  Again, fun to paint.  I didn’t quite get the figure mix right.  Was hoping to add some figures in hunting shirts but didn’t order correctly.  My bad. The biggest distinction for Kirkwood’s troops is the yellow hat lace, so at least I could see them coming.  As their white overalls wore out they resorted to bed ticking for trousers.  I was hoping to have a few more examples of this and remembered what a terrible pain in the ass it was and called two examples good enough.

Robert Kirkwood’s Delaware Regiment was really part of the old Continental Line that served throughout the southern campaign.  It’s the closest Nathaniel Green had to an elite unit, but though it had only 80 or so men.  Kirkwood was a soldier’s soldier, serving through the Revolution, only to die on the Wabash battlefield in 1790.

Back in December I went to the Perry Miniatures site and put together an order for the remaining figures I need for this project–British Legion figures for the loyalist South Carolina Dragoons, Lee’s Legion dragoons, and a handful of riflemen.  Four weeks later, having not received them, I went back and looked at my order, only to discover it tidily sitting in the site’s shopping cart.  Sent in my order the next day, and shipped immediately from the Perry site.  Still waiting, but am watching the mail daily.

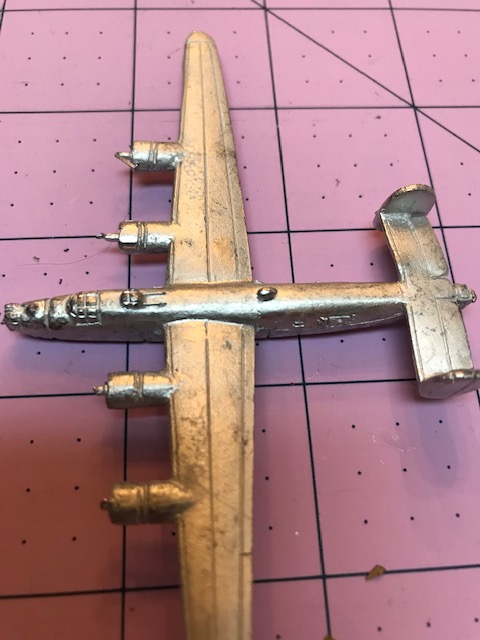
While waiting for the Perry’s to arrive I decided to switch gears and begin work on planes for Ploesti.  I don’t have a ton to do but they are big ol’ Scotia B-24D’s.  The models are nice but large, which always poses a bit of a challenge.  The planes often come with their uber-long wings pretzeled and their large stabilizers and double tails needing careful straightening.  I set into this task one evening, only to realize the B-24’s I ordered back in August weren’t the early D version of the bomber that set upon the Romanian oil fields at all, but the later B-24J with the power nose turret.  Still a nice model I can make use of, but it took another order to the UK to retrieve the situation, so I am still awaiting the whims of the Post Office.

B-24D

This Scotia B-24D is one of ten I acquired from the late Phil Barsdley.  They are spectacular in every regard, including the guns Phil added.  The paint, including “Flying Eightball” emblem and nose art I’ll never be able to equal.

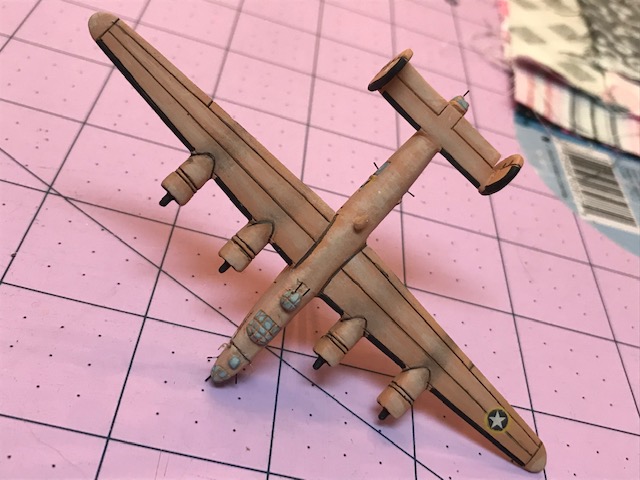
B24J

Scotia B-24J in all its raw metal glory.  Note the nose turret. They’ll paint well.

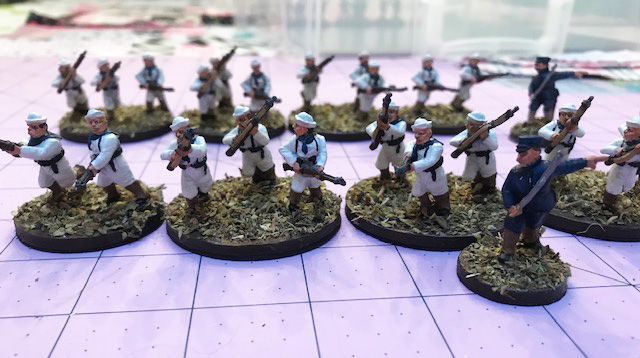
With the R and P figs and the required planes unavailable, I’ve been working on some figures for my Philippine scenario. Because there is a coastal element to the game, I gotta have marines and sailors.  I think I’ve already shared my U.S. Marines.  Like those figures the sailors are offerings from Old Glory.  Not a tough job–because they are in white uniforms with white sailor caps.  Managed to knock out both units this month.  As figures go, they are pretty simple and straight-forward.  they seem a bit small.

Sailors 1

Well, no they aren’t a lot to look at, but if you’re gonna be afloat you gotta have sailors.  Two units of Old Glory Sailors from their Spanish American War range.

They are a pretty simple paint job.  I used Vallejo Grey-White as an undercoat and then painted highlights in straight white.  That’s really all you gotta know.  Simple but reasonably effective.

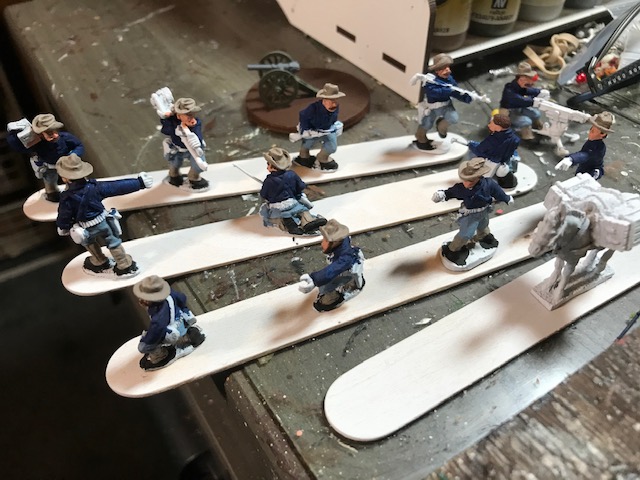
About the time I thought I could start another unit I got a raging four-day case of the flu.  When I could bring myself to actually go back in my den, I decided to paint some of the heavy weapons I’ll need for the Philippine scenario.  There is a mountain howitzer and crew and a Colt machine gun in both the firing and moving position. I’m about 50% finished with those figures

WIP 1

This bunch is from Tiger Miniatures and include crews for Colt Machine guns as well as a breach loading mountain gun from their Spanish American War range. Under construction.  Hope to be done with the lot by February 2nd.

If I’m able to finish those figures by Friday, I’ll have done 72 figures in the month of January, all 28mm, which is a whole lot for me.  And honestly, it was truly enjoyable.  It’s nice to have about three hours a day to paint.  I can get a lot done.

And the really good news–my Perry order arrived today.

Perry

My small, but anxiously awaited Perry order.


Fix Bayonets: The Day of the Horsemen


Franco-Prussian 1

A view from Maison Smyth in Dean Motoyama’s Franco-Prussian War game adapting over the Bolt Action rules. The miniatures and the terrain was spectacular.

Yesterday was our annual Fix Bayonets game day.  Like the trip to Chehalis, it is a fun little gathering, now in its seventh year.  Lawrence Bateman, Damond Crump and Bruce Smith take responsibility for hosting the game day at historic Fort Steilacoom, and the ten dollar entry goes toward buying new stuff for the fort.

Fix Bayonets offers two game periods and I participated in both of those.  In the Morning David Sullivan and I hosted a Rebels and Patriots game.  David chose a scenario out of the rule book and created “Barlowe’s Necessary.”  The British and American forces were created out of roughly equal points for six different players, three per side.  Three of the players in the game were school-age and fairly new to miniature wargaming.  But they were a pleasure to play with and did pretty well.

I was an American player, pretty much in the middle of the table, and paid for that privilege.  David was on the left side, slogging through slow, rough terrain, which also shielded him from a lot of fire.  Chris, my young cohort, was on the right side, and though the British facing him scalded him with hot fire at times, was able to take cover behind a fence line and some woods.

My command, was in the open.  Which means about the same thing as my personal motto: “Shoot me again.” If I had a piece of heraldry, it would feature a green cross, with a red heart in the middle, full of bullet holes.

I actually had some cool units.  My best unit was Lee’s Legion light infantry, and they did some great work, trading shots with several units and making an important charge during a key turn.  My unit of William Washington’s 3rd Continental Dragoons made their debut.  I also had a unit of militia skirmishers.  Finally, by a sheer order of luck I rolled up a unit of raw militia, shooting poorly, that I figured wouldn’t be too useful.  I’m glad I did.

A lot of the British units were lights or grenadiers, with a couple of line units.  That meant that point-wise, there were fewer Brits to fight, but they had  much better staying power than the Americans.  I faced a unit of light infantry skirmishers, a unit of line infantry and a unit of lights firing at my guys.  Tough.

But I also fought with my own damn die rolls which were pretty terrible for the first two- thirds of the game.  I was able to activate okay, but just wasn’t able to hit much.  The worst was when I sent my cavalry crashing into the woods woods to rout out the annoying and destructive fire of the British skirmishers, hit them, but couldn’t inflict a single casualty.  They returned to my lines at half strength, having accomplished nothing.

Things were brightening on my right flank, as Chris inflicted casualties on Mark’s lights.  A bad die roll saw the Brits take to the hills and Mark withdrew his grenadiers to cover a source of victory points. But David was being pressed on the left as troops from the center were being drawn into the the fight around the Barlowe house due to my ineffective performance.  My skirmishers fled the field after taking serious damage from the British skirmishers.  The dragoons cowered behind Lee’s Legion.  The Legion troops soldiered on, firing ineffectively, slowly accumulating casualties, but tough as nails. The green militia, gamely advanced, looking for something to do.

Then, it was like a light bulb was turned on. A round of fire sent a unit of British line running.  A British light infantry unit advanced just a little too far, were charged by the Legion, and even though the Legion lost the combat, they didn’t break.  The militia advanced and successfully fired at the British skirmishers. Dragoons, advancing behind the Legion charge were perfectly positioned to deal some death.
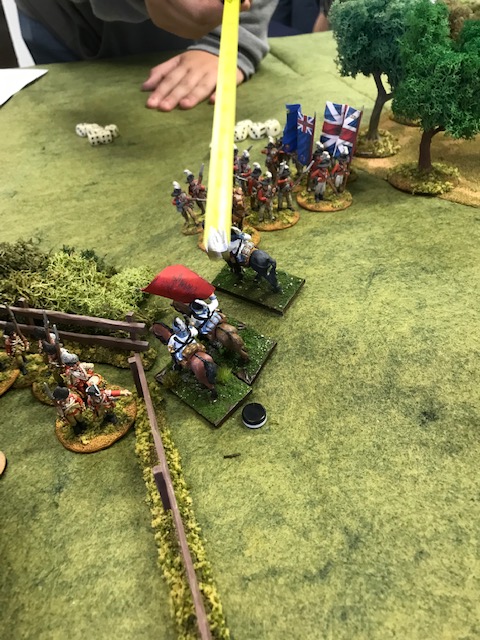
Washington's Dragoons Charge

The British line infantry to the right prepare to dispatch Col. William Washington’s dragoons after their successful charge eliminated a key British light infantry unit. Only Washington would survive.

In the following turn, the last of the game, the dragoons charged the light infantry, surprising the startled Brits, inflicting enough casualties for them to break, both sides taking losses.  However, the redcoats retreated just far enough to be contacted again by the pursuing Continentals.  The lights disintegrated, and the cavalry dispersed.  In the end, only Washington rode back to the American lines.

David held the Barlowe house, the Legion lights earned two honor points, and the British forces were all damaged enough to win the Americans a convincing victory. The Continental dragoons rocked.

In the afternoon, I played in Dean Motoyama’s Franco-Prussian War game using Bolt Action as a rule mechanism.  I found it easy to play and the WWII rules set worked pretty well for the 19th century conflict.

Dean devised a six-turn game in which both of the evenly matched sides could easily control two of four ruined buildings on the table. The side that could control one of the other side’s building would win.  The Germans had an artillery piece, while the French advantage lay with their Chassepot rifles, out-ranging their foe’s Dreyse needle-guns.

Mark Serafin and I ran the French.  We committed half our force against the building directly to our front, while holding off units to our flank.  To my right, I occupied one of our buildings with one unit, supported by a unit of mounted chasseurs.  Mark took the building on the right side supported by a unit of Algerian Tirailleurs.

With the clock ticking, we immediately pinned the unit in the house to our front, without doing a lot of damage.  Meanwhile three units of Prussians crossed the stream protecting my fortified flank.  What to do?

The chasseurs were a deterrent to do too much too quickly, and I eventually drew two units to support my building.  Fire into a wood full of Prussians neutralized one unit.  Twice, the Prussians advanced to fire on the chasseurs, but using Dean’s emergency escape rules allowed them to retreat to safety.

Jim Sagen, commanding the Prussians threatening my command, decided to assault on my position on turn four.  He advanced his artillery to get within close range. He chased my chasseurs away for the last time.  Things looked bad.  In his bloody assault, Jim destroyed my defending unit, but in the process, lost all but one of his figures. My cavalry crept ever closer to one of his supporting units.  It was now turn five.

I counter-attacked an unblemished unit of Zouaves into my building, tossing out the lone surviving Prussian.  When the time was right, I launched my horse into the supporting Prussian unit.  With no pre-measuring, I wasn’t quite sure whether they were within the chasseurs’ 18 inch charge range.  Made it by a quarter of an inch.  I managed to kill five of the eight Prussians before they could fight back, and that was their end.
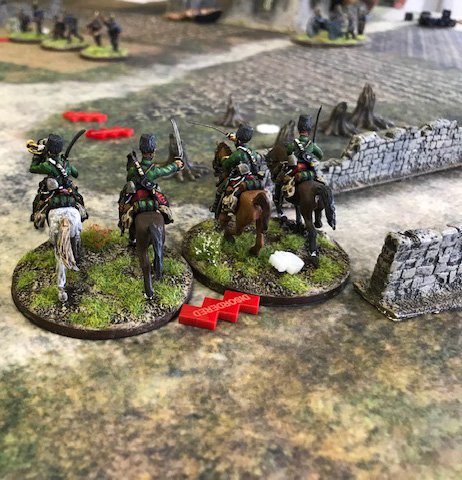
Franco Prussian 2

The chasseurs rule the my end of the table in Dean Motoyama’s Franco-Prussian War game.

In the final turn it was pretty clear the building was secure, but there was one more Prussian unit ripe for the taking. The damaged unit in the woods fell victim to the chasseurs.  With that, the game was over and it remained tied, as it began.

Dean’s experiment with the rules was successful for a first test.  I think there is still some fiddling to be done with the assault rules, but the firing and casualties seemed to work quite nicely.  I had a lot of fun with his beautifully painted miniatures.

So two awesome games in which cavalry played a major role in both.  That doesn’t always happen.
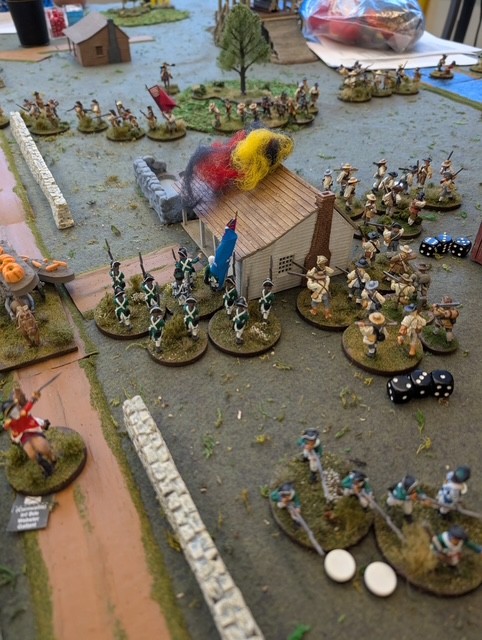
 

Grenadiers, ick

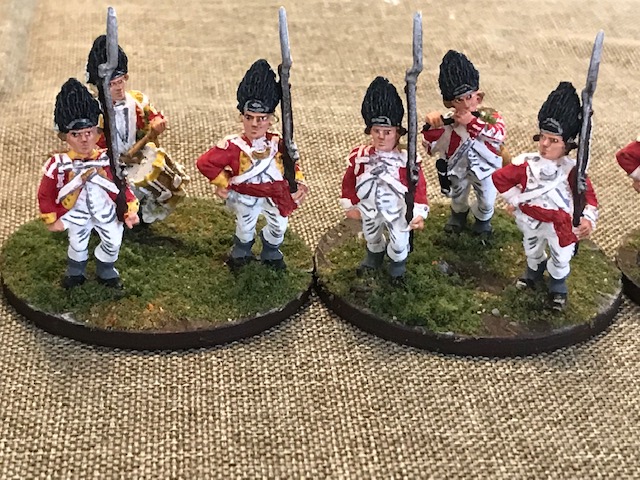
Grenadiers 4

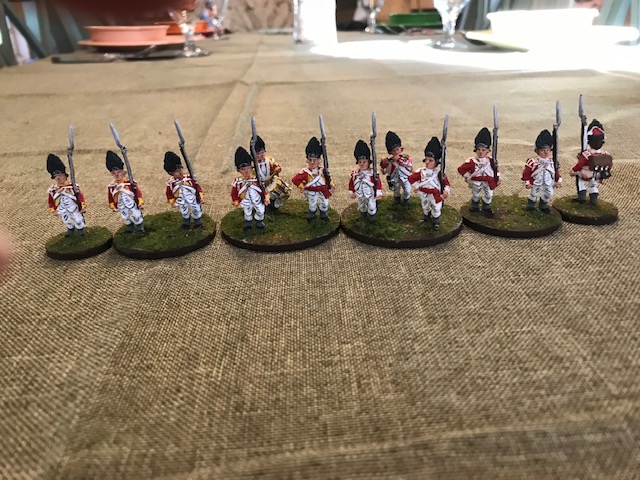
Ack!  Enough already.  I think everyone paints something that makes them crazy and for me it’s British grenadiers of the American Revolution.  Red coats, bearskins and their front plates.  Straps on straps on straps, lace, facing colors brass buttons or silver. Spare me.
I have 36 figures to finish, ideally before March 23rd when we do our first Concord run through.  I have twelve figures about 85 percent complete.  I’m ready to slit my wrists. I’d rather paint an army of Philippine soldiers in rayadillo.

Maybe it is the deadline element.  Maybe it’s just that there are so many bits that need attention—like the musicians, I forgot to mention the musicians.  Gah!! Maybe it’s remembering how great the late Phil Bardsley’s grenadiers looked when we did our Guilford Courthouse project back at Enfilade II in 1992.  Great figures and mine . . . not so much.

Grenadiers 3

In any case, I’d almost rather be painting anything else.  Some F-8 Crusaders need my loving attention.  I have a dozen Philippine infantry all picked out-in rayadillo, of course.  It’s almost time to start painting some adversaries for the Philiippine Republic and I have those too.

One thing that I have learned from all this.  When I finish the 36 grenadiers, that will follow 36 light infantry and 72 militia figures, all for the Concord game.  I started working on these in Octoberish, and I think this is the last time I’ll paint for an Enfilade project.  Rather, I’ll continue painting troops for Daniel Mersey’s games, or Airwar C 21 or Regimental Fire and Fury, but the game will have to find what I have at hand, and we’ll call it good.

Figure Review: Fife and Drum AWI British Guards

This Christmas my wife and I are trying something a little bit different with our gift-buying, including allowing each of us to buy a gift for ourselves that will be wrapped and put under the tree. I opted for figures. So I put together an order for some British Guards from Fife and Drum Miniatures.

There is something magical about Fife and Drum. I don’t know a ton about them, except they were conceived from the prominent war gaming mind of Jim Purkey of Lake Forest, Il. You may know him as Altefritz on TMP. He’s always offered considerable knowledge of 18th century military matters including the 7 Years War and the American Revolution. I became aware of the Fife and Drum range when he launched a highly successful Kickstarter campaign to fund his range of Hessians for AWI.

20131208-063318.jpg
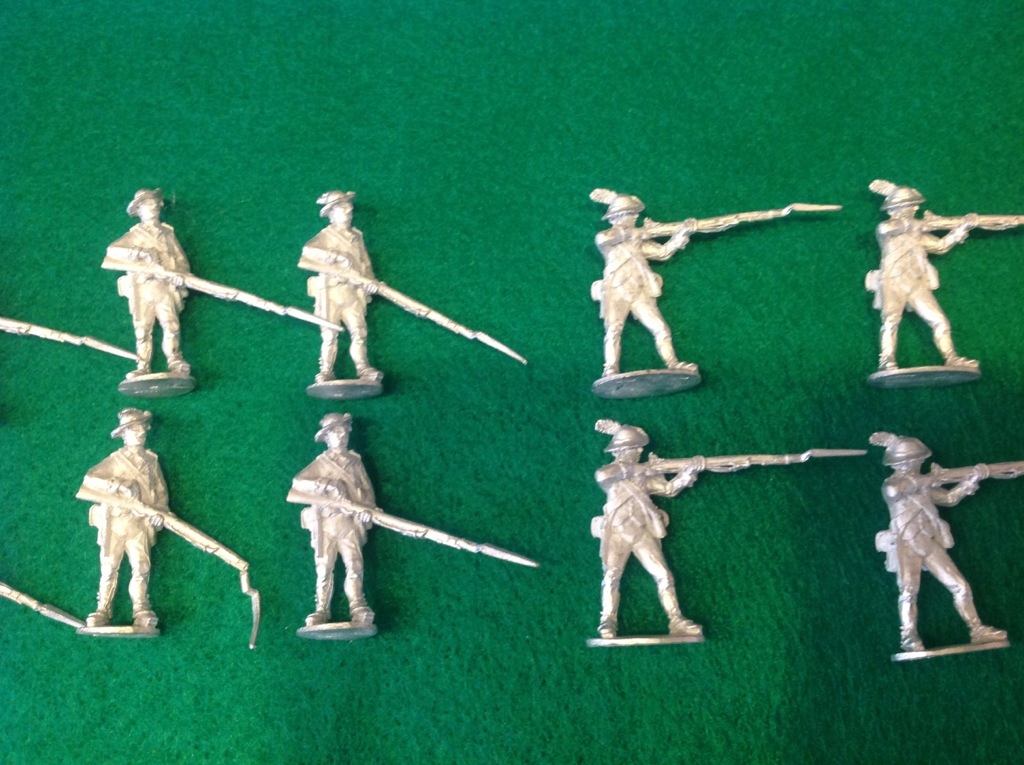
Line companies, including one fairly mangled bayonet.  But, I think I can fix it.

20131208-063406.jpg

Guards light infantry company, including an NCO figure.

I have units from many different manufacturers in my AWI collection, but I chose Fife and Drum for a couple of reasons. First, I know Jim chose to depict his figures in the non-traditional cut down uniforms adopted for the 1777 campaigns for Philadelphia and Saratoga. These and the slouch hats replacing the tricornes work well for the South, 1779-81. Second, I admired his work assembling this range, seemingly from scratch, and I wanted to support his effort.

I need the Guards for Guilford Courthouse and Weitzel’s Mill. Two battalions of 24 figures each was their game strength. I ordered the first battalion. Unlike any other range, Fife and Drum offers flank companies specifically for the Guards. Because these companies were active at places like Weitzel’s Mill, it’s nice to have unique figures with their peaked caps and horsehair crests. Though the Guards are offered in several positions, I chose the firing line. These come with figures priming their muskets, and figures firing. The command figures are a bit problematic with the officer shouldering a musket and the drummer in the Guards range. I had to add the standard bearers from the line infantry.

I really like the detail on these figures. It’s quite good, but not over-done. The simplicity of the uniforms should make them easy to paint. The faces will be hidden by the large hats. Posing is pretty simple, without a variety of head and arm positions. These figures will look very uniform on multiple figure bases, which is quite a nice departure from the Victrix Napoleonics I’ve been working on.

20131208-065703.jpg

Comparison between Fife and Drum figures and Perry miniatures from the same period.  You can see they are about the same height but the Perry figures are beefier.

20131208-065729.jpg

A comparison of Fife and Drum figures and Front Rank grenadiers.  Yep, the Front Rank guys are big.  Bill Stewart always called them corn-fed.

If the Fife and Drum range has a flaw, it is in their size. I have figures from Perry, Old Glory, and Front Rank in my collection, and they aren’t going to match well with any of them. It won’t deter me from using them, or ordering a second Guards battalion, but it’s important to acknowledge the difference. The Fife and Drum figures are 28mm tall, but their physiques are pretty slight. Compared to the Perry 23rd Regt. figures in the first comparison photo, they seem fairly small. The second picture compares the F and D guardsmen with the Front Rank grenadiers. We’ve always considered them robust, compared to the other ranges.

I’ll close with a shout out for the customer service I received. I e-mailed Jim on Black Friday about my order. He responded within an hour or so. I sent him my payment that evening, and he had my figures out to me on Saturday. They arrived by US Mail on Wednesday. I live in Washington State, so a pretty painless experience. Shipping was only $4.

Very nice figures and superb service. If you can live with the size differential between manufacturers or if you are entering this period, I would easily recommend this range of miniatures. Cost per figure is $2, about the same as Perry.