The Take Action project

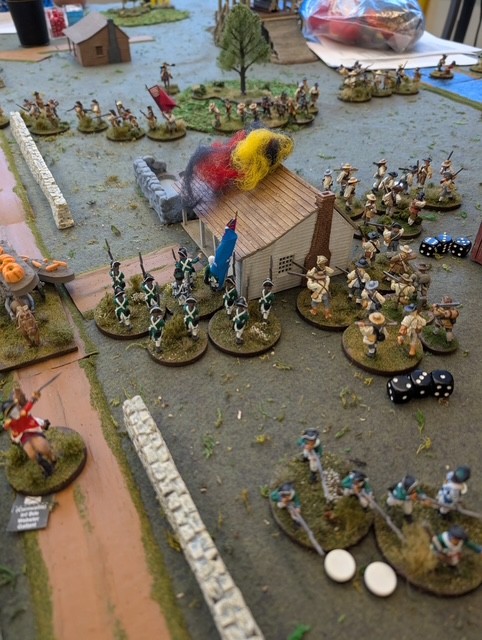
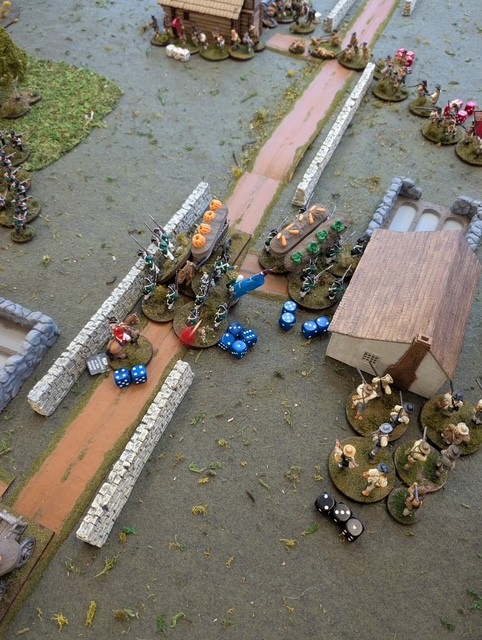
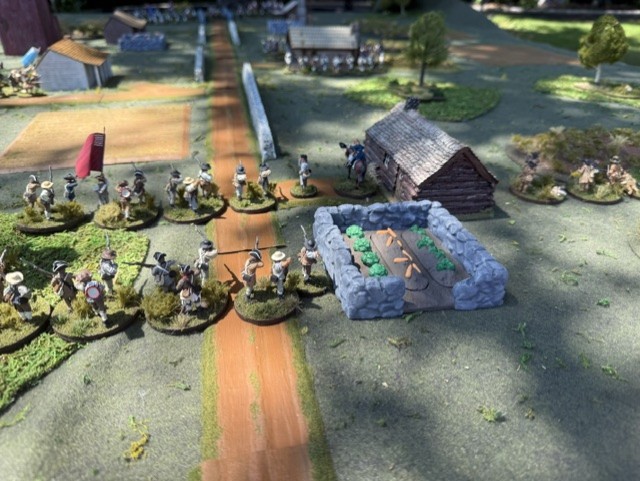
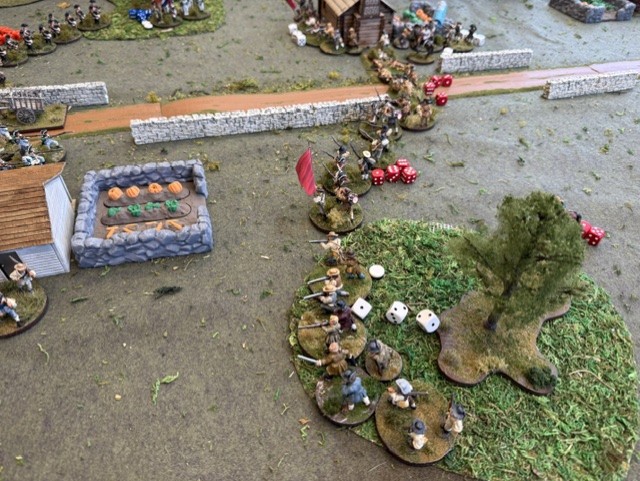
Burning Hesselburg game. Note the dice laid out by units. The number of dice determine number of activation attempts. American militia get three dice. Continentals get four

I used to think of myself as the well-rounded gamer. I had projects (so many projects) from many different periods. I had lots and lots of figures. I have something on the order of 1,000 painted airplanes. Maybe 600 ships from a variety of periods and more scales than I really wish to know about.

But then I realized that I wasn’t as well-rounded as I believed. I had pretty much given up massed battle games. Once upon a time I could do significant parts of the Battle of Waterloo, or Gettysburg, no more. My 15’s were largely gone. I was fighting small hypothetical actions with maybe company sized units. I was okay with that. I was using Daniel Mersey’s rules, which I like, and happily doing small actions. But no massed battle stuff. I wasn’t getting the pressure to do massed battle stuff either. It seems to me that massed battle projects, whether 30 Years War or Seven Years War, or Napoleonics or ACW really need to be a group project if one hopes to do sizable historical projects. Never felt the pressure from my game group to do those things. We did a lot of Daniel Mersey as a result. A lot of Lion Rampant. A lot of Rebels and Patriots, with some helpings of Pikeman’s Lament and The Men Who Would Be Kings.
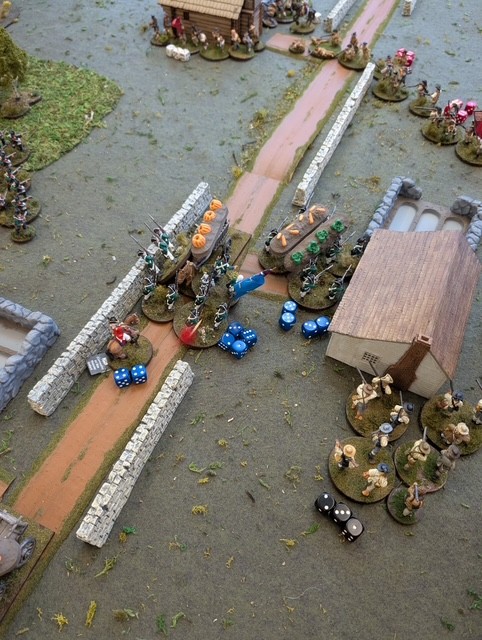
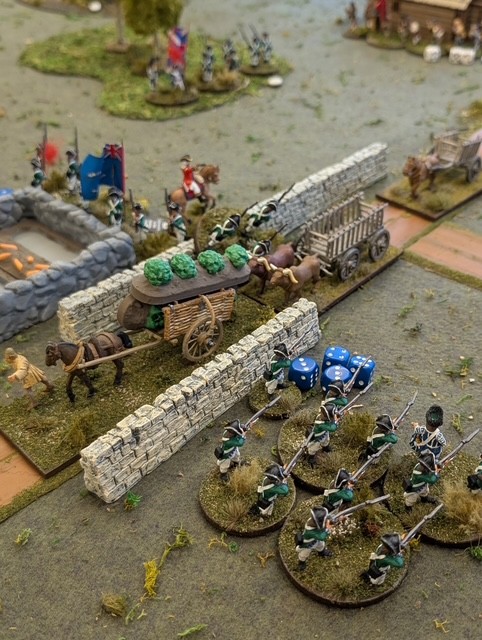
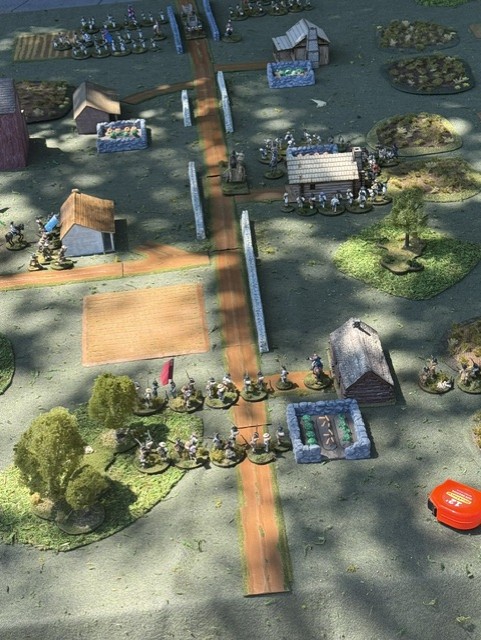
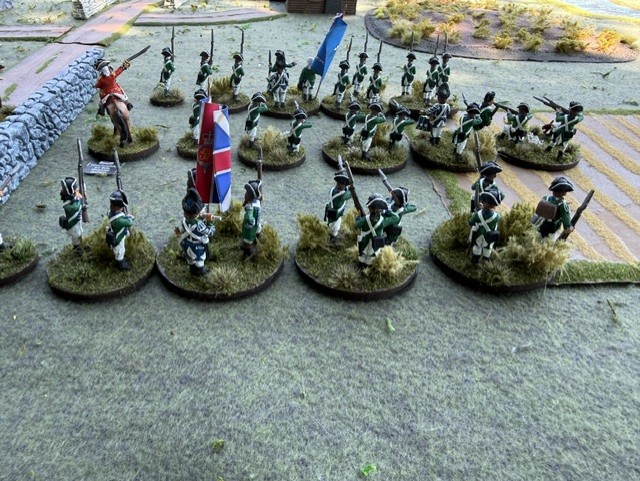
British slog their way up the road. Hessian jaegers to the left get five activation dice, Provincial regulars get four, and loyalist militia get three.

Occasionally we fell into the trap of doing some larger battles with semi skirmish units which isn’t always a great idea. R and P allows some formations and volley fire and we did some of that when we fought Resaca De Las Palmas, but that probably wasn’t a great idea. Companies and battalions (no matter how small) don’t behave the same. So I’ve focused a lot of my attention on smaller actions, often hypothetical based on historical possibility. And that’s actually been very satisfying. I developed my Mambi Justice game for the Cuban Revolution. I’ve run Drake’s Farm and Burning Hesselburg games for the American Revolution, and I have several ideas for the Spanish American War and Philippine-American War. Developing challenging scenarios has really become a thing for me. I like a little complexity, some victory conditions that may be challenging for the superior forces to achieve, even some that may create execution problems is really fun.

I was surprised when my friend Chris contacted me about play testing some rules he was working on. He has a number of published rules sets, and prefers massed battles to the semi-skirmish realms, asserting that the level often is just about blood and death. He was working on another massed battle system when he came up with a game engine he thought would be great for a semi-skirmish set of rules. He also thought it was something he could use to span the ages, but he had something he thought he could start with the horse and musket period, or something similar to the same time span as Rebels and Patriots.
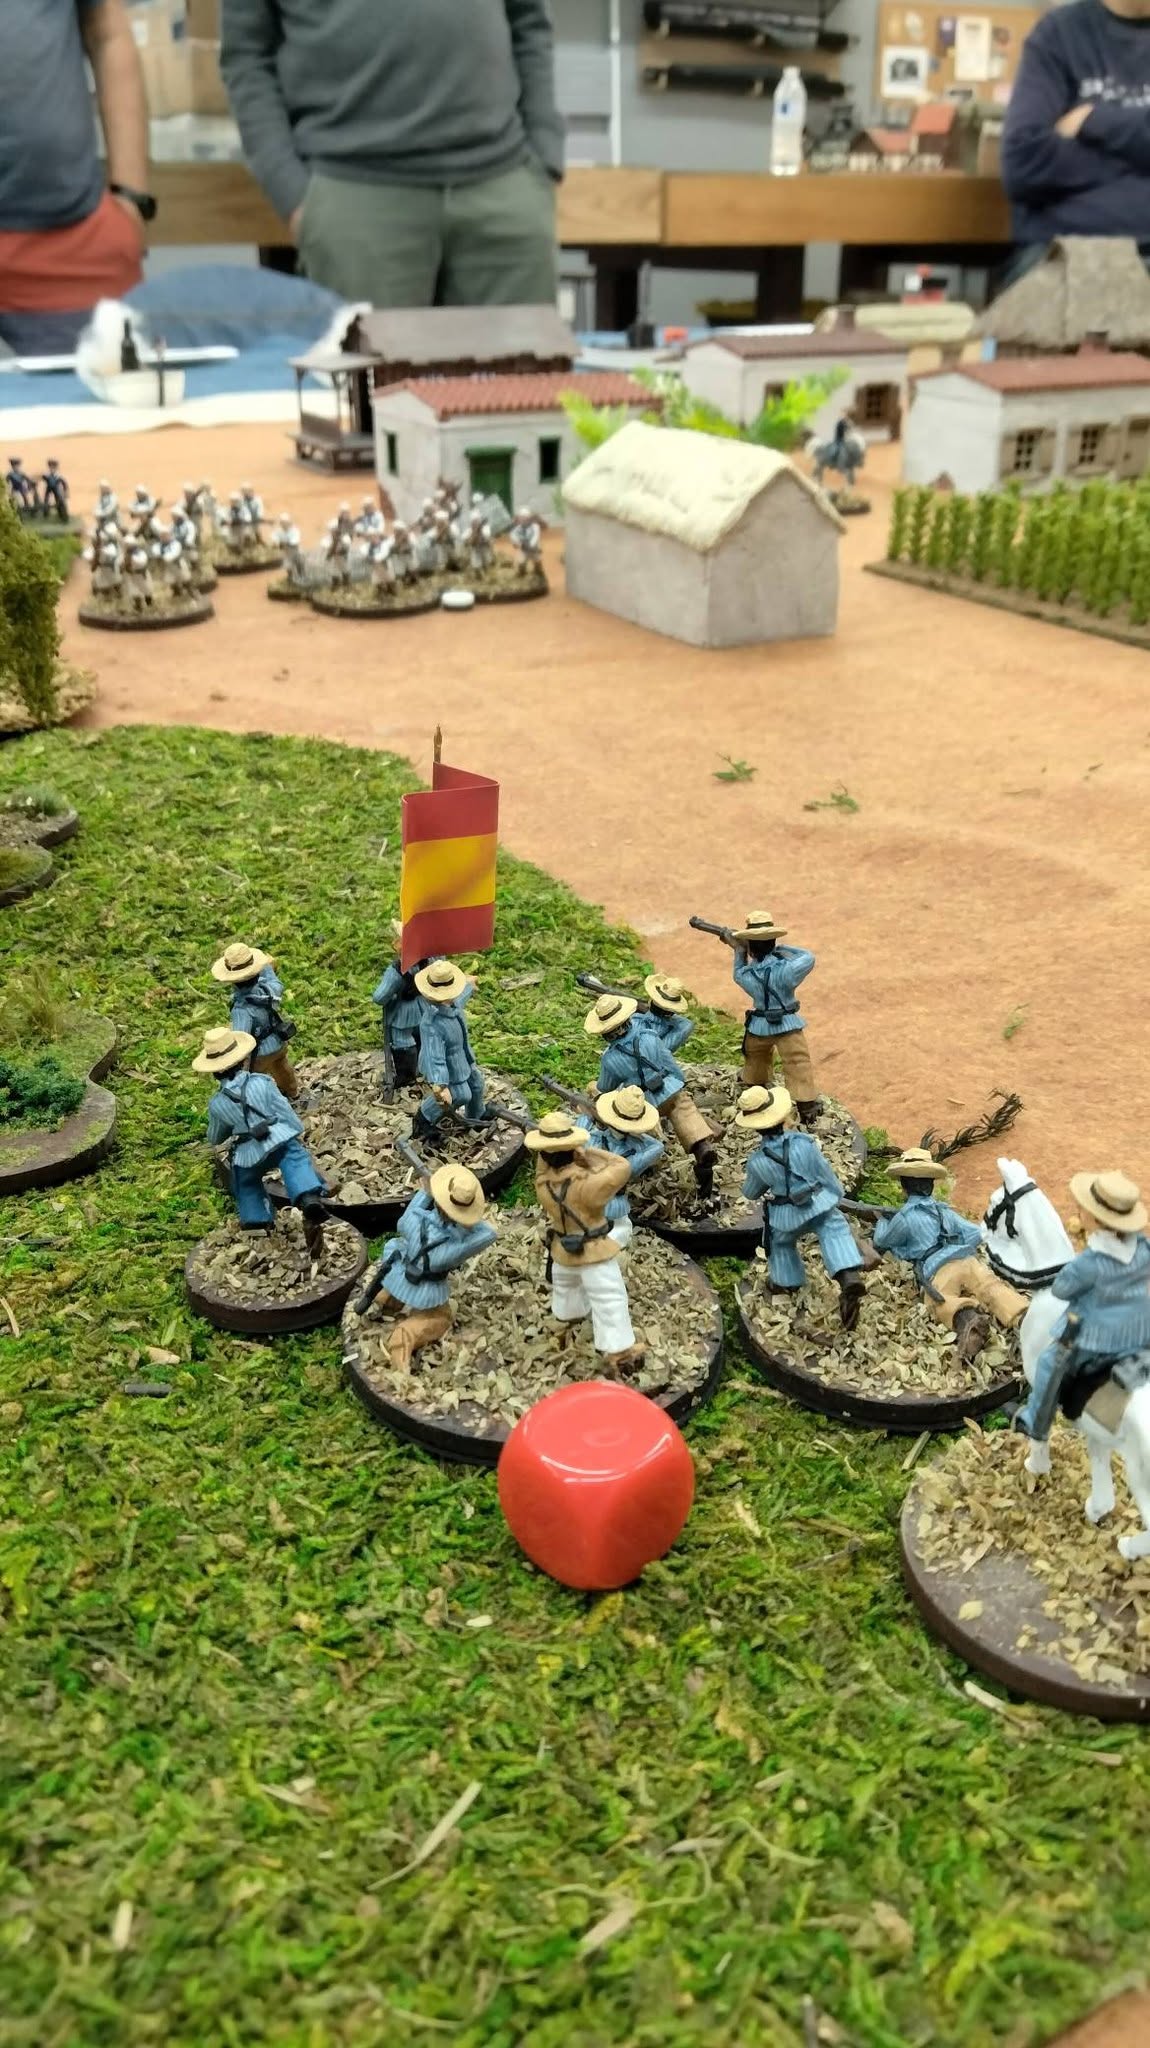
Spanish American War Tommy Atkins game. The red dice notes the unit has done all its activations.

It was an honor to be asked. I’ve never done any play-testing before. I have a number of friends who have including Chris himself who did a lot work with Arte Conliffe. I’ve never felt super adequate about these things, though I confess I’ve felt better about myself since my retirement and my gamer-as-a-second career lifestyle. The past few years I’ve tinkered with my own rules or modification of rules for my own games. It’s been nice to be included and I’ve really enjoyed working with Eric Donaldson and Steve Abarr as colleagues.
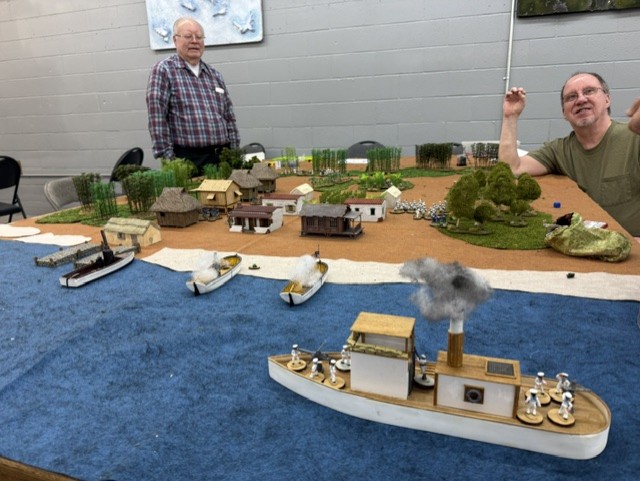
It floats, it has guns, it’s a gunboat. The star of the show. The Guanica landings, Puerto Rico 1898

We in the Puget Sound area are perfect for the task because we play a lot of skirmish level games. Lots us are familiar with Daniel Mersey’s rules-activation based, clearly structured, relatively simple to play–easy to learn and easy to teach, that’s what I’m looking for. These rules, the Take Action rules, are in some respects even easier to play and learn, but with more choices offered each turn to the players, and more flexibility. Depending on a 12-figure unit’s quality, the player commits their activation die to rally, movement or shooting. Everybody is successful on a die roll of 4-6. Very few changes or modifiers. I confess I’ve never actually played a game, but I’ve run at least eight. I prefer these rules to Rebels and Patriots. However, it really rewards good scenario design. If four guys just show up with three units per guy and no clearly thought through plan, it will just be about killing guys and Chris’s concerns will be confirmed.
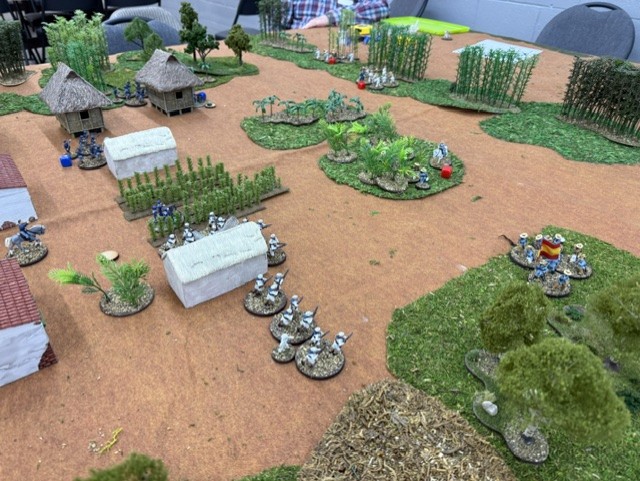
More Guanica Tommy Atkins game.

Two weeks ago I ran my first game of Tommy Atkins, a colonial set of rules that would parallel The Men Who Would be Kings. This variant hasn’t been played as much. My game was based on the American landings at Guanica, Puerto Rico during the Spanish-American War. It was again easy to play and easy to teach. I liked my scenario design, and my issues with the game had little to do with the rules and more to do with specific scenario design. I hope to run the game again at the end of the month. It has a gunboat. Everyone loves a game with a gunboat. Enfilade game.

I think working with Chris confirming his instincts and offering suggestions where needed is maybe the most fun I’ve ever had in the hobby. I feel like I’m in on something special and as I said, I am honored to be a part of it all.
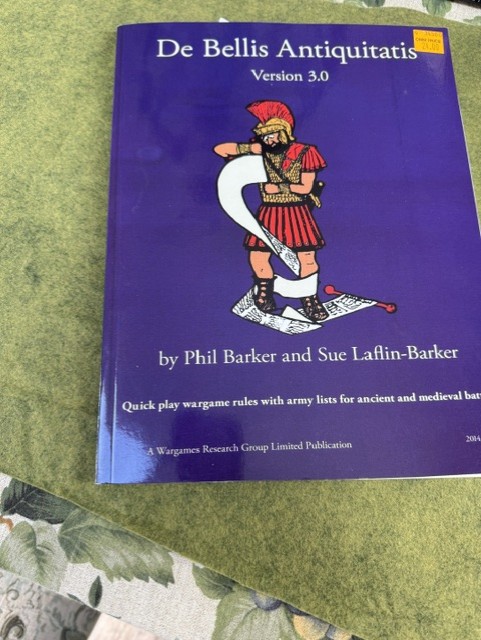
15’s, Xyston Miniatures and return to DBA

I am a 28mm guy. I made the move to a larger scale years ago. I started out with 15mm Napoleonics and ancients. I admired 28’s but 15’s were smaller took up less space and most importantly were cheaper and that was my preferred scale well into the 90’s. I did play DBA and had lots of armies that I ultimately gave away to a friend. Though I did paint a bunch of 12mm WWI figures five or six years ago, the rules were a loser and they are sitting unloved (but painted) on a shelf in my garage. But in the spring after a podcast with Chris Leach I decided to challenge myself by taking on a massed battle project.

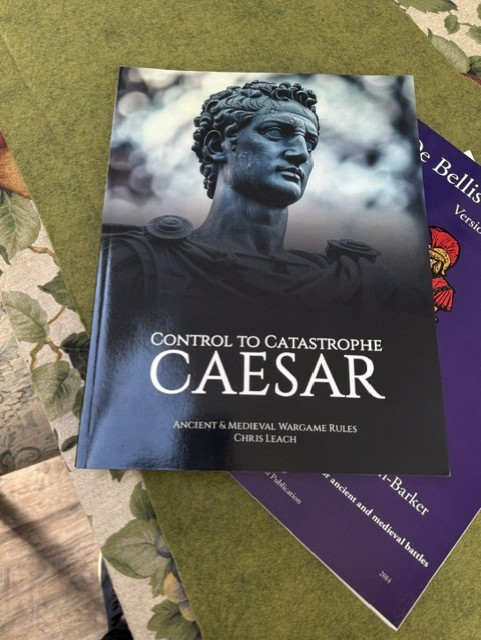
I’ve decided a set of rules to shoot for are Chris’ Control to Catastrophe rules. There is some prep for just leaping in to these. i need a gridded game board which should not be a big deal. Of course I need figures too. I’m doing 15mm figures rather than 28’s. I just didn’t want to deal with the larger figures and the larger space that would be required.

In order to get started, I decided I would start with a somewhat smaller project and those would be DBA armies. I played a lot of DBA 2.3 in the early 2000’s and enjoyed it. We’re really fortunate that there is a very active DBA community in the Seattle area led by Paul Hannah and Andy Hooper. I’ll just speak for myself here. DBA is not a super exciting game. Although the 3.0 version is more interesting than earlier versions. But Paul and Andy always keep it fun and positive. They help anyone new or experienced become a better player and I really like that. They also compile statistics on every DBA game played in the area, and keep track of the performance, not of the players, but the various armies. As a baseball person, I think that’s really fun.

I had many (like 30) DBA armies some time ago. They were all mounted for version 2.3. At some point I just stopped playing. I think I was moving on to other 28mm projects. DBA stopped being a thing in Tacoma, and they just took up space. I passed them along to Mark Wensnahan and he’s used them for a variety of different things, including DBA. At our monthly gatherings at Wizard’s Keep, DBA is a regular thing. DBA goes on all day,and often players will finish the bigger games they’ve opted for and march right over to the DBA table for a game or two. Without wanting to step back and do the DBA thing again, I just kept on keeping on.

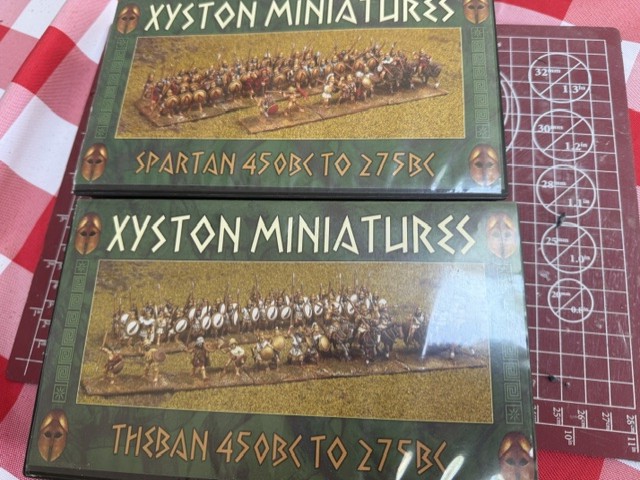
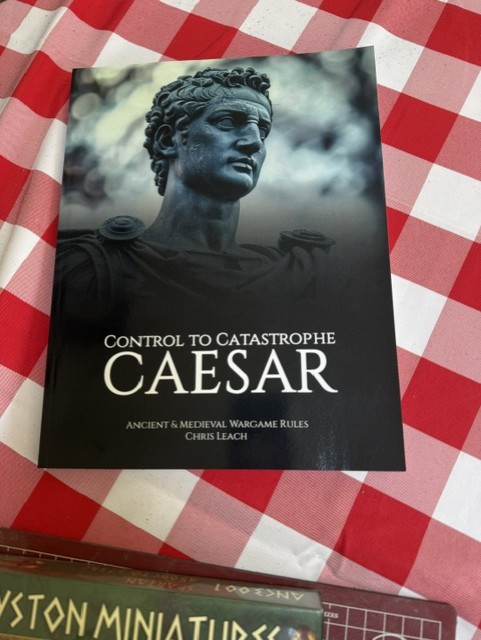
Then Steve and I interviewed Chris Leach on the Pod and I vowed to do a massed battle game using his Control to Catastrophe rules. I decided to focus on armies from the Peloponnesian War, so hoplite armies. At Enfilade, I asked my friends working the Bring and Buy to keep their eye out for any of the Xyston Hoplite armies and lo and behold I ended up with Spartans and Thebans. I ordered the Xyston spears to go with the little men and the Little Big Man shield transfers and around the middle of July made the time to paint some DBA armies.

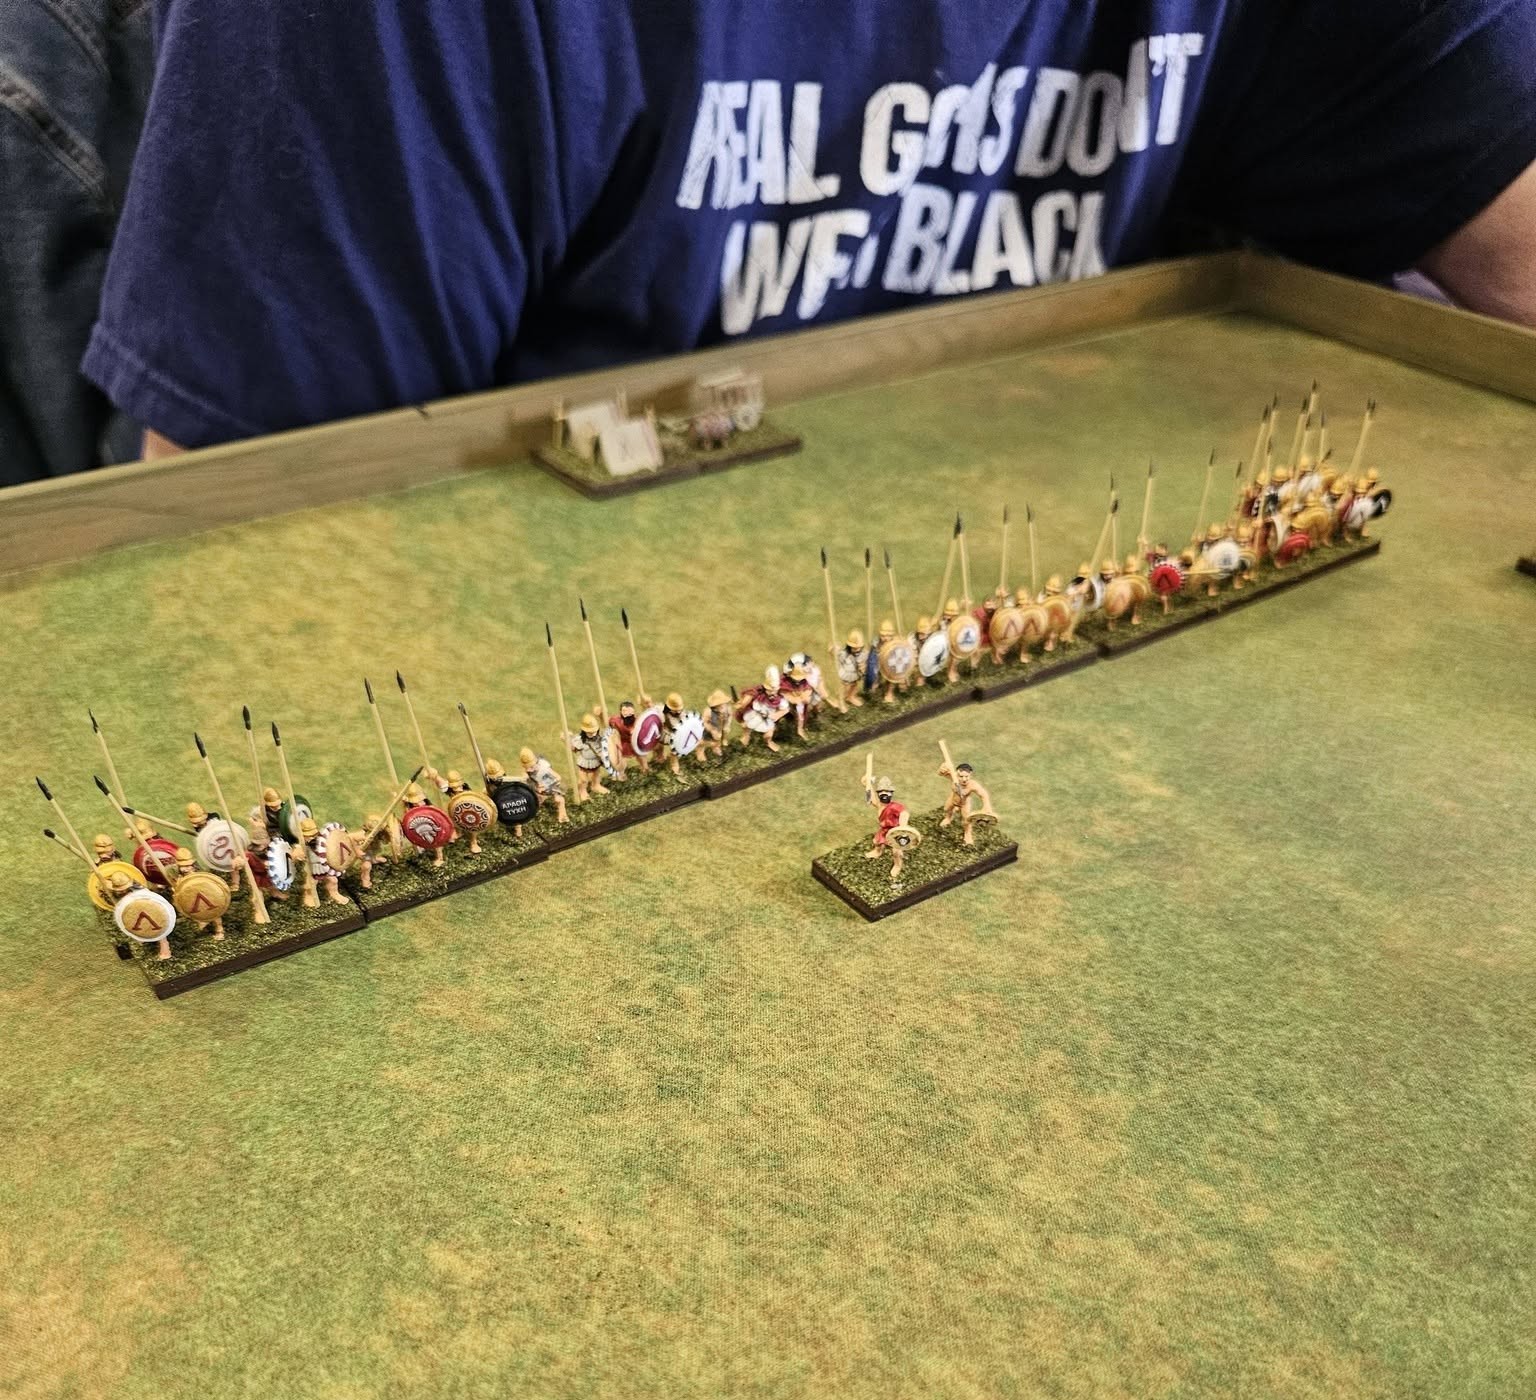
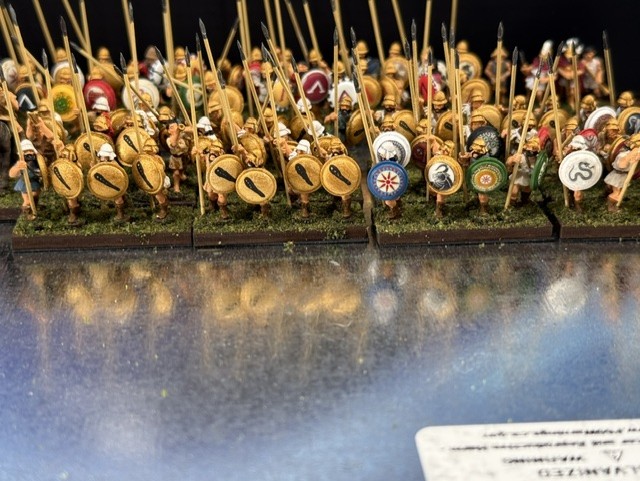
The Spartans ready themselves for their first game!!!!

I wish there was lots to report on. The figures are smaller than I’m used to but relatively easy to paint. I like the detail on the minis but there is the extra hassle of the separate spears and shields. The first batch of hoplites I tried to paint with the shields glued on. Mistake. I struggle a bit with the shield transfers. They’re easy to use but difficult for me to center. I bought the Spartan Lamda and Theban club transfers but decided it was just a lot easier to paint those on. The Xyston figures will always offer their own challenges. I think the spears will be fine–and damn they’re pointy. The shields are another matter. My three games of play meant re-attaching two shields. Even painting them is a bit of a struggle. I would like to get an Athenian army too, and I might actually try epoxy.

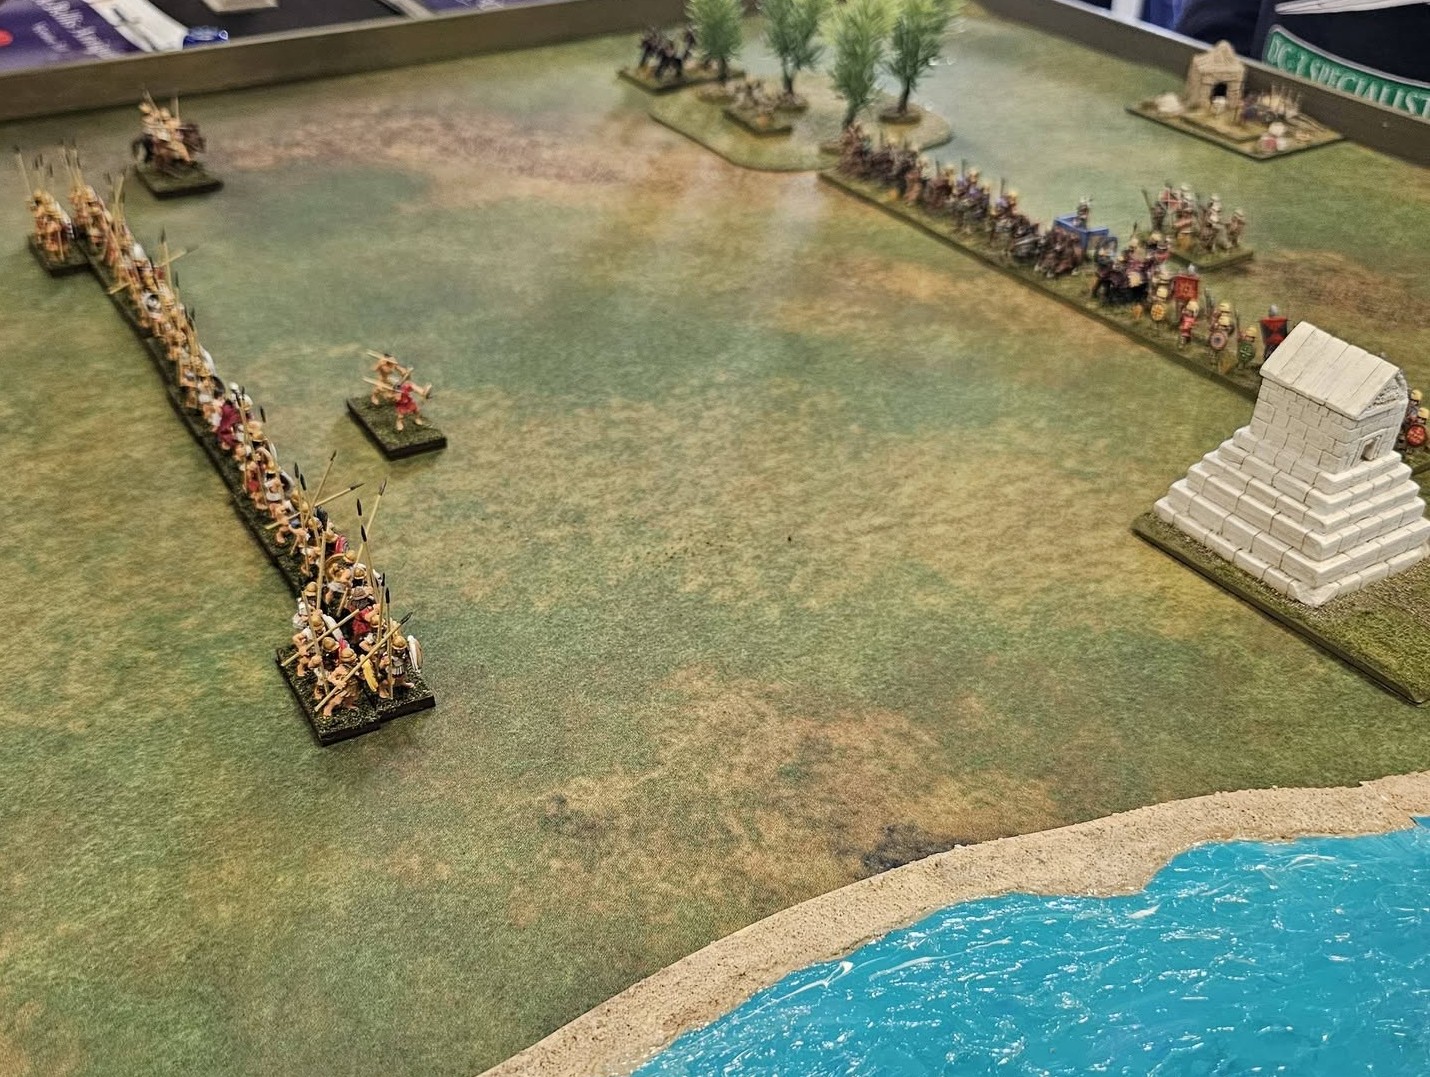
Spartans vs. Achaemenid Persians.

I completed the Spartans first and was able to get them into a few games in August. I played a couple of games with Andy and one with Paul. It was fun. The 3.0 rules are just a lot different. The Spartans don’t offer a lot of options and they aren’t very maneuverable. But if they can get hold of you they are unpleasant. But they’re mostly just guys with spears.

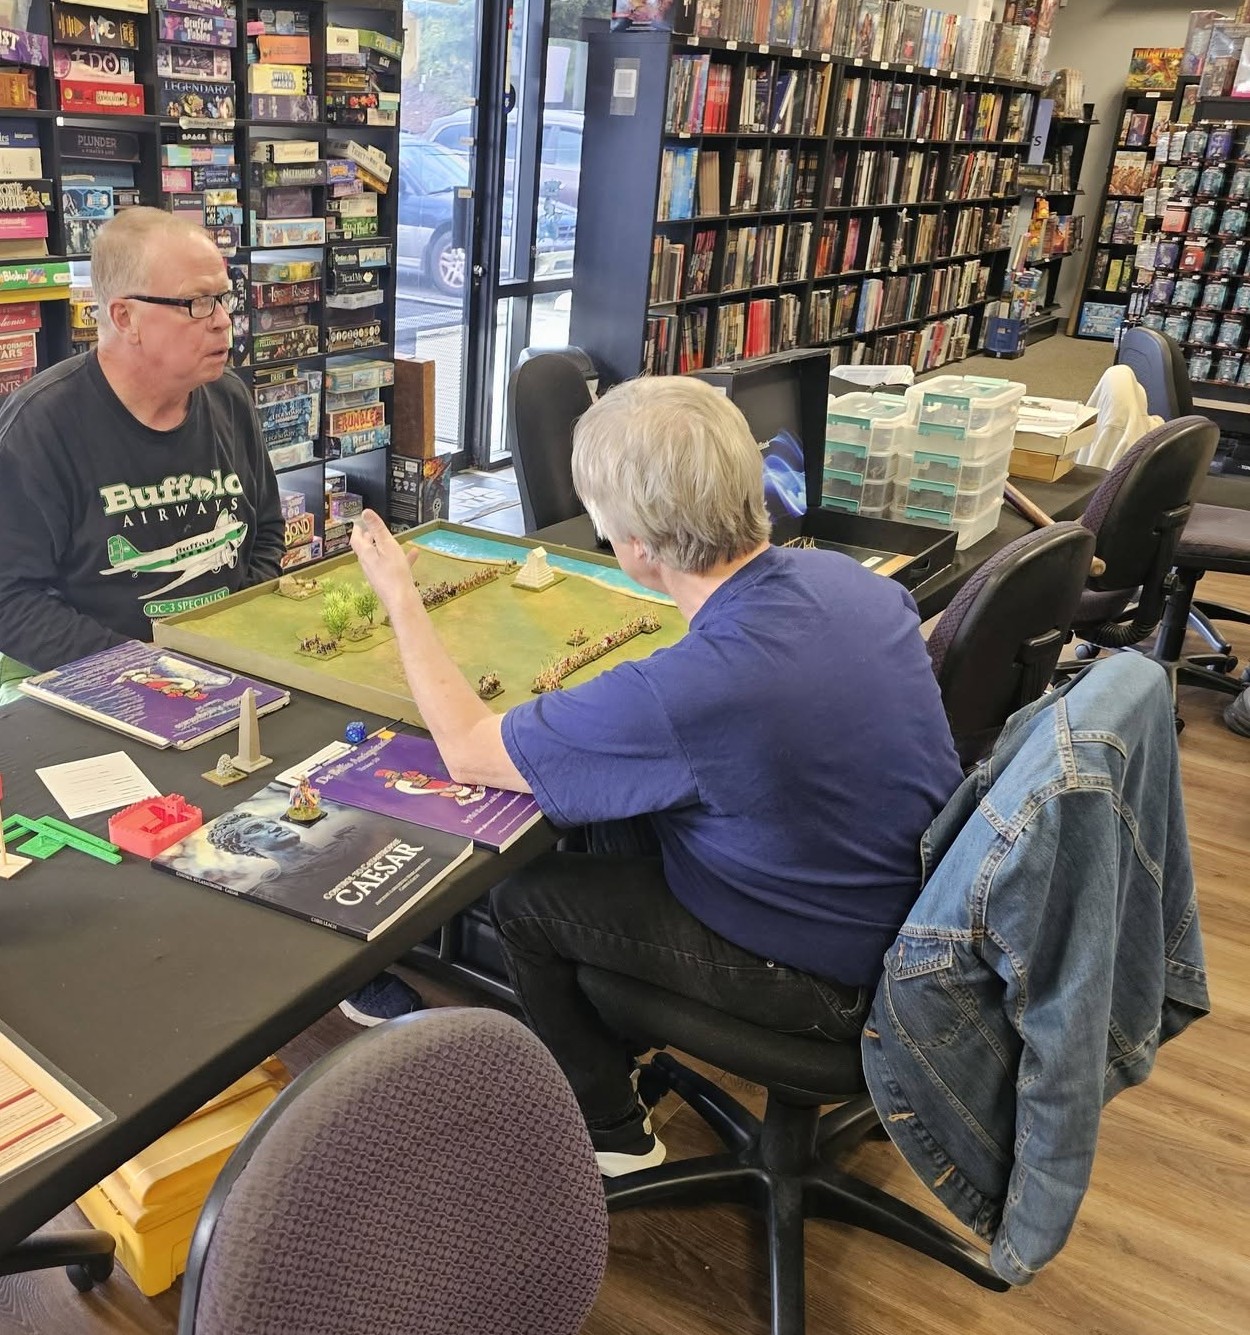
Getting ready to unleash the Spartans on Paul’s Persians. The best part of playing games is spending time with good friends.

Last week I finished the Thebans. So the first two DBA armies are done. I have the Alans, a dark ages steppe army that has the virtue of playing across lists 2, 3, and 4. I’m not in a hurry to paint them up, and expect I’ll work on them in November.

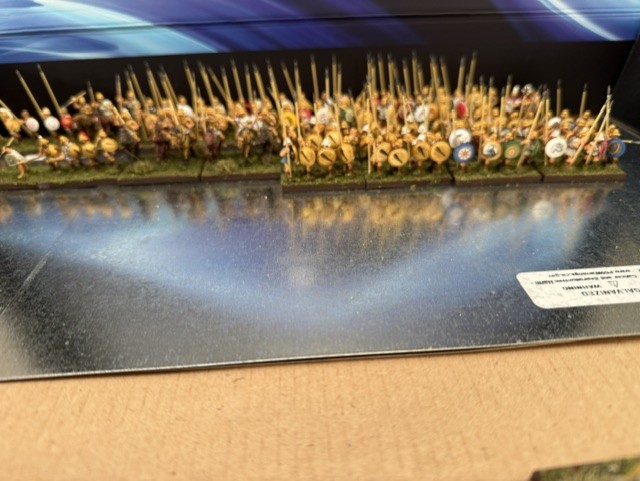
These is my Theban army, again Xyston figures with some Little Big Man shield transfers, though I hand painted the Club of Herakles on the Theban figures. Some other shield pattern signifies hoplites from an allied city-state.

I’m expecting to play some more and build on toward Control to Catastrophe, maybe by the end of the year. I did order lots of extra hoplites that I’m not in a hurry to paint, but we’ll see.

DBA is not the only 15mm project I’m working on. I actually don’t have many 15’s. I have some pretty 15mm Hallmark Jacobites and British for the First Jacobite War in 1688. They are finished, though I confess I have a lot of leftovers I probably won’t do anything with. I also have a significant number of 15mm fantasy figures I’ll continue working on to complete a Lord of the Rings project. This is a home-grown massed battle project and I’d like to try to play a game of my rules called “The Third Age” before the end of the year.

Burning Hesselberg Pt. 2: The playtest

Yesterday we did the first playtest of the game.

The Cascadia Tabletop Gamers held their monthly meeting yesterday at the Panther Lake Library across the parking lot from  Wizard’s Keep because of a game conflict-which unfortunately wasn’t actually a thing.  The one real complication with the move to the library was the size of the table space. I was planning on something close to 8′-6′ and I lost about a foot. Not catastrophic, but I would have loved a tish more set up space.

In the scenario , the British have the onus of being offensive.  They have to burn houses, and forage from gardens to punish the town for its support of the Continentals during the winter/spring of 1777.  The most valuable of the landmarks is the Sylvester Sawmill.  The Americans have fewer troops, but their mission is more defensive: defend the mill and kill British.  Both sides played well, especially not knowing the rules.

Wes Rogers effectively used his provincials to fend of the Patriots while gathering forage.

The Americans were allowed to plunk their three militia units in the town before the British set up and deploy six markers including three dummies to represent potential positions.  The British were also able to deploy one of their commands, the three units of Loyalist Provincials in the town with wagons for removing forage.  The remaining British, a command of three loyalist militia and a command with a unit of light cavalry and Hessian Jaegers came in on one end of the board.  An American command with two units of Continentals and a unit of Continental riflemen came in at the other end of the board.

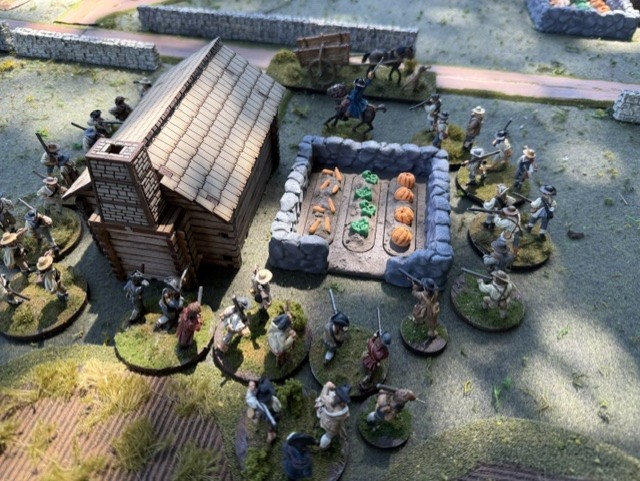
The Americans used the woods and the house to anchor their defenses to limit the British advance into Hesselberg. The building became known as “Hesselberg Alamo.”

The British, in addition to dealing with the Americans, had to put up with my in-game shenanigans.  They had limited torch markers to burn things with and had to make my silly die rolls to get things to burn and they rolled phenomenally badly, so it wasn’t easy.  But in the end three of the seven buildings on the board ended up ashes.  The Jaegers and the militia were also subject to a “become looters” rule.  No harm, just time wasted.  Only one of George’s militia units fell into the spell of ransacking a house they should be burning.

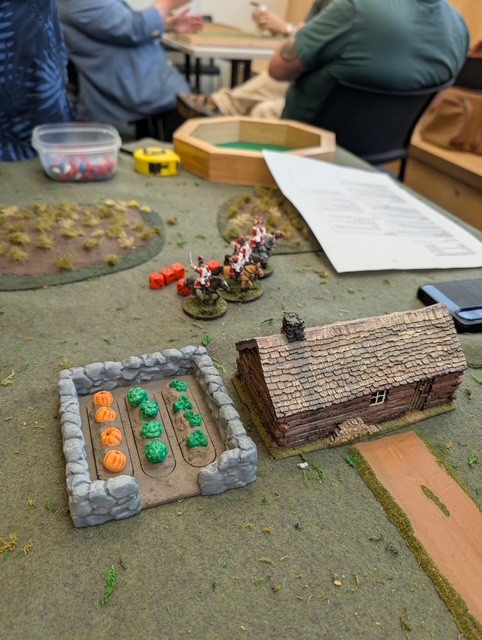
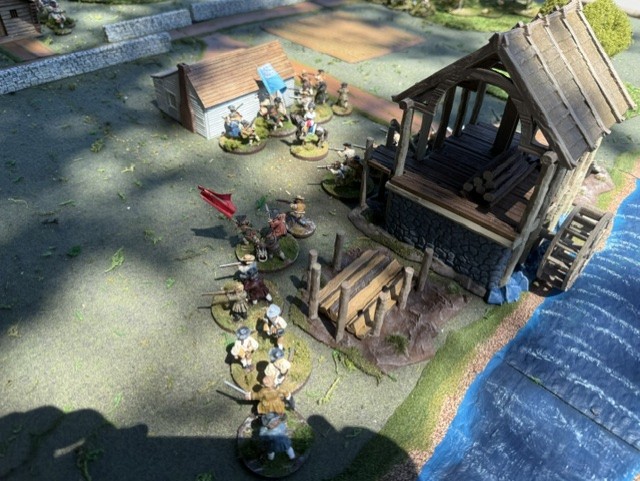
One of the factors holding up the British advance was the “looting” shenanigans I pulled on some British units. Thankfully only one of George’s militia units was snared by the looting die roll. This is them piled up outside the house instead of burning it.

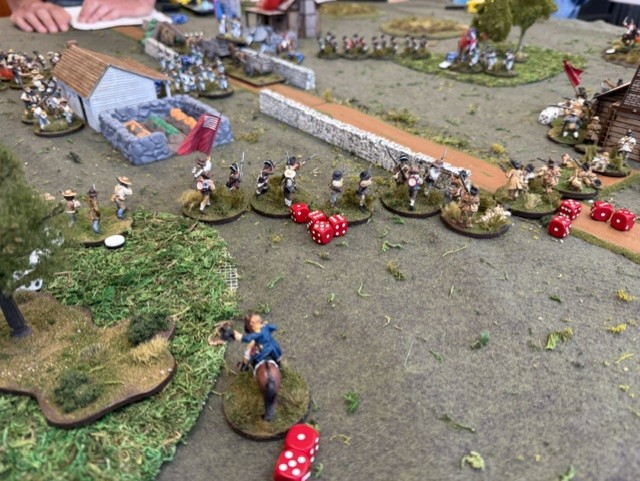
The real game, however was in the two battle lines that formed in the middle of the table.  The Americans seized formidable positions that they defended well, inflicting damage on  the British usually from cover and regularly made saving throws.  One of the houses, occupied from the beginning of the game by one of Joe’s militia units, became known as “Hesselberg’s Alamo.”

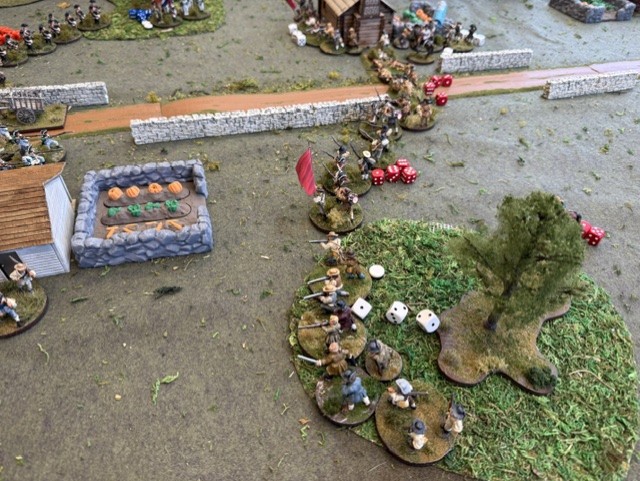
The battle lines form from the American POV.

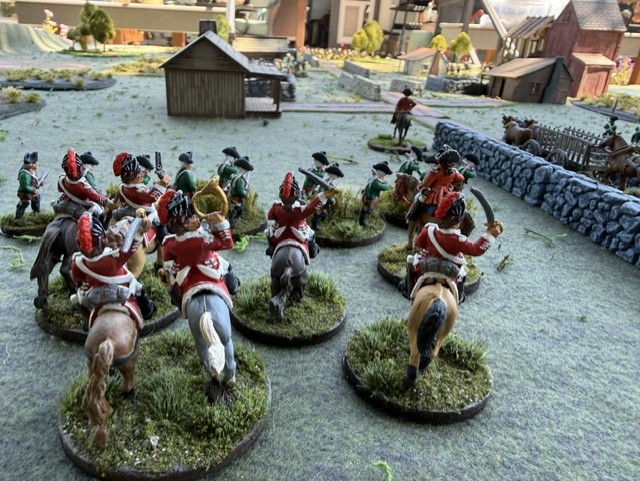
The final gambit was Bruce using the speed of his dragoons to ride around the flank and rear of the American army to seize the valuable sawmill, but Americans, seeing the danger were able to bring fire on horsemen and inflict significant damage.  We ended the game shortly after. 

Bruce’s dragoons ride around the American army as they attempt to capture Sylvester’s sawmill. They were thwarted as the Continentals diverted units to target them with damaging fire.

Based on the victory conditions I wrote for the game, the British received points for burning and removing forage, but the Americans held the vital sawmill and dished out a fair number of casualties.  It would have been a slight American victory.  But Hesselberg did lose almost half its buildings and half its forage, so I’m content calling it a draw.  The British had a difficult job and played well.  So did the Americans.  I was quite loud and had fun.  A few tweaks were suggested and they will be incorporated when I run the game again at Drumbeat South.

There are a couple of rules issues I need to work through. This was the first game I’ve played with cavalry. According to the rules it really takes two hits to kill a figure. That’s something I overlooked and it won’t happen again. There was also a melee that didn’t turn out the way I thought it should, so I’m working through that. But the game was played with five guys who hadn’t played the rules before and I think had a pretty solid grasp of them before we were through.

The Burning Hesselberg playtest: Part One

Today is the day I’ll be running my first Burning Hesselberg game. Remember, this is my AWI playtest using the Take Action rules by Chris Leach. These rules fit my purpose as a semi skirmish game, similar to Daniel Mersey’s Rebels and Patriots game. It is an activation based game, but the players are offered a bit more flexibility than the Mersey rules. Burning Hesselberg is played in 28mm figures, with three British players and two American players.

In the game, the British have been sent to punish Hesselberg for their support of the Patriot cause. Their job is burn houses, forage food, and try not to get too shot up by whatever Americans are sent out to face them. They have some very good troops–light dragoons and jaegers, some middling troops-Loyalist provincial infantry, and some truly wretched troops-New Jersey loyalist militia. Their mission is to do their jobs and go home.

The Americans have some ties to Hesselberg and hope to save some of the buildings, particularly the big sawmill. Their job is to harass the British, minimize the destruction and drive off the invaders.

The game is scaled for the properly for the rules and the relative inexperience of the players with Take Action.

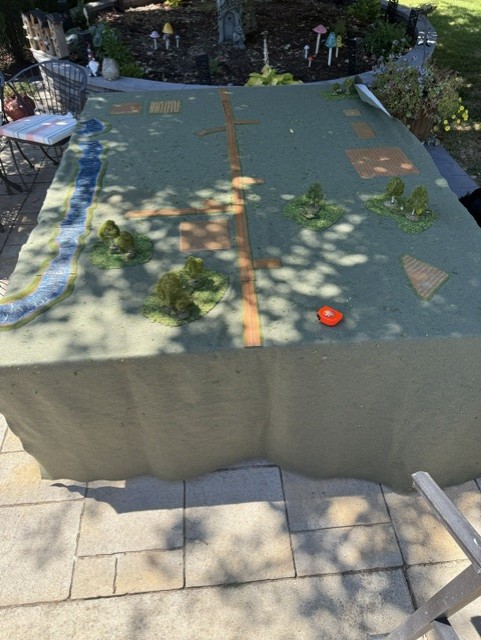
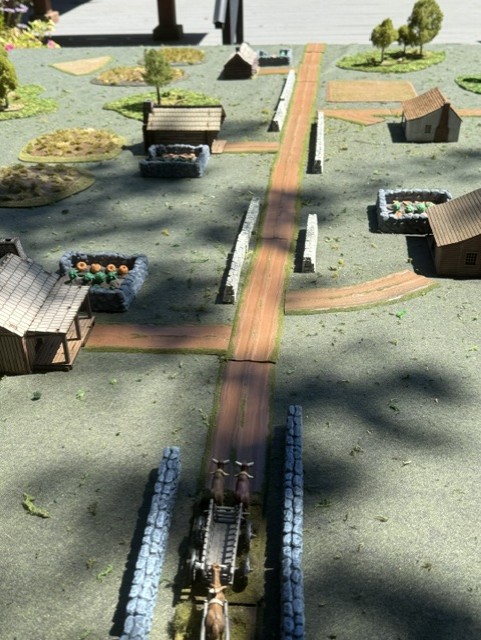
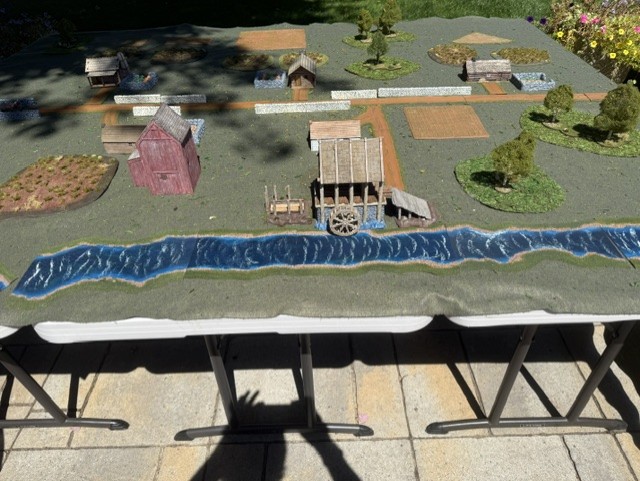
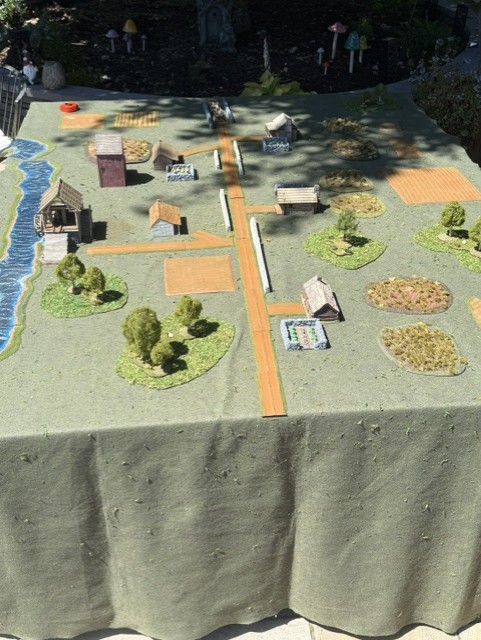
Running games is always a challenge for me. I really like developing scenarios. I want scenarios with a little bit of a twist, something more than two armies show up and have a battle. Especially for these lower level skirmishes, there’s usually a purpose in mind, but there are extenuating circumstances that make things interesting. And while I’m imagining all this and writing it down, its still important, at least for this game, that I see what the table can look like. Unfortunately, I don’t have a game table in my house. But yesterday it was very nice as it often is in summertime Puyallup, so I was able to set up tables on my patio to get a glimpse of what the board should look like.

I use a 6 X 10 felt mat for my games. Yes, I know it’s old school, in my case really old school. I’m guessing this mat is 30 years old. I do have some of the mousepad mats, but Ii don’t love ’em and prefer to use my felt that is well cured with residue from years of lichen and various tree shedding (plus a small but unsightly coffee stain.)

The first step was to put out the Hesselberg road. It has to run about 8′ down the center of the table. I have 2″ Wizard Kraft roads, but I wasn’t sure how much straight road I could manage. Thankfully there was enough. From there I needed to determine where British units would enter the board. I wanted them to start 12″ in from the “East” board edge. I plunked down a wagon to show where that would be. From there I could begin distributing the buildings that form the farming town of Hesselberg.

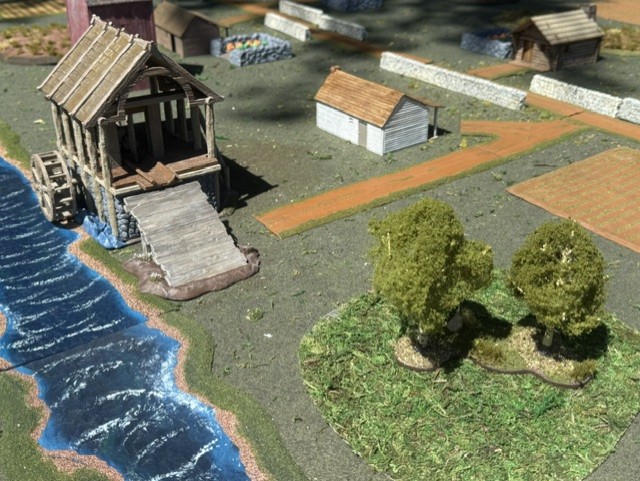
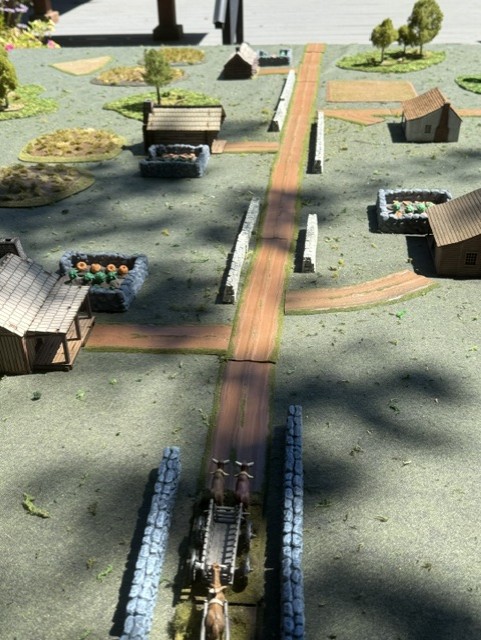
From left: This picture was actually taken as I was putting things away, but it shows the main road and the additional “driveways” I added to space out the buildings. Destroying the buildings is a British victory condition, so they couldn’t be too close together or too far apart. The large saw mill is an important victory condition for both sides. I added a few small woods to break up line of sight and fields for eye candy. The mill is water powered, so there had to be a river.

My goal with scenario development is to create a story. The British are sent to Hesselberg to carry off some needed forage. This will be represented by vegetable gardens scattered through the village that can be carried off. They are also ordered to burn the sawmill and other houses which have supported the Patriot cause. One British command will start in the village, the rest must move on to the board. There will be wagons which must stay on the road. There are rules for burning the structures and there are limited resources for effectively burning. Some British troops may be tempted to loot buildings rather than doing their jobs which might be a problem, chiefly a time waster.

The Americans have a different goal. Sent to Hesselberg by General John Sullivan, New Jersey militia with men from the town will begin in the town so early opportunities for combat exist. They won’t deploy their three units immediately, but will have six counters including three dummies to confuse their enemies. Three units of Continental troops will set up at the west side. They win by saving the saw mill, and as much of the town as possible, and by killing British.

The British definitely have the tougher job.

The set up for the game will look something like this.

From left, an overall picture of the battlefield. In the foreground Connecticut Continentals head down the road from the “West” board edge. The British come in from the “East” with Loyalist militia ravaging a farmhouse in the middle of town. In the middle of town Loyalist militia surround a farmhouse. Will they forage and burn, or will they loot the place? 17th Light Dragoons and New Jersey Provincials enter the East side of town. New Jersey militia defend the mill. Connecticut Continentals and riflemen enter from the West.

I’ve done the best I can to create a game that isn’t symmetrical but should have some play balance. Looking forward to working through it. I’ll be running it again in Chehalis in a few weeks. It’s also a game that has Enfilade potential.

Burning Hesselberg and What Comes Next

Owen gives me the “Not another project!!” look

About six weeks ago I agreed to host a game at our Drumbeat South gathering at the Chehalis Veterans Museum. It’s a wonderful venue if you happen to be in central Washington heading up or down I-5 to or from Portland. Kind of tucked away, I highly recommend a visit. It’s also a great, affordable venue for a game gathering. NHMGS has taken to sponsoring an event there twice a year and I really like it. Roomy enough, affordable. Food close by. It’s a yes from me.

A few pics I didn’t take of the Chehalis Veterans Museum. It’s an easy venue to like and the meeting space upstairs is first rate for a regional gathering.

The game I’ll be running at the Vets Mu on August 15th is another Take Action game. I guess I know longer think of these as playtests because I’ve sort or adopted them as my rules of choice for semi-skirmishy horse and musket rules. If Chris was to throw up his hands and abandon them tomorrow, I think I’d still play them just because of the options it gives to the players. Simple, easy to run, fun stuff.

I’m running a game I’ll call Burning Hesselberg, and it is another game rooted in the 1777 and beyond “Forage Wars” in New Jersey. These little struggles to control supplies, led to wanton destruction that drove New Jersey firmly into the Patriot camp. The British failed to bring Washington’s forces to a decisive battle and the alienation of the locals led General Howe to pack up and head for Philadelphia via a long voyage into Chesapeake Bay.

New Jersey Loyalists and Connecticut regulars under construction. Hoping the lot is done in the next couple of days.

My scenario is a five player game with three British players running eight units and some wagons. Their goal is to sack a farming village and saw mill that has supported Washington’s forces. They have an interesting mix of troops with quality British dragoons and Hessian jaegers, some Loyalist regulars and Loyalist not-very-good militia. Their job is to torch as many buildings as possible and forage some useful resources for the troops back in Brunswick. The Americans forces, comprised of a mixed force of Continentals and militia is to make their job that much more difficult.

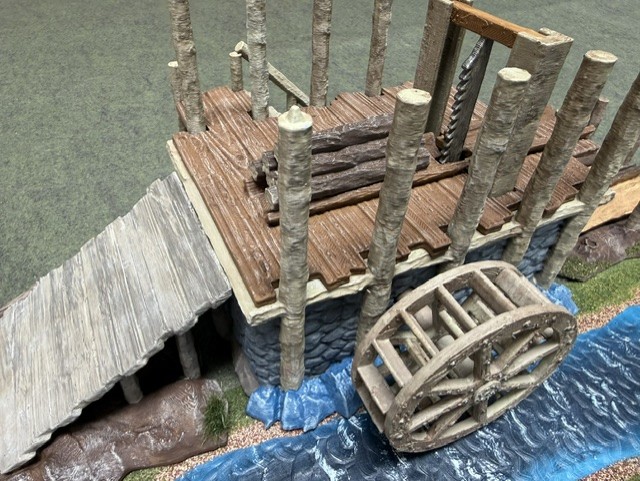
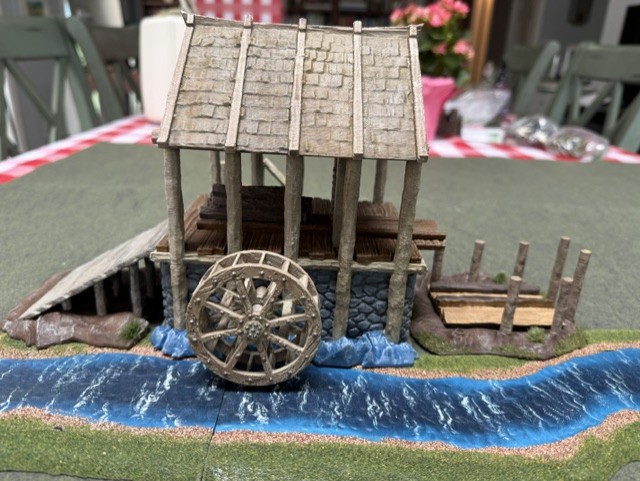
There is stuff to do to get ready. I needed to paint some figures–that I have of course. There were mounted and dismounted British dragoons. I needed more Loyalist regulars. And then there was the matter of some more fairly ratty looking Continentals. Lots of time to accomplish this, except that I volunteered to play test the game on July 25th at Wizard’s Keep, cutting three weeks off my timeline. Even so, things seem to be coming together. I’ve even added a couple more buildings to my meager collection including an Etsy 3D print of a water powered saw mill, I’m calling Sylvester’s mill. Things should be ready for the WK game. The scenario is written and I’m excited to give it a try. I’ll be sure to include a post with photos to fill you in.

This is Sylvester’s

I will be giving the American War of Independence a bit of a rest to pick up something different. I wrote earlier about doing something with the Peloponnesian War. Yes, Greeks, hoplites, spears, those guys. At Enfilade I bought a pair Xyston 15mm DBA armies for Sparta and Thebes. Though I parted with my many DBA armies a few years ago, there is a part of me that’s interested in playing again, and these armies offer an entry point to something larger. But nothing is ever quite as simple as it should be. I need bases and I’m going to avoid painting symbology on those wee, small 15mm shields. The Xyston figures need spears. So all that stuff must be ordered, and I have now done that.

My hope is that I can go ahead and do the 15mm thing without a lot of difficulty and the DBA’s can come together quickly. Then I’d like to move on to something a little more intense and that is using these same DBA figures to play the Control to Catastrophe rules. This game is played on a gridded game board. Of course, I don’t have a gridded game board so I’ll have to come up with one. I think I have something I can use and create a board. Because I’m playing with 15mm figures mounted on DBA bases, I don’t need a big space.

It’s not clear how many more figures I’ll need to do both DBA and C to C, so I’ll have to figure it out. However, I do have enough to start, plus bases, plus spears, plus shield transfers-or at least I will have enough when it all arrives from Mr. Litko, Mr. Xyston, and Mr. Victrix.

My AWI Summer

1st Connecticut Continentals ca. 1777. These are Perry figures. Only one figure has a uniform.

One of the things I really wanted to do in 2026 is paint my way through my giant pile of American Revolution figures. They’re all 28’s, metal. Some I’ve had for a number of years, mostly Perry figures, with some Old Glory and Front Rank/Gripping Beast figures thrown in for good measure. I inherited David Sullivan’s mega pile of AWI figures too, and they leaven my Perry/OG/Front Rank pile with more Perry figures and some nice Foundry figures.

How many are there? Really? You want me to count them? Let’s just say there is a lot. I think that since the first of the year with all my other projects I’ve worked on I’ve painted about 125 AWI figures. How committed am I to sticking with it? Well, I’m hoping that by the end of the week it will be closer to 150 figures.

These figures are, I believe, Foundry figures and came from David Sullivan’s giant pile of AWI figures. And there are so many more. These are painted as Provincial regulars from the New Jersey Loyalists. This was a very large Provincial formation that raised six battalions and will appear in my Take Action game on August 15th in Chehalis.

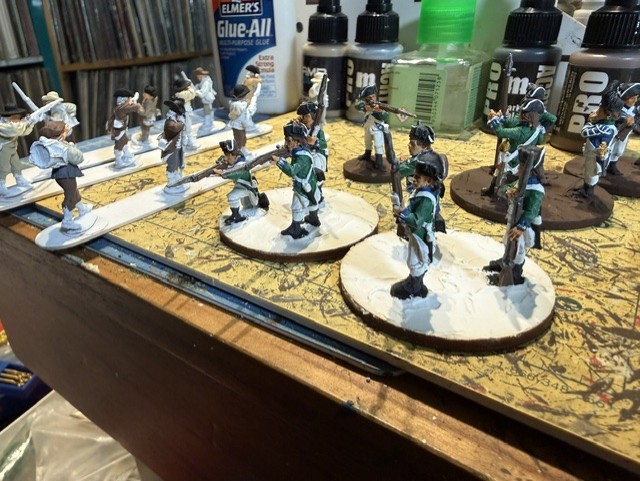
As I’ve written before, my AWI Project, like my Hundred Years War project is torn between two projects differing in scale. I have my bunch of semi-skirmish units that I can do small scale actions with. I play these with Daniel Mersey’s Rebels and Patriot rules, or I can use the Take Action semi-skirmish rules under construction by my friend Chris Leach.These rules both use 12-figure units. A lot of the figures I’ve been painting are for these games. One doesn’t need a ton of units to play these games. Really a player should only command 3-4 units to manage them effectively. But it’s really important to have a nice mix of different unit types and that’s where I am now. I have lots of militia troops for both sides. I’m currently painting some New Jersey provincial troops for the British. I’ve done a pile of Hessians, with a few more to come. For these games I’m mostly considering the “forage wars” that persisted in New Jersey from 1777 to the end of the war. But I’m also really drawn to the persistent conflict between Patriot and Loyalist militias in the Carolinas and Georgia from 1779-81. The most important thing is to have the right mix of representative units . . . which admittedly could be endless.

I’ve painted a lot of troops for this skirmishy stuff, but have overlooked one of my bucket list projects–building the units for Nathaniel Greene’s southern campaign from Guilford Courthouse to Eutaw Springs. I’m not sure why I’ve let this slip. I’ve always had an interest. I continue to read a lot about this, but I haven’t added to the units I have. The American regulars stay pretty much the same with a few adds and subtractions, but the British change considerably. After Guilford, the first of Greene’s semi-victories, Cornwallis slips away with his army to Wilmington and then on to Virginia and its eventual doom at Yorktown. The remaining British commanders in Charleston are left to hold South Carolina with a handful of British regulars, provincial troops and whatever else they can get their hands on. I’ll play this out with Regimental Fire and Fury.

These are Lawson’s Virginia militia that were in the first line at Guilford Courthouse. These are Perry figures, that seem just a little too well armed with their bayonets. The remaining pile of southern militia are being combined with other figures for less well clothed regulars for the early war. See Connecticut infantry above.

Yes, I know Regimental Fire and Fury is considered kind of Old School, but I like ’em. I love the Maneuver Chart which is the chief play engine of the game. The firing chart seems to work fair and equitably. I would say the rules are of medium complexity, but not impossible to figure out by a newbie. Good stuff.

I just finished my first F and F unit in a long time. Just some Virginia militia for Guilford Courthouse, but there are a lot of them, so I gotta start somewhere. There are British Guards and line infantry, more Americans, lots to do, but it is all work I enjoy doing them.

I do have a game I’m planning. We have a game day scheduled for August 15th in Chehalis at the Veteran’s Museum (be there or be square.) I’m going to run a hypothetical game based on the burning of a Patriot town in New Jersey in the early summer of 1777. It will be called Burning Hesselberg and will include patriot militia and Continentals vs Loyalist regulars, some mounted and dismounted cavalry, and raw Loyalist militia. We’ll see how this goes. Will keep you updated.

And in the coat closet . . .

I think many of us, when we get to a certain age, and if we’ve been gaming long enough, have accumulated far more miniatures, board games, rules, and books than we can effectively play with. I think I’ve made the case that I have some 40ish odd projects that are in various stages of completion. Some I haven’t played with in years and others I couldn’t if I wanted to because they need more attention. Others are done, kinda, and maybe I’ve moved on from them. A candidate for being parted out to a potentially more interested user.

In my garage, where I keep my painted and based stuff, there is a shelf in my wire rack devoted to ACW Naval. I have something on the order 130 painted ships in 1/600 scale. I would love to say I’m finished, but I doubt I ever will be. David had a huge number of unbuilt ships. Most I gave a way but I purloined a few for myself. David Manley and Matt Lawson continue to fill holes in the register of ships available to both navies. I don’t have little check boxes of needs, but maybe I should. I don’t need every Confederate ironclad ram real or imagined, I don’t need every Union monitor, though a couple more of the Canonicus class would be nice. Lots of ships here and my friends, Michael, George and Scott have ships too. They just need to see the light of day.

Our choice is to play the old Yaquinto Ironclad rules. Yes these were written in 1979. Yes they have more charts than an ophthalmologist would be comfortable with reading (in relatively small print.) But to quote General Patton, “But God help me, I do love it so.” David Sullivan and I developed a hexless miniature conversion for 1/600 ships 30 years ago and we’ve stuck by these rules.

You will be shocked to hear that not everybody loves them. I discovered that on Dave’s lawn during a Covid game. It broke my heart. There are other games out there. None of them have Irondclads’ depth, but in many cases they move the game along. One game I’d like to try–in fact I own it–is Dawn of Iron. I’ve looked at it and didn’t find it compelling but haven’t played it. Hammering Iron–I laugh at you. Iron and Fire by David Manley I’d consider for a large game. I have everything for Sail and Steam Navies–which I don’t hate, but also don’t love.

This week, my first post-Enfilade game was an Ironclads game. I’ve kind of had the itch the past few months and I’d just painted Matt Lawson’s beautiful Dictator monitor so, what the hell. I reached deep in the back of my reptile brain that seemed to be stuck in Tiger II’s and JSII’s and decided to do a hypothetical 1866 game. The Confederates had stayed in the war and managed to free Wilmington but badly needed supplies. I gave the Johnnies a pair of blockade runners and the Laird Rams (because it’s 1866 and if you are unarmored you’re nothin’) The blockade runners Fort Donelson and AD Vance had to cross the table edge safely, under fire from Union batteries. The ironclads, Mississippi and North Carolina had to turn around and exit the table edge to Bermuda.

Blockade runners Fort Donelson (front) and AD Vance (trailing) are about ready to exit the board and gain victory points for the Confederates. But wait . . .

Unfortunately, the Union ironclads Dunderberg and Dictator are both appearing to the South on that board edge. Both are sizable and quite nasty, and even a tish faster than the Confederate ships and they somehow have to turn around to escape. The only Confederate advantage is their 9″ rifles which out-range the Yankees.

Turn three, Scott is maneuvering the Laird Rams past the Dictator and and near the Dunderberg. It’s about to get ugly.

That is the scene, and on turn one things are looking pretty good for Confederate Navy. The blockade runners are moving 13″ a turn and in three turns they’ll be off the board. The batteries have missed their fire. The Laird Rams are making their turns and fire all eight of their guns at the Dunderberg. Most bounce off harmlessly, but one hit and penetrated the pilot house requiring the huge mountain of iron to lose half its speed and remain on course for the next four turns. Pretty tough in a game where moving and turning matters. The Union ships were out of range for fire.

Turn two was fairly uneventful as the the Confederates took a turn to re-load their guns and the Union ships had difficulty hitting. Though the Dunderberg had plenty of guns to fire, most couldn’t angle properly to shoot at the fleeing Confederates, and Dictator was a victim of bad die rolling. The blockade runners continued their hell-bent ramble toward the board edge and safety.

Before the deluge. Mississippi has maneuvered past the Dundeberg, but North Carolina sits squarely in her broadside. Bad things about to happen.

Turn three things got a little interesting. Dunderberg’s pivot 11 inch guns began to hit North Carolina. Not enough shots to do serious damage, but demonstrated that with some good die rolls, they were big enough to trash some armor. Dictator misses again. Fort Donelson just crossed the board edge and escaped, but AD Vance was not so lucky. The 8 inch Dahlgrens penetrated and rolled the dreaded “Engine Critical” in which the engine loses all power, and each turn must roll to restart. An unlucky die roll results in an explosion. We’ll see.

Turn four is the turning point of the game. North Carolina maneuvered into Dunderberg’s broadside and took a withering amount of damage, including a fire which miraculously it rolled off in the damage phase. Dictator’s 15 inch guns also got in on the fun. The Confederate ship lost floatation and speed. Mississippi was properly aligned for an exit. The Confederates were reloading. AD Vance was unable to to start its engine, but with momentum reduced to half speed was also unable to exit.

Turn five Dunderberg is finally able to increase speed and maneuver. Not shoot as much. North Carolina is slowed by damage and both Confederate ships fire. Dunderberg accepts damage like the big armored ship she is and shrugs it off. Mississippi is positioned to escape and leave her sister to her fate. Ad Vance continues to slow as that darned engine refuses to start.

Turn six Dunderberg lets North Carolina have it withits stern pivots and the damage is catastrophic. Two fires break out. A magazine hit. The “Engine Critical.” Bad stuff beyond bad stuff and the doomed ship strikes. The Mississippi escapes. The AD Vance and her stuck engine explodes killing virtually the entire crew.

AD Vance fails to restart engine which explodes killing all its crew. Not so good.

It was, in the end, a tough day for the Confederates. I really wanted to drag out the Dunderberg. The model was a Bay Area Yards casting that I really enjoyed making and I knew it would be difficult for the Confederates to handle. I tried to create a scenario that didn’t require the rams to fight the Union, but rather to get away, and hoped they would simply make a u-turn to escape, but they tried to loop around the Union ships and Kurt, running the Dunderberg simply rolled too well on his damage rolls.

The game itself went fairly fast. Michael Koznarsky did his usual great job running the charts. I think it was not easy for Keith who had not played the game before, and when the Dunderberg unloaded the turns could get long. Even so, I’d like to put in another Ironclads game before the summer is over, using wooden ships.

Enfilade Approacheth: and What Comes After

The Repulse attacked in a playtest for Enfilade.

Enfilade 2026 is just a a few weeks away. Games are scheduled. Duties are assigned, mine included. The convention never ceases to stress me out. I had a number of text messages, voice mails and phone calls left unanswered while I was on vacation–on a cruise ship (the quality of sea-borne internet has indeed improved.) I think part of it is because I feel responsible. Nobody wants to be the director who screws something up. I also know this is my last Enfilade as director. And yes, I mean that absolutely, positively. I’m confident that my successors will try hard, learn how to do it, and will be just as attentive. I wish them the best.

I’ve given myself fewer things to do. I am running three games, but beyond that I’m going to do my best to relax and take it all in. If I can sneak into Gerrit Swaneveld’s Sack of Troy game or Steve Rees’ Maxmillian race game, I may partake. But I may just put myself on call and relax, we’ll see. In any case I’m looking forward to seeing everyone and the awesome games they’ll host.

As I wrote in my last post, my life doesn’t begin and end with Enfilade–though it often shapes what I do. I’m hoping I can take the approach the next year differently. Rather than create a whole new project requiring a lot of new buying, building and painting, I’m hoping I can happily paint away and a project will take shape.

Hessians. One simply can’t have too many. These are based for Rebels and Patriots/Take Action

At the present time, with my Enfilade work happily complete and in the can, I’m following a pattern I hope to keep up throughout the summer. I’m painting units for my two AWI projects–the skirmishy Take Action rules and Regimental Fire and Fury–and I’m working on my LOTR plastics. I’ve been able to complete all my Hessian figures-which is equal to five 12 figure units for Take Action. I’ve finished two of the GW plastic Isengard orc units.

That’s a lotta orcs. But wait, there’s more . . .

I also want to be sure to do at least one ship per month. In March I complete six of the Fletcher class destroyers Mark Waddington printed for me. This month I finished the other nine. So that’s done and off my work table of doom. I think May I’ll take on a couple of the David Sullivan leftover Thoroughbred river boats.

Looking ahead, my mind is being shaped by a recent conversation with my friend Chris Leach in White Rock. Chris was a guest on the Tanks and Tomahawks podcast. We were discussing skirmish games and massed battle games, and I pointed out that while he does almost exclusively massed battle games, I do almost entirely single figure skirmishy games. In reflection, I thought that was weird. In 2010 I wrote the an article for the much loved but now-departed Citadel called “What’s Up With Single Figure Gaming?” I followed that up with a blog entry from my much missed Blogger site on the same topic. At the time I didn’t question but did express wonder at the explosion of single figure games. I guess that 16 years ago I wasn’t doing as much, but certainly some. That was high water for the Martians, exploring Lewis and Clark and trying to figure out what to do about the Hundred Years War. But today, I can truly say I do very little in the way of massed battle gaming.

But I have all these piles of figures, especially unpainted ones, that need something besides a skirmish scale set of rules. So let me say here and now that I have a plan, sort of, kinda. These will be my massed battle projects. Now, stop rolling your eyes and shaking your head. I see you out there!!!!!

  1. AWI–Fire and Fury. This is a no brainer. In fact I’ve already started. I have no idea how many unpainted AWI figures I have, but it’s some where between a buttload and a shitpile. I have unpainted Old Glory figures, Front Rank figures and Perry figures. I’ve even ordered more. (What a dope!) Some of these will be representative units for Take Action. But others will be devoted to doing those Nathaniel Greene battles I keep blathering about. I’ve got the figures. I’ve got rules. This is an easy choice that has already been made.
  2. The Hundred Years War– a project in search of rules. I have a lot of painted Hundred Years War figures mounted for Lion Rampant or even the pre-gunpowder version of Take Action. I may even have too many. There is no reason not to do massed battle armies for this period. I don’t know if I have quite enough figures to pull this off? I really am not sure about rules. Not only do I have a fair number of metal figures for the period, I also have four boxes of Perry Plastic figures. I know there are rules out there-Control to Catastrophe covers the period, but I don’t know if I want to do a gridded mat for 28mm figures. That sounds spendy and the matt would likely have to be much larger than any table I could use. 2012 or so I started working with Daveshoe on an adaptation of Fire and Fury to the Hundred Years War. For Dave it was kind of an eye-roller, but we walked through a playtest at Game Matrix back in the good old days. I love the command rolls and think there could be something there. I’ve begun having conversations with Co-Pilot. I’ll keep you posted.
  3. The Peloponnesian War–this is a looking ahead last project idea. This is something I’d do in 15mm. That’s saying something. I haven’t painted 15’s in a very long time. I’m thinking I’d start with some Xyston DBA armies, get some use out of them, and they’ll be a basis for an Athenian and Spartan Control to Catastrophe armies. I don’t mind the gridded mat for this scale. It will not have to be large and would be more affordable. I don’t expect I’d spend a penny on this until September.

It will be interesting to see how long I can say “This is it!!!!” But for right now this is making sense to me. There will be updates and pictures

What’s Happening With the Lead Pile?

I have a lead pile. I’m sure you do too. It’s the nature of the hobby. It’s March 21, and unlike me, I don’t believe I’ve purchased a single figure, hunk of terrain or other associated game pieces this year. And I’m tellin’ ya it’s really hard.

Our Wednesday game group, a very fun social group of guys, has its fingers in lotsa stuff. In some ways I envy them. They are playing games I’ve never tried. I’m not sure whether I’ve avoided them because I’m just kind of a snob and stay away from the next new thing (though they aren’t new anymore.) Or maybe it’s just that I have my hands full and hope to concentrate on those things. Instead of me just blathering on without real context, let me give some recent examples.

I’ve now played two games of Flames of War using my podcast partner, Steve’s desert armies. Both games were really fun. However, of the games I’ve tried, it’s the one I’m most likely to stay away from. From a historical standpoint, I’m really not heavily into WWII land combat. I’d have to build two armies, because I’m just not tournament oriented. Steve showed you can do some scenario making, but even if I was to do that, I’m not sure what I’d do. It’s just not my period. I will happily play and enjoy every minute.

I played my first game of Bolt Action. The rules were just a blast. I think it’s because we kept armor to a minimum. There is lots of discussion in our group about adapting BA to Vietnam. There are some semi-official Vietnam adaptations, so I’m really interested. In fact, I’m hoping that this week some time I can get some time to review what I have and determine whether I have enough. Can’t imagine I don’t. I’ve painted all the figures I own except for a handful of ARVN guys. They’re all really big Gringo 40’s figures. I have David Sullivan’s figures as well, so there should be plenty to play with, plus he has some unpainted stuff. Worth investigating. However, I have been thinking about Warlord’s Korean War range . . .

Finally, I also played WWI Wings of Glory. I think I’d played once before years ago. Again, just a lot of fun. I got shot down, but enjoyed the heck out of the game. I’m pretty sure at some point I’ll order a few planes, plus the game expansion and a balloon. Just so I can add something to a game.

The challenge when you’re introduced to something new is to not rush out and buy shit piles of stuff that needs painting and maybe never get to it. I am 70 years old. I am a healthy 70 years old. I can still see. I don’t have arthritis in my fingers (unlike my poor beloved who is also a very capable quilter and has a hard time threading needles.) I love painting and I paint every night because a day without painting is like a Pacific Northwest day in December listening to Bill Withers sing “Ain’t No Sunshine.”

So here’s what the plan is for the Lead Pile for the moment:

I’m working on AWI stuff. At the present time, I have two separate AWI game projects. One is based for semi-skirmish games like Rebels and Patriots and the Take Action rules I’m helping to beta test. The other is more of a massed battle game played with Regimental Fire and Fury. For the skirmish based games, I really need some representative units. Continentals, British, Hessians, maybe some Provincial forces and some cavalry and a gun or two. The F and F stuff is all built around Greene’s southern campaign and those must represent specific units. I have loads of unpainted figures, but I will need a few more. I stated the goal of painting 400 AWI figures by the end of the year. So far I’ve finished 24. But I have more I’m working on now.

Finished Front Rank Hessian figures. I love me some Front Rank figs. They are well cast and seem so old school. They take my Hessian count to two units for semi skirmish.

Kurt and Mark said they want to do some MESBG. That’s all I needed to hear, because I have a fair number of Isengard figures. All orcs. It would be nice to finish these. They paint up quickly. I have the Isengard set from GW Lorri got me for Christmas in 2024. That’s 40ish figures, plus I have six Warg riders. I’d love to finish them and draw a bow around this project. I don’t expect to buy more figs, but I could see the potential. This month I’ve finished three Trolls and ten armored orcs.

Painting plastic figures isn’t something I do regularly, but that is different with my Middle Earth stuff. The Trolls had to have a pin drilled into their feet to get decent purchase on a base. Used Warpainter speed paint for their flesh. Different, easy. The Orc mob to the right is my third such collection. The fourth one will likely come in April. Trolls by an Etsy seller, Orcs by Games Workshop.

I also said I promised to paint some ships throughout the year. God knows I have lot of ships for almost every period and scale you can imagine. A couple of years ago Mark printed 18 Fletcher class destroyers for me in 1/1250. This month I painted six of them in the very basic Measure 21 blue gray on blue gray scheme. My guess is I’ll keep working on these until they’re done. But there is so much more. Some is mine, some I inherited. ACW ships, Lissa in 1/2400, Tsushima in 1/3000, German pre-dreadnaughts in 1/1250, WWII Japanese and Americans in 1/700. Love me some ships. Any ships.

Six Fletcher class destroyers, early production. STL’s from War Times Journal. Printed by my friend Mark Waddington. There are more to paint, but different versions. In Measure 21 camouflage, which is a darker blue gray, over blue gray. Some paint schemes are easier than others.

    Our Weekday Warriors game group has changed in the last year. We’ve added a couple of new members, lost a few others. That’s really changed the mix of what we play. Not as much SAGA, though that’s a game I still really like. There are more games that I’m less familiar with, but am happily willing to try. Introducing new things to the mix is good, if a little dangerous, because it always tempted the younger version of me to chase it. I think I’m more into re-purposing existing figures and projects than just buying more stuff and adding to Kevin’s pile of lead.

    Force Z travels to Chehalis

    A setting up picture of Repulse. It would not stay quiet for long.

    Today was one of those days. I woke up at 3:15, and could not get back to sleep. At 5:00 I began drinking coffee and reading Chernow’s Washington. It didn’t put me to sleep either. I loaded the car last night. I started the car, and headed out at 6:30, stopped for a breakfast sandwich and Americano at Starbucks, and hit the road for Chehalis. Traffic was fairly light. and I pulled into the Vet’s Museum at 7:50. I laid claim to a table and immediately began setting up. By 8:45, I had four excellent choices to run the game and we got started.

    The Force Z game is played in five waves. In each of the waves there is either one squadron or two squadrons, 7-9 planes or 15-18 planes. Their goal is to deliver their ordnance while surviving as much damage as possible from the shipboard AA fire. The Japanese win by sinking the British ships. Anything less is a loss.

    The first wave of level bombers achieved their purpose with a hit and fire in the hangar area of Repulse.

    It didn’t take long to find four volunteers for the game. Vic, Dale, Joe and Jessica all were the Japanese mad bombers. Wave one was eight Nell bombers with 250kg bombs ready to drop them on the Repulse. They dutifully flew over the ship in column, and each plane dropped two bombs inflicting one hit that caused minor damage. The players could all learn what it was like to move, turn and take AA fire. The Repulse, in the middle of a violent made half its inadequate AA fire unavailable for the first wave, and inflicted some minor damage to the attacker

    Joe and Victor plan their attack for Wave 2 on the smoking Repulse.

    The second wave was a bit more challenging. The players get two squadrons of planes to run. They’re Nell torpedo bombers. The torpedo attack rules are more limiting. The bombers must be at low level. The attacks must be made at speed 7 or less until they drop their torpedoes. Torpedo ranges are critical and pre-measuring isn’t allowed. Bombers can’t launch in a turn in which their planes are turning. But torpedoes are the money in this game. Bombers flying two miles high just don’t hit much, so it’s the torpedo luggers that have to do the hitting.

    Wave 2 attacks the Repulse from the Southeast corner of the table. Lots of great discussion between the players about which chances to take. They decided a straight in strike would be best and with four torpedo hits, who’s to argue.

    The players had some decisions to make. The board entry put them closest to Repulse. Would they attack there? Would they maneuver planes to both sides and attempt an “anvil” attack (raises the chances of a hit. Would they try to shift the entry location and tempt the fates that all planes would get there on time.

    For the time being their decision could wait. At the beginning of the game they rolled on the Getting Started table which had three possible outcomes, all kinda bad for the Japanese. They rolled the Interception option. The British had 11 Brewster Buffaloes waiting 90 minutes or so away to come to the aid of the Force Z if called upon. In the Getting Started table, a die roll would direct the Buffaloes to intercept Wave 2 off table, with a die roll against each squadron. Jessica’s die roll directed both attacks on Lt. Take’s squadron and he paid the price. Two planes were shot down, and two were so badly damaged they couldn’t continue. Lt. Takei would be bringing 3 planes to the table instead of 7. The Japanese could have rolled differently and broke up their attacks or created unfavorable sea conditions making it harder to hit, but got the interception instead.

    Lt. Takei’s survivors and Lt. Ishihara’s nine planes stuck with a plan to attack Repulse directly. Though they had planes damaged in the attack, none were shot down before their torpedoes were launched, and one was shot down as it was exiting the board. The Repulse was not so lucky and suffered four torpedo hits. But it wasn’t just the hits. It was the die rolls on the damage table that were 7,7,8,8 on the D10’s the game uses. Anything 7-10 does critical damage, such as flooding, rudder jams, loss of AA or internal explosions. The Repulse was left in pretty bad shape, in a sinking condition and loss of most of her AA. Eeep.

    There was an actual lull of almost an hour between waves two and three. I meant to have a British damage repair roll. I wasn’t prepared (as in, I forgot,) but that will be something for a future game.

    12 of the Bettys in Wave 3 targeted Prince of Wales. The Prince actually shot down two of them, but as you can see, five torpedo hits left her paddling for her life.

    Wave three was two full squadrons of Betty torpedo bombers. Bettys actually lugged heavier torpedoes but I just didn’t think a distinction was worthwhile. They approached from the west, or mainland side of the Gulf of Siam. Five targeted the listing, sinking Repulse, while the remainder attacked Prince of Wales. By the time they departed the Repulse had taken five more hits, and the Prince of Wales engineering was wrecked, she was listing and the game was pretty much done.

    Vic’s five remaining planes targeted the listing, rudder jammed hulk of Repulse. You can see what happened. Five hits. Secondary explosions. Ick.

    Overall, I was incredibly pleased with the game. It looked great. It played easily enough. The mechanics of movement, anti aircraft fire, bombing and torpedo attacks worked well. The torpedo damage was really bloody, but the die rolling for the Japanese was really hot and I can’t do anything about that.

    But one of my goals was to get the Japanese through all five attack waves and we only made it through three. So here are a few things I’ll do for the next play test.

    1. Move the Prince of Wales a little closer to Repulse. That way the Japanese can still gang up on one of the ships, but it’s more likely they’ll be able to support each other with AA fire.
    2. Put two British destroyers on the table. There were three destroyers as part of the task force, though they seem to have played little part in the Dec. 10th attacks except for rescuing survivors. I have rules for the destroyers. They are mostly a distraction and contribute little to the AA attacks, but they’re something.
    3. Probably the big change is making the torpedo attacks harder to hit. Don’t have a problem with the damage, but it seemed like they were hitting at a rate of about 40% which is about twice the rate historically. It’s easier to judge the short range distance on the table from the long range, so hitting on the table has to be more difficult. At the current time hitting is possible on a 7-10 unless there are subtractions for angle or damage. I’m torn between hits on 8’s or 9’s.

    Another playtest on the 28th at Wizard Kings. I’ll need to organize. Looks like the PoW’s mast needs a repair. But looking forward to it.

    Just one last word in praise of the Chehalis Veteran’s Museum. First, for our group, it’s a terrific venue for a game space. It isn’t huge, but it could easily house our three or four games we ran each period. It’s comfortable, not too warm, lots of room to spread out. We had 32ish folks there at one time. It wasn’t loud, which is what often happens with a bunch of old guys who don’t hear well. I didn’t spend time in the museum itself, but I have and it was great. Lots of great stuff to see including exhibits on women in the service during WWII. Some might call that woke; I just call it history. It’s equidistant between Portland and Seattle and we had a nice turnout from both areas. We’ll be back in August, and I hope to be there too.