Burning Hesselberg and What Comes Next

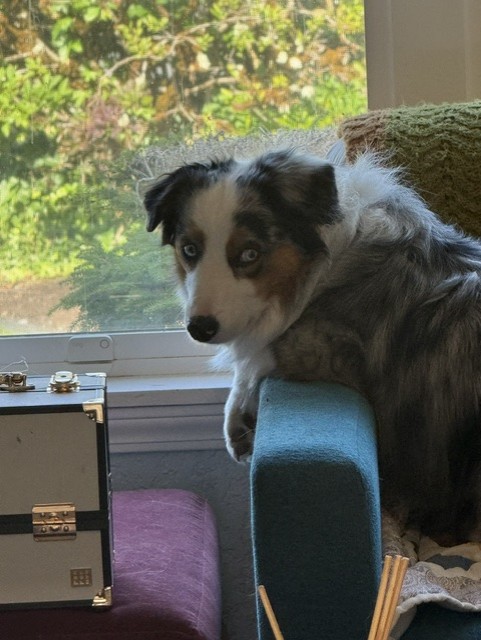
Owen gives me the “Not another project!!” look

About six weeks ago I agreed to host a game at our Drumbeat South gathering at the Chehalis Veterans Museum. It’s a wonderful venue if you happen to be in central Washington heading up or down I-5 to or from Portland. Kind of tucked away, I highly recommend a visit. It’s also a great, affordable venue for a game gathering. NHMGS has taken to sponsoring an event there twice a year and I really like it. Roomy enough, affordable. Food close by. It’s a yes from me.

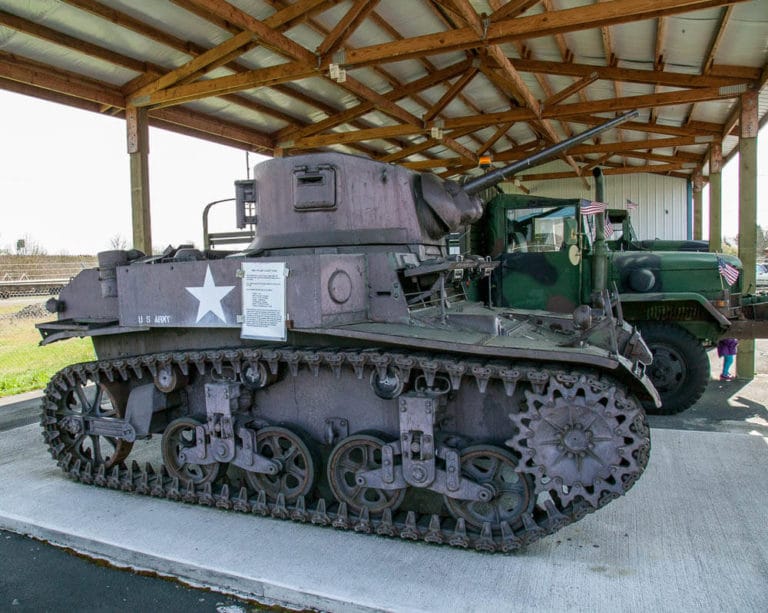
A few pics I didn’t take of the Chehalis Veterans Museum. It’s an easy venue to like and the meeting space upstairs is first rate for a regional gathering.

The game I’ll be running at the Vets Mu on August 15th is another Take Action game. I guess I know longer think of these as playtests because I’ve sort or adopted them as my rules of choice for semi-skirmishy horse and musket rules. If Chris was to throw up his hands and abandon them tomorrow, I think I’d still play them just because of the options it gives to the players. Simple, easy to run, fun stuff.

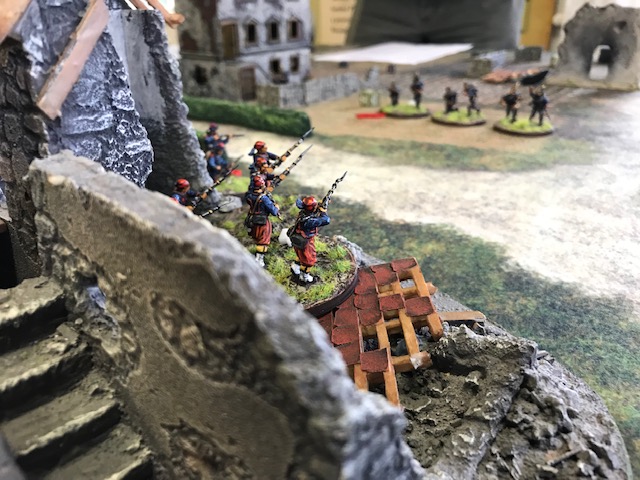
I’m running a game I’ll call Burning Hesselberg, and it is another game rooted in the 1777 and beyond “Forage Wars” in New Jersey. These little struggles to control supplies, led to wanton destruction that drove New Jersey firmly into the Patriot camp. The British failed to bring Washington’s forces to a decisive battle and the alienation of the locals led General Howe to pack up and head for Philadelphia via a long voyage into Chesapeake Bay.
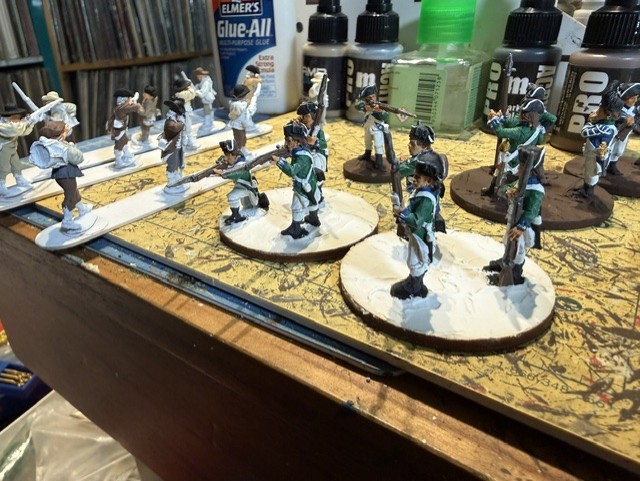
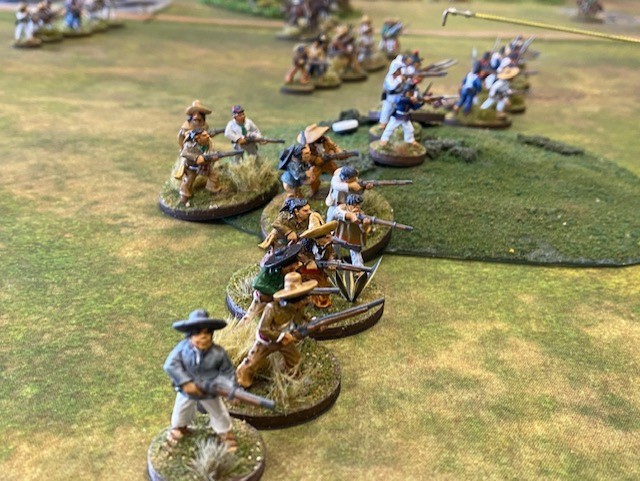
New Jersey Loyalists and Connecticut regulars under construction. Hoping the lot is done in the next couple of days.

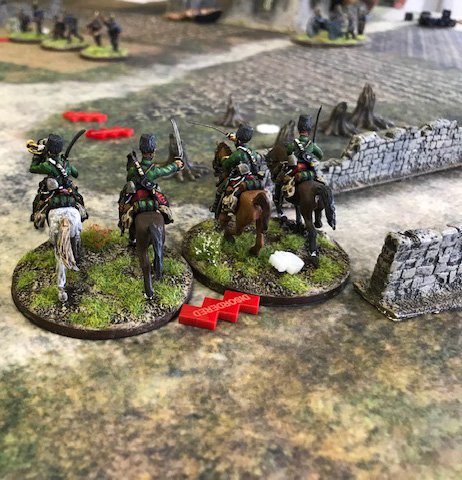
My scenario is a five player game with three British players running eight units and some wagons. Their goal is to sack a farming village and saw mill that has supported Washington’s forces. They have an interesting mix of troops with quality British dragoons and Hessian jaegers, some Loyalist regulars and Loyalist not-very-good militia. Their job is to torch as many buildings as possible and forage some useful resources for the troops back in Brunswick. The Americans forces, comprised of a mixed force of Continentals and militia is to make their job that much more difficult.

There is stuff to do to get ready. I needed to paint some figures–that I have of course. There were mounted and dismounted British dragoons. I needed more Loyalist regulars. And then there was the matter of some more fairly ratty looking Continentals. Lots of time to accomplish this, except that I volunteered to play test the game on July 25th at Wizard’s Keep, cutting three weeks off my timeline. Even so, things seem to be coming together. I’ve even added a couple more buildings to my meager collection including an Etsy 3D print of a water powered saw mill, I’m calling Sylvester’s mill. Things should be ready for the WK game. The scenario is written and I’m excited to give it a try. I’ll be sure to include a post with photos to fill you in.
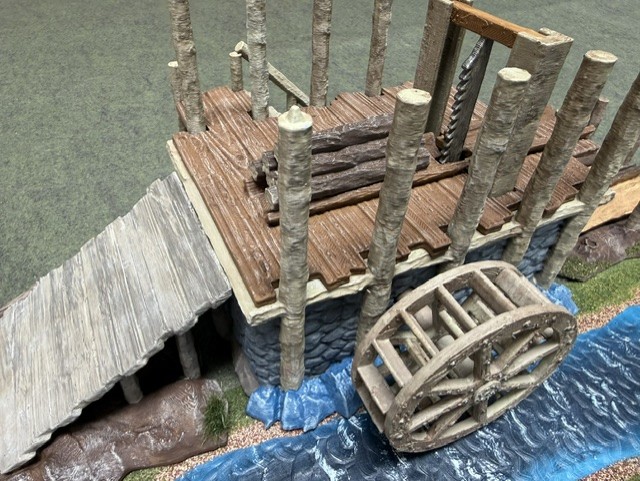
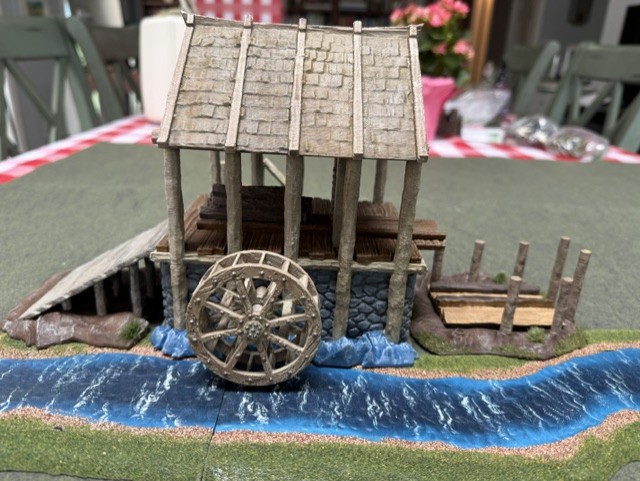
This is Sylvester’s

I will be giving the American War of Independence a bit of a rest to pick up something different. I wrote earlier about doing something with the Peloponnesian War. Yes, Greeks, hoplites, spears, those guys. At Enfilade I bought a pair Xyston 15mm DBA armies for Sparta and Thebes. Though I parted with my many DBA armies a few years ago, there is a part of me that’s interested in playing again, and these armies offer an entry point to something larger. But nothing is ever quite as simple as it should be. I need bases and I’m going to avoid painting symbology on those wee, small 15mm shields. The Xyston figures need spears. So all that stuff must be ordered, and I have now done that.
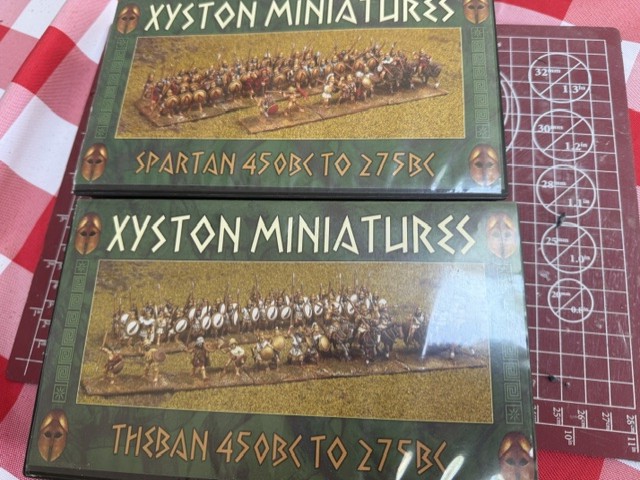
My hope is that I can go ahead and do the 15mm thing without a lot of difficulty and the DBA’s can come together quickly. Then I’d like to move on to something a little more intense and that is using these same DBA figures to play the Control to Catastrophe rules. This game is played on a gridded game board. Of course, I don’t have a gridded game board so I’ll have to come up with one. I think I have something I can use and create a board. Because I’m playing with 15mm figures mounted on DBA bases, I don’t need a big space.
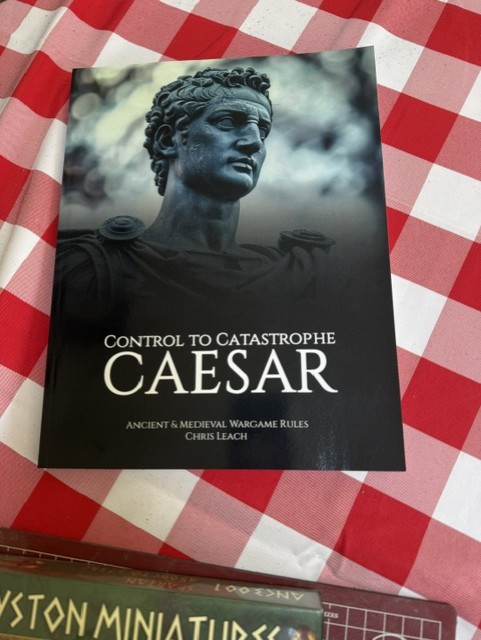
It’s not clear how many more figures I’ll need to do both DBA and C to C, so I’ll have to figure it out. However, I do have enough to start, plus bases, plus spears, plus shield transfers-or at least I will have enough when it all arrives from Mr. Litko, Mr. Xyston, and Mr. Victrix.
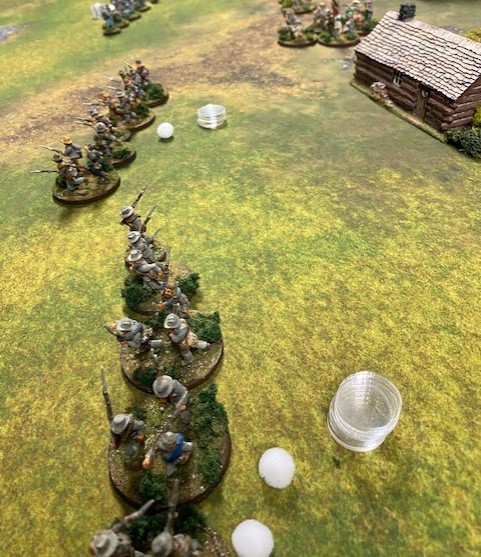
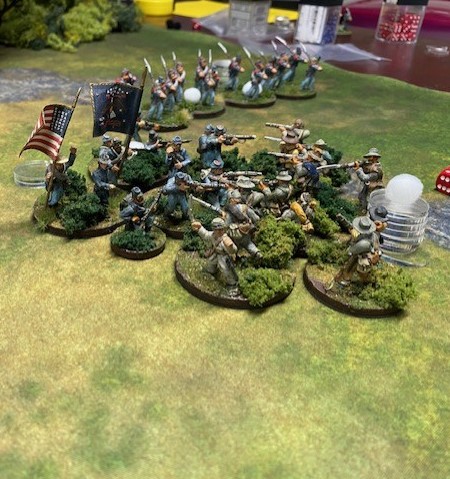
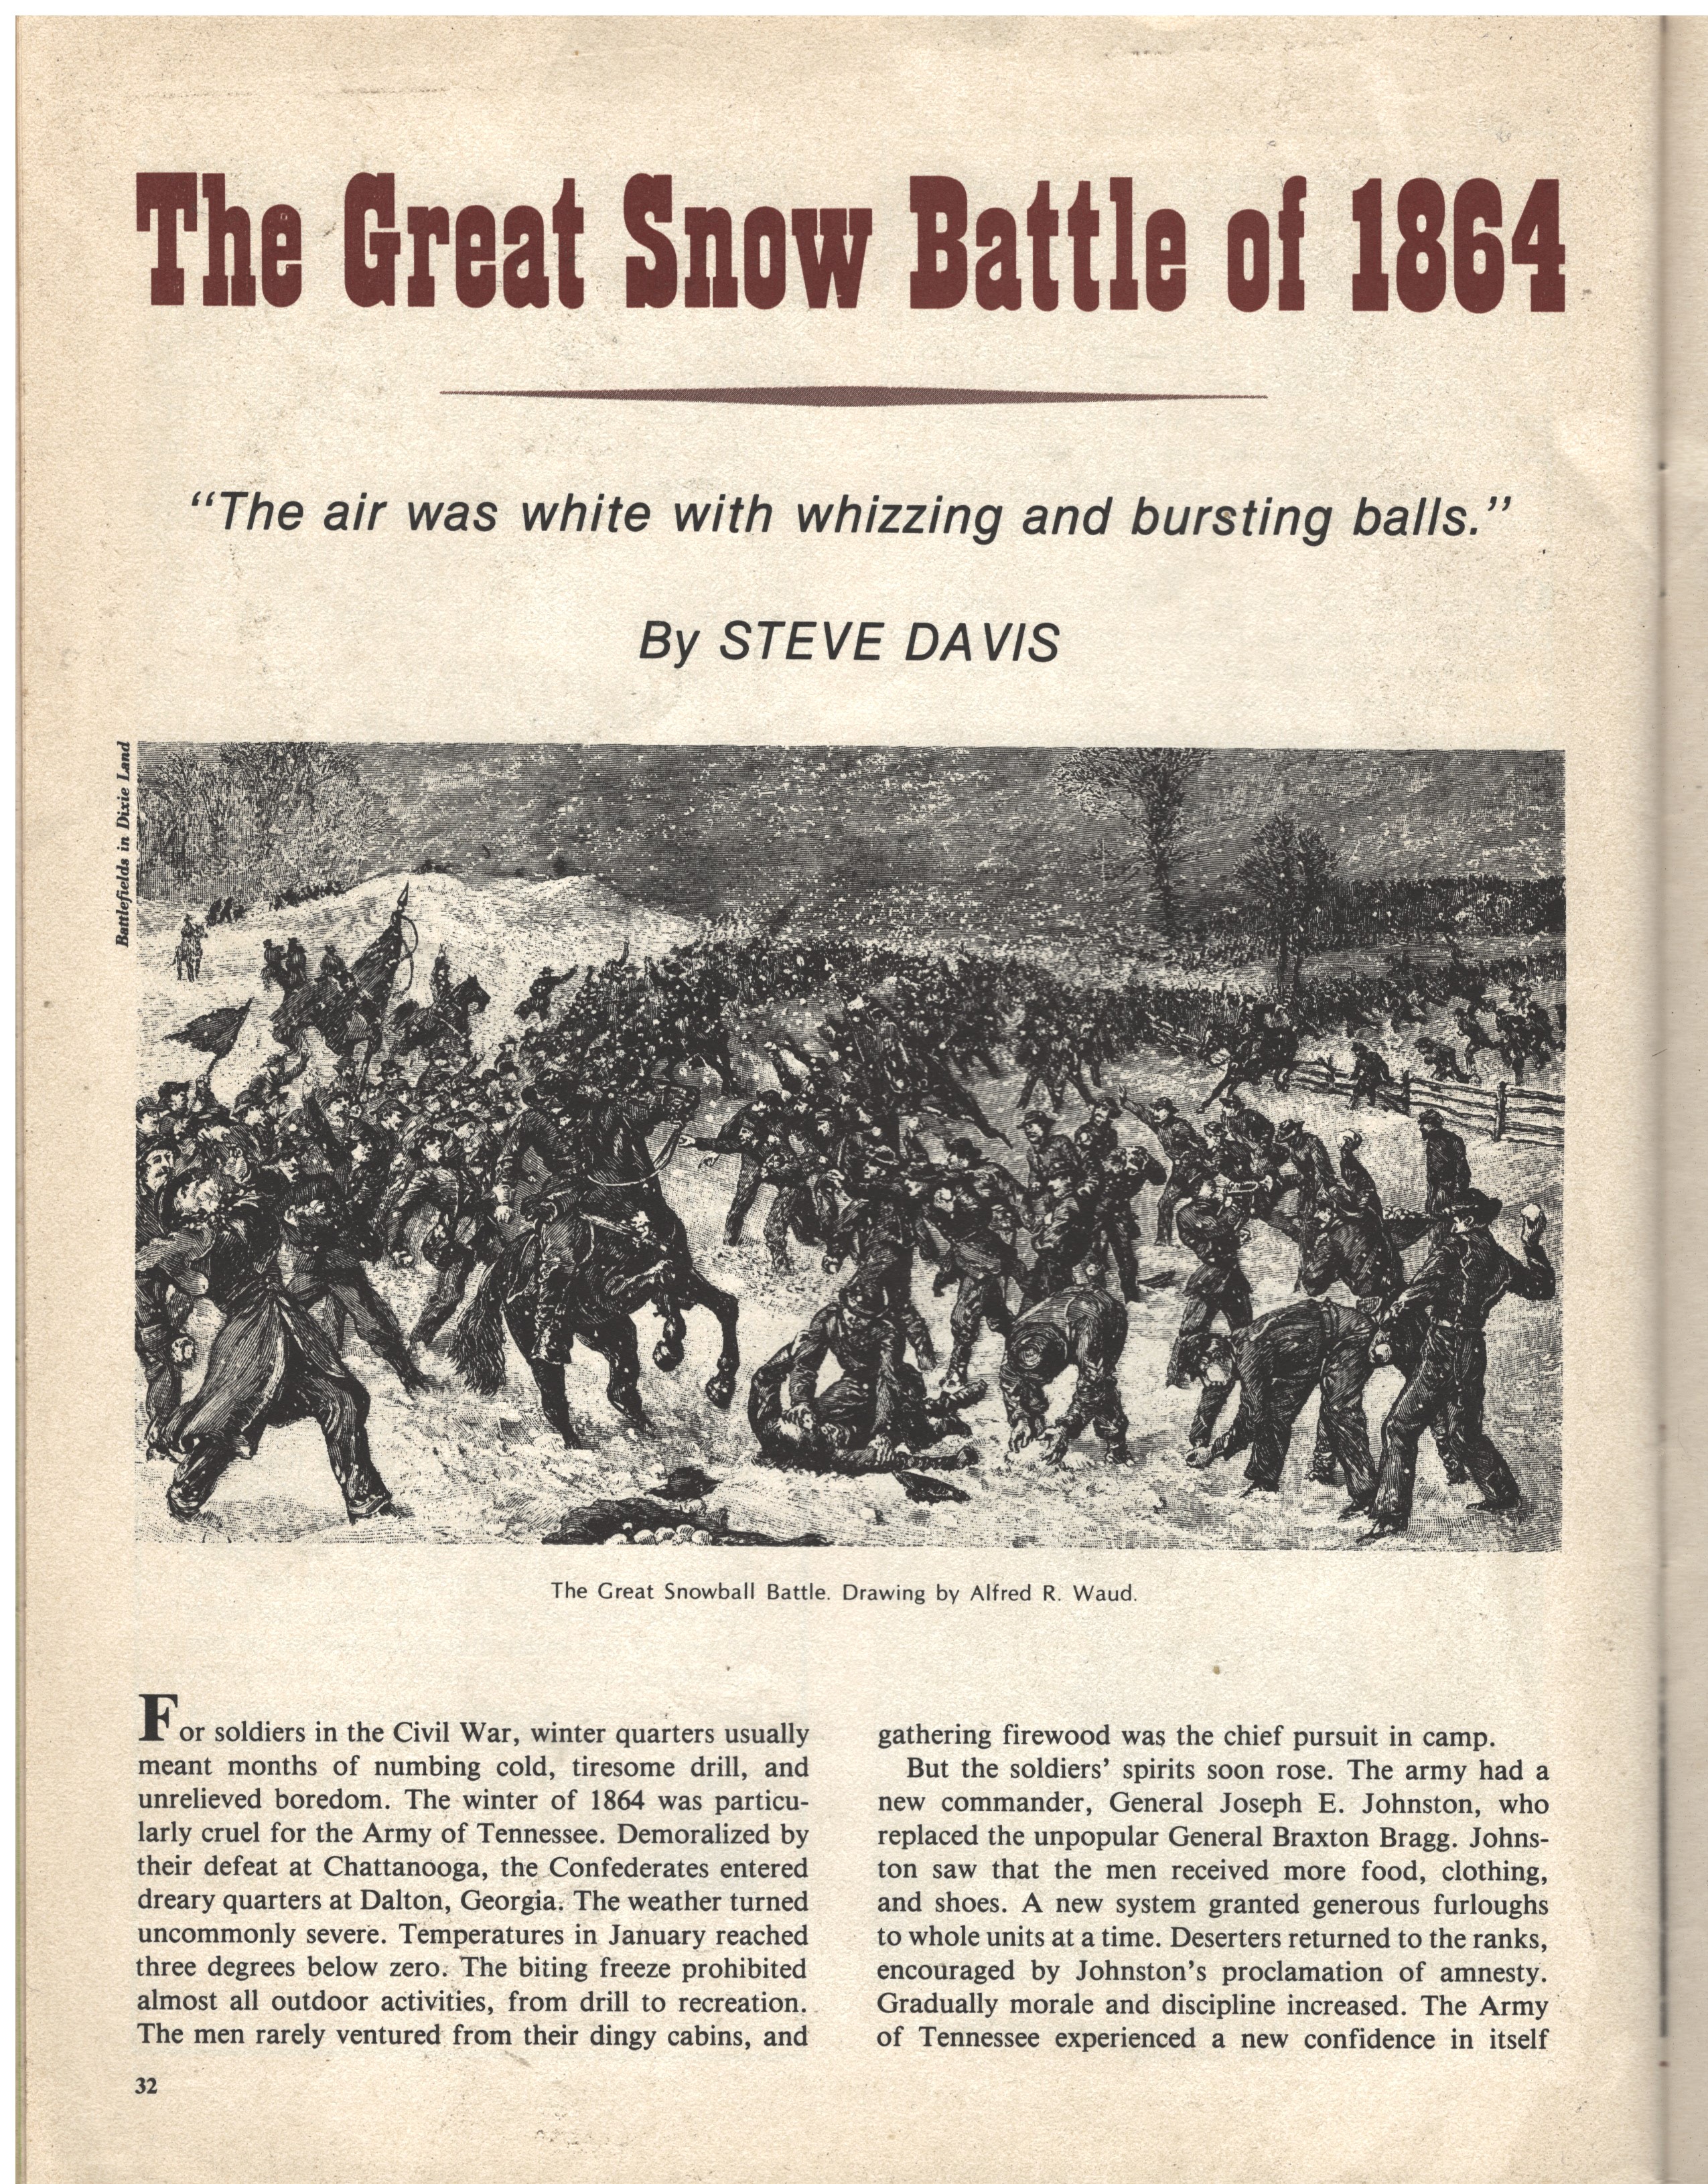
Because, Just Because: The Great Snow Fight of 1864.

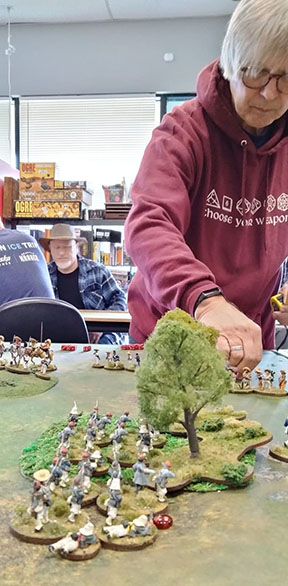
The 9th Florida prepares to advance against the 5th Georgia. Each unit has a stack of stamina markers and a supply of two snowball ammo markers that can be expended. Reloads are available but it’s tricky.

It’s been a while since my last post. Sometimes I feel like I just run out of worthwhile stuff to say. I’ve been busy. I’m probably playing 3-4 games a month. A fair amount of SAGA, some MEBSG (Lord of the Rings) and some Moro Wars using the One Hour Skirmish Wargame rules. More than anything I’m enjoying time with my friends. Oh, and preparing for Enfilade 2025 in May. Ack.

Georgians (blue) and Floridians (gray) brawl.

However, one day I decided to do something I’ve always wanted to do and that is write some rules for and run a game of The Great Daulton Snowball Fight of 1864. Just a quick historical synopsis. In 1864, the Confederate Army of Tennessee, disastrously ejected from Chattanooga at Missionary Ridge by U.S. Grant, was encamped at Daulton, Georgia in winter quarters preparing for the 1864 spring campaign. Under new leadership by veteran general Joseph E. Johnston, the soldiers awakened to a snowfall of 5-7 inches and snowball fights broke out across the encampment. Eventually, the skirmishes spread into company, regimental and even brigade level clashes. Generals Cleburne and Polk both appeared at the head of their troops as snowballs whizzed by. I learned of this fun-sounding clash while reading Steve Davis’ wonderful article (“The Great Snow Battle of 1864”) in the June 1976 issue of Civil War Times Illustrated many years ago.

Probably 25 years or so ago I tried to run a game using a published set of rules on this topic and it just didn’t go well. I’ve always had this in the back of my mind, and thought it would be fun–and different–so I cobbled the rules together over a couple of days and yesterday we tried them out.

I have a few ACW figures for Rebels and Patriots, six infantry for each side. These are twelve figure units. Not a lot of figure losses, though that changed a bit with our game play. I got together some willing friends on a Weekday Warriors Wednesday and we gave it a try. I’d like to say they were perfect out of the gate, but they weren’t. However there was a basis for constructive collaboration and I really appreciated that.

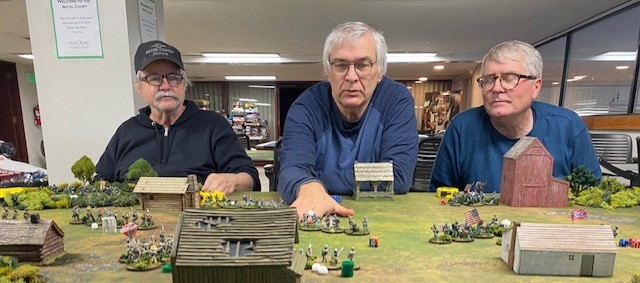
Mark, Mark, and Eric consider how best to survive this initial test of The Great Snow Fight of 1864

Each unit was allotted stamina points, because while snowball fights don’t cause casualties, they do wear out the participants with cold, wet and the odd bumps and bruises. Units could “huck” (throw snowballs) or they could “brawl” (melee). The rules as written really favored brawling, so we saw more of that than huckin’. Units expended their stamina points quickly in brawls which forced them to take time to recover their stamina before jumping back into the festivities. Each player also had an encampment building which needed some defending. Each turn was played in rounds with a die roll for initiative. Snowballs were restricted to supply and reloading. It was possible to have “dirty” snowballs, but they carried a required brawling response that was sort of like mutual assured destruction, so we didn’t see these used. We played 12 turns in about 2 1/2 hours

All agreed that the game was a fun idea and that there were lots of choices for players to make. Lots of sensible suggestions were made that standardized some game features, including figure losses (think of them as desertions as things got too cold, wet and rough.) I’ve already made changes to the rules and am anxious to try them again. I’ll get the chance on December 28th at the monthly Wizard’s Keep Saturday. Looking forward to it. A big thank you to Mark Waddington, Mark Wensnahan, Eric Donaldson, Gary Griess and Keith French for playtesting the rules. I had a lot of fun.

The Long Retreat, Vol. III and more Maximilian Ideas

Your obedient servant manipulating his Mexican forces to their doom.

I actually do play games. I know I often write about my interests and what I’m painting, but I do like to run and play games. Yesterday I ran a Rebels and Patriots game at Wizard’s Keep in Kent. This is a monthly event, and what a wonderful day in great venue. This event is organized by Ralph Holloway and if you’re interested in playing a game or meeting new gamers, I can’t think of a better place.

I can’t make every event, but I was available for March 30th and I decided to run a Rebels and Patriots game. It needed to be big enough for a fair number of players. I thought Maximilian in Mexico would work. I have a lot of figures and all that was left for me to do was cobble together a decent scenario.

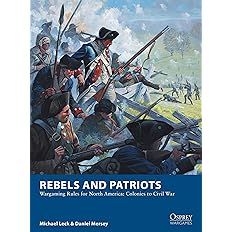
Rebels and Patriots by Daniel Mersey. 16 bucks on Amazon. Just do it. I’ll teach ya how to play.

For those of you not in the know, Rebels and Patriots is an Osprey set of rules by Daniel Mersey. Mersey has written several sets of rules Osprey has published. They all have a similar game engine, requiring a successful activation die roll. The mechanics are simple, easy to learn and teach, and allows games to move pretty quickly. Each side in yesterday’s game, “The Long Retreat, Vol. III” had four or five units per player, at least half had not played the rules before and we reached a conclusion in nine turns and about 2 1/2 hours. Highly recommended, it’s the best twenty bucks you will ever spend on a set of horse and musket rules.

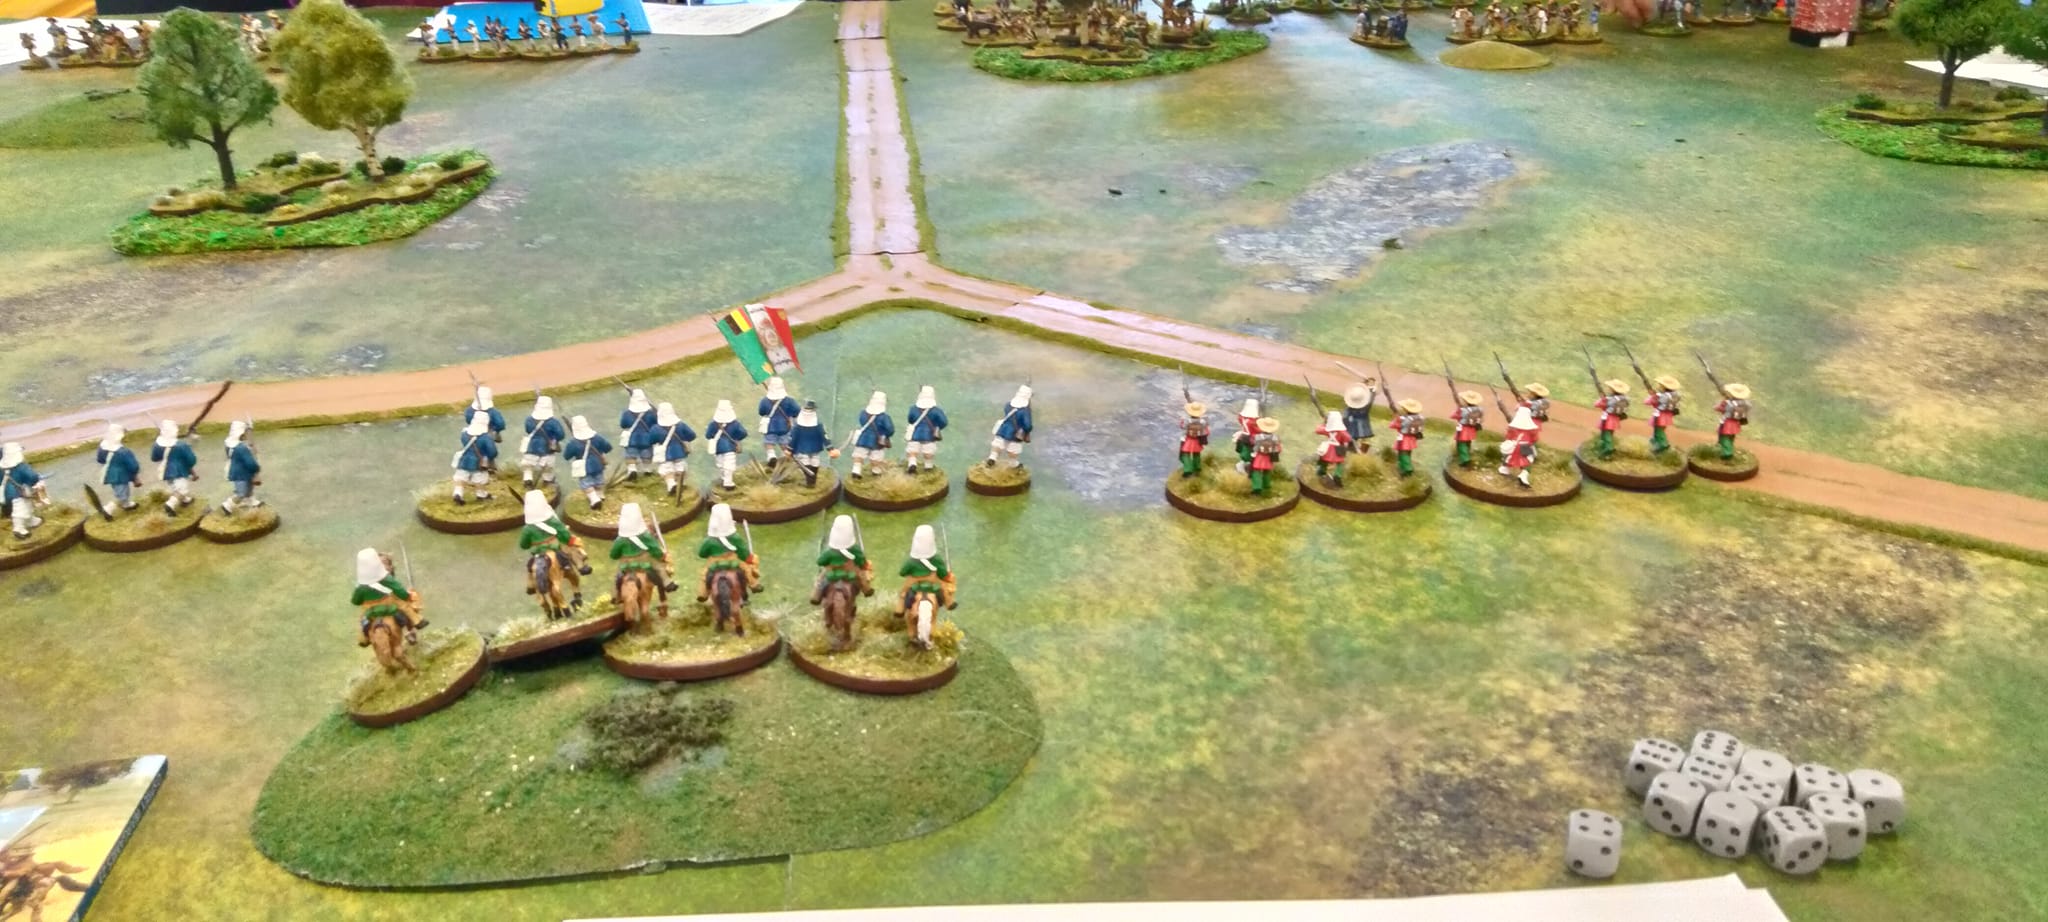
My challenge was to come up with a scenario that did not involve throwing troops of equal point values out to slaughter each other. That’s boring. So we instead did a scenario that was not atypical of the French in Mexico–the French chasing a retreating Republican army that was trying to get to safety. There were two French players, and one player that had a force of Imperial troops. Imperial troops were those serving in Maximilian’s Mexican army. The French were Napoleon III’s expeditionary troops that arrived in Mexico in January 1862 and remained until 1867. The Imperial troops represent the army of Imperial Mexico raised by Maximilian after he arrived in Mexico in May of 1864. The French were hard bitten veterans of Algeria and Mexico and I rated them as veterans and aggressive. The Imperial troops were conscripts and volunteers, with little experience by November 1865-the time of our scenario-and were rated green.

Each French/Imperial player had some units to play with. The two French players each had a gun, a unit of light cavalry, a light infantry unit and two line units. All units were veteran and aggressive except for the artillery piece. Lots of points. The Imperial player had three line infantry units, including the Belgian Legion, and one light cavalry units. Nothing special. Their mission was to kill Republicans and position themselves to exit the board by the road. The Imperial troops set up a foot and half on to the board, while French troops game on to the board near the road entrances.

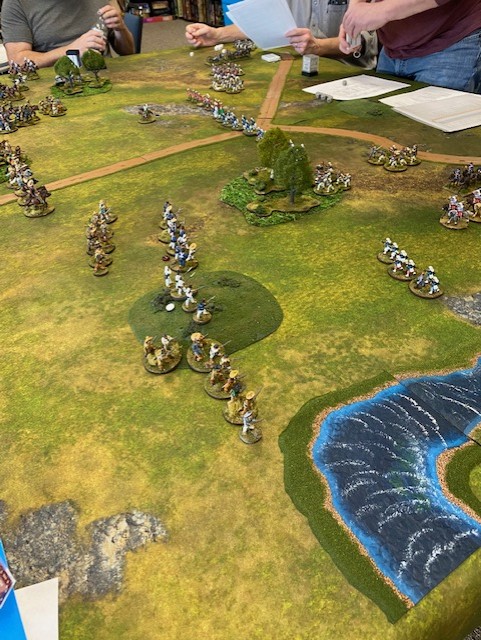
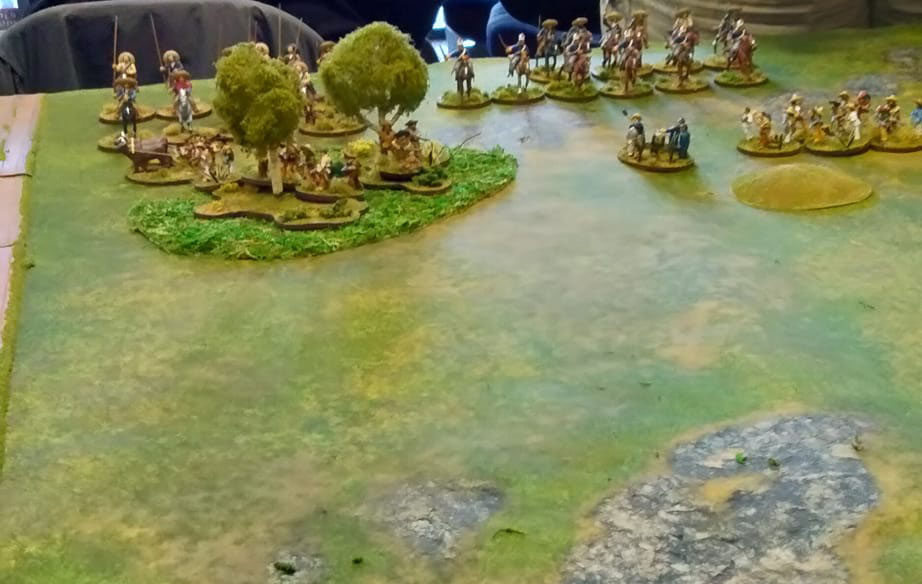
Republicans deploy their artillery in the middle of the field with support from militia infantry and cavalry.

Choosing troops for the French and Imperial troops was easy, the question was setting up the Mexicans in a way that generally historical but offered some challenges to the French. By November 1865, the American Civil War was over. President Lincoln and later President Johnson vehemently opposed the French intervention in Mexico. Though the U.S was still recovering from the aftermath of the Civil War, Generals Grant and Sheridan notably opposed the French violation of the Monroe Doctrine and the establishment of a European-style empire across the Rio Grande. Grant served in the Mexican War 1846-48 and was notoriously sympathetic to the Mexicans in his Memoirs. He directed Sheridan to the Rio Grande with a sizable number of troops. Though Sheridan’s men did not intervene in the conflict, they did make sure surplus weapons made their way across the river and into Mexican hands. Empress Carlota wrote with sorrow about the effect of American repeating carbines against the charge of the Imperial Red Lancers in 1866.

Taking this into consideration, I did some fiddling with the rules in the Mexican organization. The Mexicans had three commands. The first was a cavalry command with five light cavalry units. Three of the units were militia units. I made all the Mexican militia units in the game regulars, because they had considerable experience in the war on both sides. However I did make a key rules change regarding the militia, I’ll explain shortly. The militia were supplemented by two units of regular light cavalry. These units were veterans and armed with American repeating carbines. More on this to come. There were also two infantry commands. Each had a regular, veteran unit armed with repeating rifles. Each also had two units of militia foot rated as average. One of the commands had a gun. The other had a skirmish sharpshooter unit (American Sharps rifles with scopes, of course.)

The rules changes I made for the scenario were as follows:

  1. The militia units did not suffer the green -1 modifier for activations and rallying. However, they could only suffer two disorders before melting away instead of the usual three in the rules. This made them brittle and more likely to melt away as things got bad. This better represented how Mexican militia seemed to react historically. Militia units also could not form closer order, which meant no volley fire.
  2. The other big change was the use of repeating American arms in the game. The cavalry had repeating carbines and the infantry had repeating rifles. Activation and ranges were the same. I allowed these shooters to add 50% more dice in a successful shooting attack. Nasty. However, each time they successfully fired, they rolled to see if they needed to reload–a 1 on a D6. This was resolved by taking a turn to make a successful shooting activation. Shooting could commence the following turn and French would fall in droves. Hah!

The game began with a general advance with the Imperial troops in the middle and the French on either flank. There was some promise as one of the Republican regular cavalry units blasted the French 5th Hussars from the saddle on the left. The skirmishers and a regular infantry unit engaged the French light infantry on the right inflicting some losses. But the veteran French morale came into play as they began to take casualties, casually passing morale checks, while the Mexicans had trouble activating and hitting. I ended up commanding the Mexicans on the right flank and though I had positioned my troops to inflict considerable damage on the French in front of me, I had failed activations, rolled poorly on my shooting, and in the end, the French simply throttled me. My teammates did better, but it wasn’t going to be enough as the French advanced across the table. Even the green Imperial troops seemed unstoppable. I think everyone had a good time, all played well, but at the end of Turn 9 we called it good.

This is a scenario I wouldn’t mind trying again. I don’t think I’d do anything different for the French. They were mighty and given that they had the onus of getting across the table, they had to be tough. They also outnumbered the Mexicans. Though the activation rolls required for the green Imperialists did slow them down a tish, they were all there at the end of the game, getting ready to roll over what was left of the Mexican center.

I would change some things for the Mexicans. I’d get rid of the Mexican cavalry corps. I’d add a third Mexican infantry command. I’d also add a cavalry unit to each of the Mexican commands. Each would have the same organization with a regular unit armed with repeaters. One command would have a gun, another with skirmishers, not sure about the third command. I liked the repeaters, but I think I’d ditch the reload roll. The French seemed quite capable of weathering the storm.

I’ll follow up with a quick intro to the French Adventure in Mexico, just in case you’re thinking, “Whoa, this is cool” but don’t know how to get started.

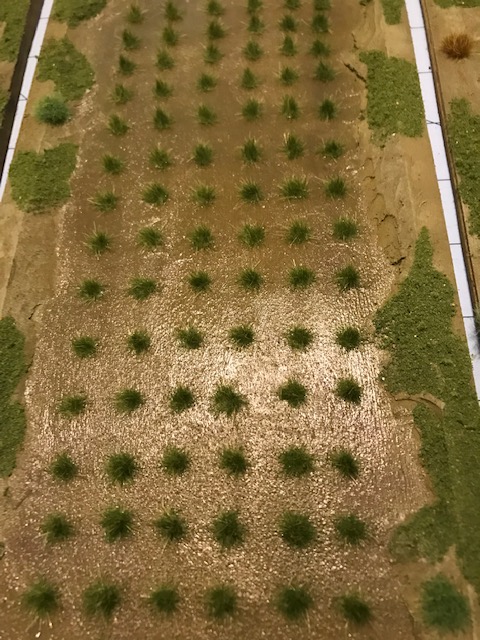
Making Rice Paddies

One of the important aspects of this hobby I feel less skilled for is building stuff.  I’m always amazed when my friends are able to create.  One of the best parts of working with Mark Waddington was the man could build ANYTHING.  Well that, and he’s just one of my favorite people.  Those who can imagine and build buildings, a town, a waterfront, my hats are off to you.

Me, I usually just buy stuff, so my boards are boring and sterile.  But the for the Philippines, I simply have to have terrain bits and lots of it.  I’ve built my bamboo forests, there will have to be jungle terrain.  And one other important feature of all Southeast Asian campaigns whether it’s the Philippines, Indochina/Vietnam, Malaysia or Burma is the rice paddy.  If people live near your battlefield, rice paddies are a must.

There are lots of different approaches to take.  This is a link to the paddy project on the Tactical Painter blog.  His approach looks great, but I have different plans.

One important difference is I want to make rice paddies for 28mm.  I also chose some different materials.  That doesn’t mean my way is better, it’s just my way.

Paddies 1

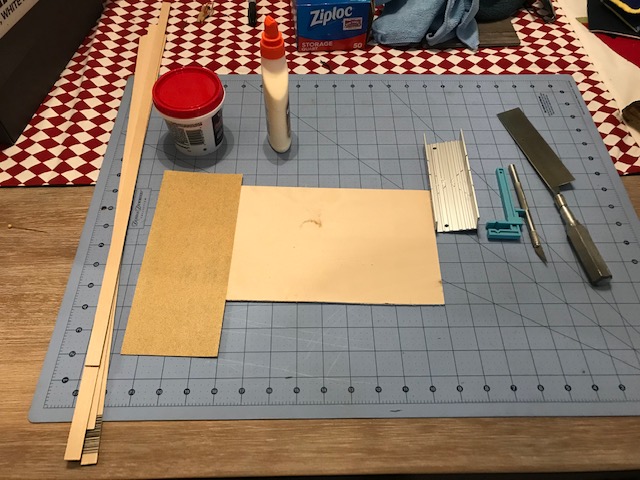
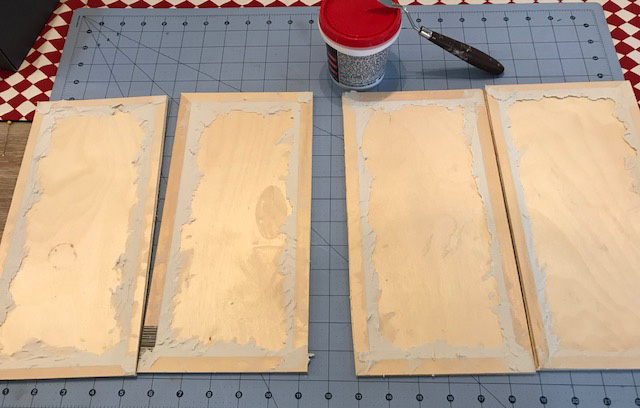
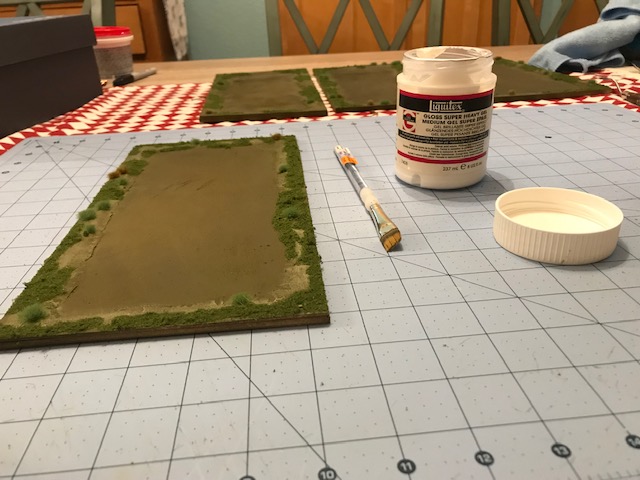
These are all the materials and tools I used to to cobble together the four paddies after cutting the 12″ squares in half with my jigsaw.

I started with craft plywood for the bases.  I buy it from Michael’s, and it’s easy to get.  It’s 1/8″ thick, so thin enough to work with.  It comes 12″ square and I divided those in half, two sheets to make four 6″ X 12″ rice paddies. I built an elevated border around each paddy to represent the path that most grunts had to walk along in Vietnam, and figured they were probably the same in the Philippines. I used basswood strips.  I like basswood better than balsa because it’s sturdier and less porous.

Paddies 2

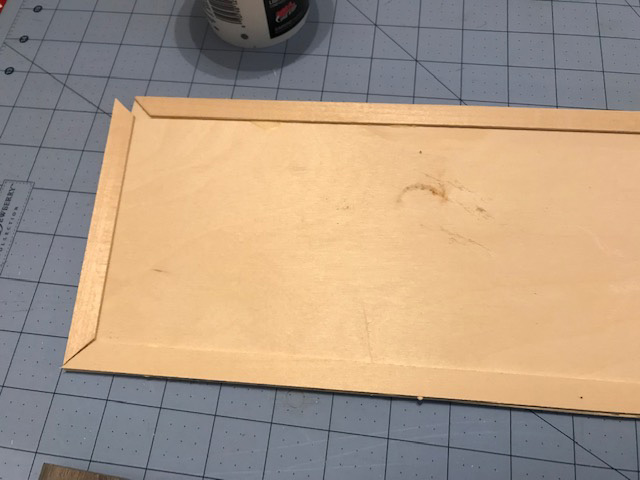
My carpentry skills are about as bad as they come, but I decided to miter the edges of the basswood sticks that form the edge of the fields. Made some mistakes, but it worked out in the end.

I actually invested in some stuff for this project.  I bought a new razor saw for my X-Acto gear, as well as a miter box.  I actually cut the 45 degree angles because . . . well just because.  Made a few mistakes along the way, but it all seemed to eventually work.  I glued everything down with Elmers wood glue and let it sit for a good long time.

Paddies 3

I used lightweight spackling compound to form the slopes and fill the joints on the paddy fields. I left it to dry overnight before sanding.

The next step is to fill gaps between the basswood and create a slope down to the growing area.  I couldn’t quite decide what to use.  I considered using modeling paste that I use for my bases.  It dries fast, and because it is acrylic, dries hard.  I decided to use lightweight spackling compound instead.  It is a little harder to work with, but easy to sand.  I didn’t worry about keeping straight lines along the edges from top to bottom.  Those slopes wouldn’t be perfect.

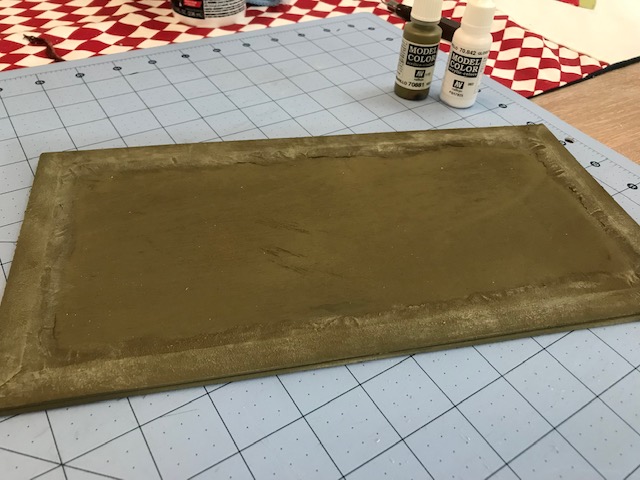
I finished applying spackle and let it dry overnight and into the following afternoon. The next step was sanding most of the rough edges. I started with fine sandpaper, and moved to my Dremel tool’s sanding discs.  It went faster and achieved my purpose.  It also allowed me to even up the outer edges of wood which I didn’t manage to get entirely straight with my jigsaw. After each paddy was sanded, they were sprayed with Testor’s Flat Olive green as a base coat.  They were left to dry overnight.

Paddies 4

I sprayed each field with Testor’s Olive Drab. It’s what I had and it’s a good base color. After that I mixed Vallejo Yellow-Green and White to create a contrasting color for dry brushing the edges. Then I created an even lighter version for further contrasts.

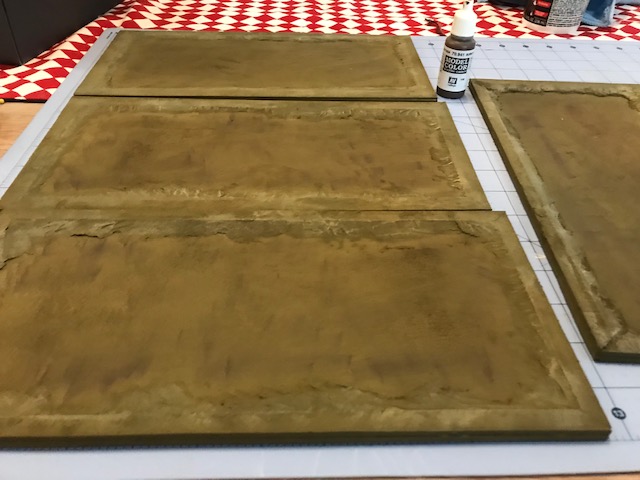
The next step was dry-brushing the the paddies.  I wanted to lighten the slopes and tops while darkening the paddies themselves a bit.  To lighten I dry brushed using Vallejo Yellow-Green, lightened with some Vallejo White. I used a large flat brush.  I did two coats, the second lightened even further.  A final round of dry brushing used a little bit of Vallejo Burnt Umber to darken up the middle of the paddy where the rice would be planted.  It was fine for it to be splotchy.  I just wanted it to darken up a little bit and provide a good contrast with lightened edges.

Paddies 6

A final step in the dry-brushing was to use Vallejo Burnt Umber in the middle of the fields. I was just looking for a splotchy, irregular darkening that would show through the gloss gel I’d use over the top.

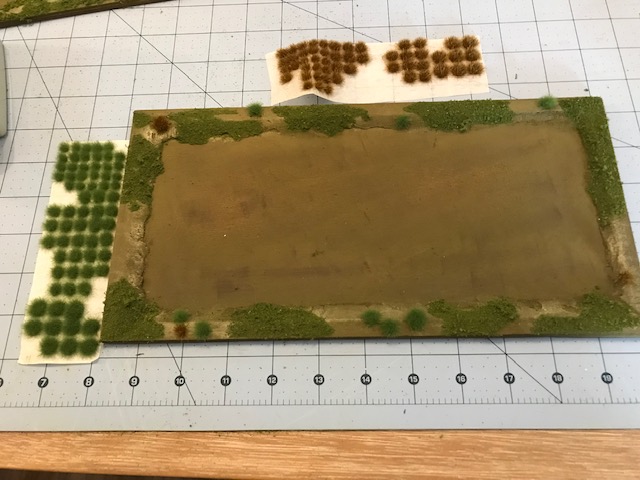
I followed that up by adding some turf and tufts by Army Painter.  I put the groundcover in random areas, to allow the dry brushing to show through.  After each paddy was completed.  I sprayed each with dullcoat twice.  I wanted to be sure to keep everything in its place.

Paddies 7

I flocked the edges irregularly and applied tufts. I tried to let the dry brushing show through where possible. I wanted an irregular, natural look. Then I added some tufts. I sprayed each paddy with Dullcote twice, to keep things in place. Note: It’s critical to do this before applying the clear gel medium or it will flatten your shiny surface.

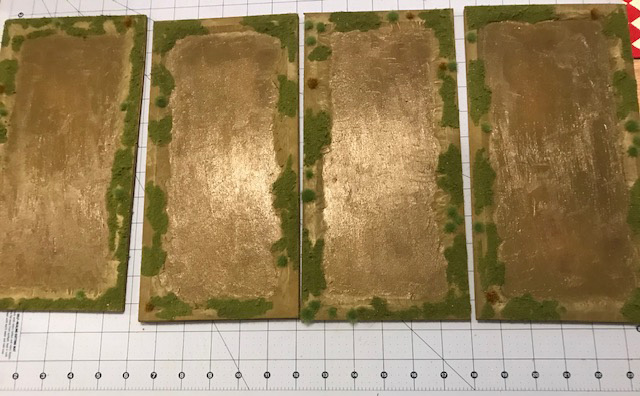
Because the paddies are wet, I needed to show the shining surface of the flooded field. There are so many great products available now, from simple clear varnishes to liquid epoxies.  I took a middling approach and brushed all with Liquitex Super Heavy Clear Gloss Gel Medium. Again, I applied it with a large flat brush.  It took about half and hour to paint it on all four paddies.  Then I listened to Steely Dan’s excellent Aja from 1978, and applied a second coat.

Paddies 12

I used Liquitex Gloss Gel Medium applied with a wide flat brush to create the water effects. I did one coat, making sure to get in the crannies of the slope I’d created, then did a second coat of just straight strokes covering the swirls I’d made the first time.

Paddies 8

Voila!! We’re ready for the terminal stage.

Paddies 13

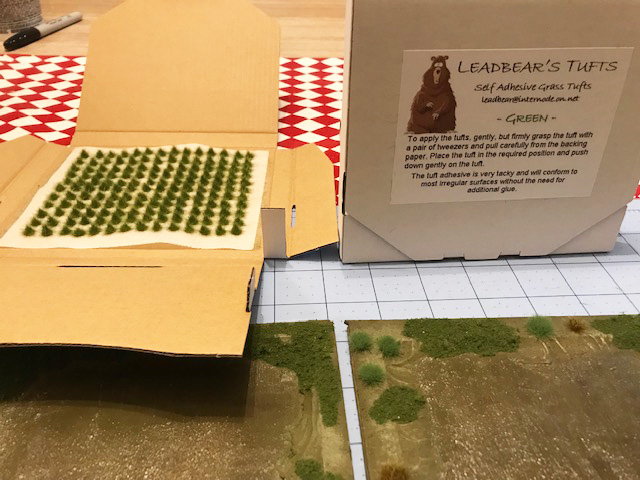
Leadbear’s excellent tufts. 140 of the small tufts per box cost about seven bucks US. They are the best of the tufts I’ve worked with.

To represent the growing rice, I decided to use tufts.  I didn’t want the tufts to be too tall, for fear putting figures on them would just smush them.  I also wanted something easy.  Tufts are a lot easier than attempting to clump together static grass in a pool of clear Elmer’s so tufts were certainly an answer. I’d seen a blurb on Facebook from a friend that he’d recently purchased tufts from Leadbear.  Another friend showed me his considerable collection of Leadbear tufts, and I was impressed.  It happens that Leadbear also has a Facebook page, so I decided to give him a try. Leadbear is Barry from Australia.  He’s a great guy.  His range of products is considerable.  Prices are inexpensive and the shipping isn’t bad.  I’d received my order in August, but hadn’t used them yet-because I always use up what I already have.

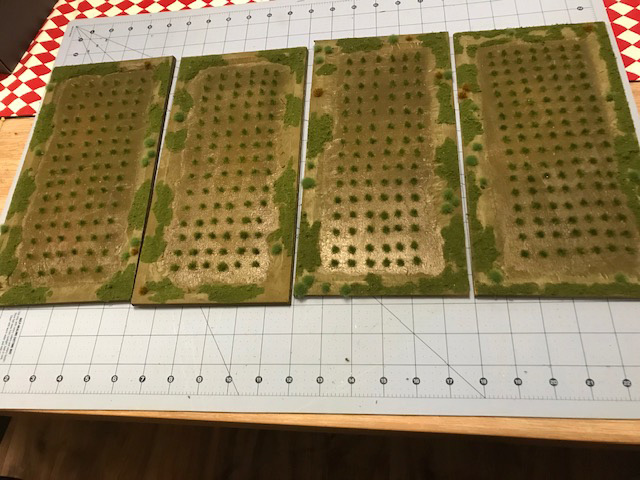
I used the 4mm green tufts I’d ordered.  I thought I would keep them in tidy rows.  Great idea.  The tufts themselves were great.  They were irregular in ways those by others I’ve tried aren’t.  They are super sticky in the ways that others aren’t, so no glue.  I hope I don’t regret it later. Of course, because I’m old and half blind, my straight lines and tidy rows wander a bit, as I expect they might in real life.  I used up some two and a half boxes of the three I purchased for the four sets of fields.

Paddies 10

Paddies 11

Done. I think I worked on these over three days. It did require some patience and waiting time, but I feel like it was worth it.

That’s it.  I’m happy with the way they look.  It’s always fun to make something.  I’ve had the materials to do this for some time.  I didn’t feel like painting figures this week, so this was needed and enjoyable diversion.  It did require some patience, which is so unlike me, but it’s one less thing to do later at then end of this project.

Fix Bayonets: The Day of the Horsemen


Franco-Prussian 1

A view from Maison Smyth in Dean Motoyama’s Franco-Prussian War game adapting over the Bolt Action rules. The miniatures and the terrain was spectacular.

Yesterday was our annual Fix Bayonets game day.  Like the trip to Chehalis, it is a fun little gathering, now in its seventh year.  Lawrence Bateman, Damond Crump and Bruce Smith take responsibility for hosting the game day at historic Fort Steilacoom, and the ten dollar entry goes toward buying new stuff for the fort.

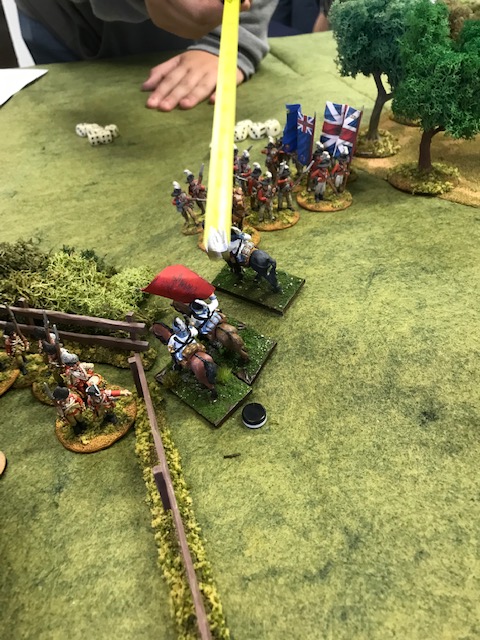
Fix Bayonets offers two game periods and I participated in both of those.  In the Morning David Sullivan and I hosted a Rebels and Patriots game.  David chose a scenario out of the rule book and created “Barlowe’s Necessary.”  The British and American forces were created out of roughly equal points for six different players, three per side.  Three of the players in the game were school-age and fairly new to miniature wargaming.  But they were a pleasure to play with and did pretty well.

I was an American player, pretty much in the middle of the table, and paid for that privilege.  David was on the left side, slogging through slow, rough terrain, which also shielded him from a lot of fire.  Chris, my young cohort, was on the right side, and though the British facing him scalded him with hot fire at times, was able to take cover behind a fence line and some woods.

My command, was in the open.  Which means about the same thing as my personal motto: “Shoot me again.” If I had a piece of heraldry, it would feature a green cross, with a red heart in the middle, full of bullet holes.

I actually had some cool units.  My best unit was Lee’s Legion light infantry, and they did some great work, trading shots with several units and making an important charge during a key turn.  My unit of William Washington’s 3rd Continental Dragoons made their debut.  I also had a unit of militia skirmishers.  Finally, by a sheer order of luck I rolled up a unit of raw militia, shooting poorly, that I figured wouldn’t be too useful.  I’m glad I did.

A lot of the British units were lights or grenadiers, with a couple of line units.  That meant that point-wise, there were fewer Brits to fight, but they had  much better staying power than the Americans.  I faced a unit of light infantry skirmishers, a unit of line infantry and a unit of lights firing at my guys.  Tough.

But I also fought with my own damn die rolls which were pretty terrible for the first two- thirds of the game.  I was able to activate okay, but just wasn’t able to hit much.  The worst was when I sent my cavalry crashing into the woods woods to rout out the annoying and destructive fire of the British skirmishers, hit them, but couldn’t inflict a single casualty.  They returned to my lines at half strength, having accomplished nothing.

Things were brightening on my right flank, as Chris inflicted casualties on Mark’s lights.  A bad die roll saw the Brits take to the hills and Mark withdrew his grenadiers to cover a source of victory points. But David was being pressed on the left as troops from the center were being drawn into the the fight around the Barlowe house due to my ineffective performance.  My skirmishers fled the field after taking serious damage from the British skirmishers.  The dragoons cowered behind Lee’s Legion.  The Legion troops soldiered on, firing ineffectively, slowly accumulating casualties, but tough as nails. The green militia, gamely advanced, looking for something to do.

Then, it was like a light bulb was turned on. A round of fire sent a unit of British line running.  A British light infantry unit advanced just a little too far, were charged by the Legion, and even though the Legion lost the combat, they didn’t break.  The militia advanced and successfully fired at the British skirmishers. Dragoons, advancing behind the Legion charge were perfectly positioned to deal some death.

Washington's Dragoons Charge

The British line infantry to the right prepare to dispatch Col. William Washington’s dragoons after their successful charge eliminated a key British light infantry unit. Only Washington would survive.

In the following turn, the last of the game, the dragoons charged the light infantry, surprising the startled Brits, inflicting enough casualties for them to break, both sides taking losses.  However, the redcoats retreated just far enough to be contacted again by the pursuing Continentals.  The lights disintegrated, and the cavalry dispersed.  In the end, only Washington rode back to the American lines.

David held the Barlowe house, the Legion lights earned two honor points, and the British forces were all damaged enough to win the Americans a convincing victory. The Continental dragoons rocked.

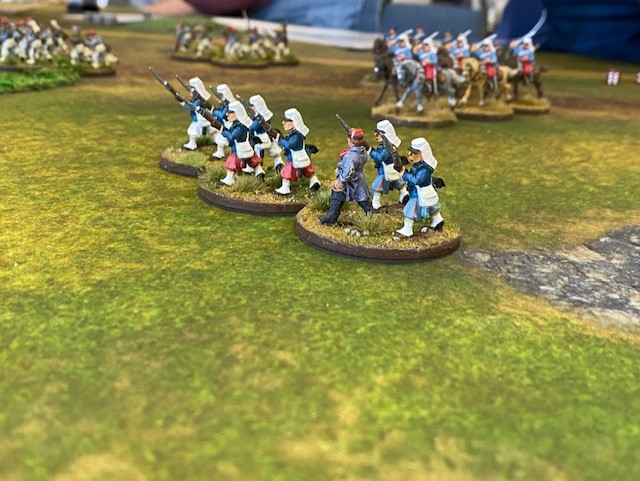
In the afternoon, I played in Dean Motoyama’s Franco-Prussian War game using Bolt Action as a rule mechanism.  I found it easy to play and the WWII rules set worked pretty well for the 19th century conflict.

Dean devised a six-turn game in which both of the evenly matched sides could easily control two of four ruined buildings on the table. The side that could control one of the other side’s building would win.  The Germans had an artillery piece, while the French advantage lay with their Chassepot rifles, out-ranging their foe’s Dreyse needle-guns.

Mark Serafin and I ran the French.  We committed half our force against the building directly to our front, while holding off units to our flank.  To my right, I occupied one of our buildings with one unit, supported by a unit of mounted chasseurs.  Mark took the building on the right side supported by a unit of Algerian Tirailleurs.

With the clock ticking, we immediately pinned the unit in the house to our front, without doing a lot of damage.  Meanwhile three units of Prussians crossed the stream protecting my fortified flank.  What to do?

The chasseurs were a deterrent to do too much too quickly, and I eventually drew two units to support my building.  Fire into a wood full of Prussians neutralized one unit.  Twice, the Prussians advanced to fire on the chasseurs, but using Dean’s emergency escape rules allowed them to retreat to safety.

Jim Sagen, commanding the Prussians threatening my command, decided to assault on my position on turn four.  He advanced his artillery to get within close range. He chased my chasseurs away for the last time.  Things looked bad.  In his bloody assault, Jim destroyed my defending unit, but in the process, lost all but one of his figures. My cavalry crept ever closer to one of his supporting units.  It was now turn five.

I counter-attacked an unblemished unit of Zouaves into my building, tossing out the lone surviving Prussian.  When the time was right, I launched my horse into the supporting Prussian unit.  With no pre-measuring, I wasn’t quite sure whether they were within the chasseurs’ 18 inch charge range.  Made it by a quarter of an inch.  I managed to kill five of the eight Prussians before they could fight back, and that was their end.

Franco Prussian 2

The chasseurs rule the my end of the table in Dean Motoyama’s Franco-Prussian War game.

In the final turn it was pretty clear the building was secure, but there was one more Prussian unit ripe for the taking. The damaged unit in the woods fell victim to the chasseurs.  With that, the game was over and it remained tied, as it began.

Dean’s experiment with the rules was successful for a first test.  I think there is still some fiddling to be done with the assault rules, but the firing and casualties seemed to work quite nicely.  I had a lot of fun with his beautifully painted miniatures.

So two awesome games in which cavalry played a major role in both.  That doesn’t always happen.


I Got Stuff Done!

Late Sunday night I was still struggling to get some stuff finished for the week, despite putting in a fair amount of painting time for the week. But, it finally happened.

Let’s be clear, I do have some busy distractions right now.  In early October Lorri and I are going on vacation to Hawaii.  We’re excited.  We’ve never been there before, so it’s a big hoo-hah deal.

While we’re gone we are doing a major remodel at Chez Smyth. The remodel will require moving all the furniture out of the living room and dining room.  We’re renting a POD to store furniture, but I have about 700 books and 300 records that will have to be packed so bookcases and record storage can be moved.

It’s a job.  The benefit is that I’ve been able to weed out some of my books, which will create better storage for other books I’d like to move to more desirable places and creating a bit more storage for other things.  Like miniatures.

But, I have gotten some painting done.

Washington 2

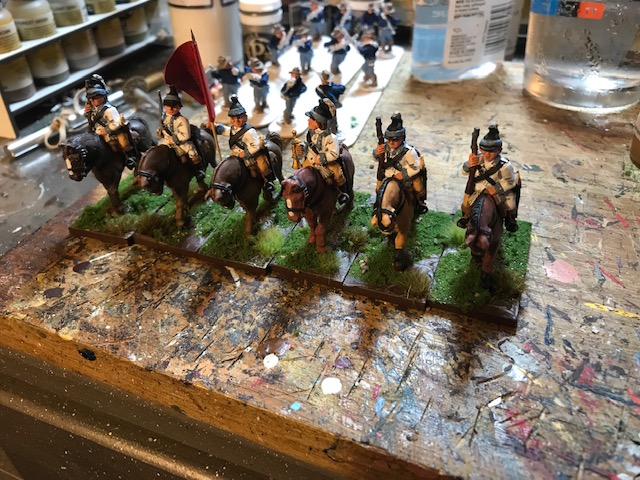
Washinton’s 3rd Continental Light Dragoons is one of my very favorite units from the War of Independence.

I completed my first mounted unit for Rebels and Patriots.  I’ve long loved William Washington’s 3rd Continental Dragoons.  They fight everywhere throughout the Southern Campaign.  Washington, a cousin of that George guy, was a terrific leader.  Even though his unit totaled less than a hundred men, they always seemed to be in the right place.  At Cowpens and Guilford Courthouse, key counterattacks really turned the tide of those battles. Unfortunately, Washington’s luck ran out at Eutaw Springs when he led his cavalry into wooded ditch defended by British regulars.  He was unhorsed and captured.

My figures are from Front Rank.  I’ve had them for a while, and I’d like to start painting a lot of these stray figures.  As will al Front Rank figures they are pleasingly chunky.  If I have a quibble, it is that the troopers all have their carbines out, which I think is dumb. The British light dragoons don’t have their firearms out.  They have swords, like any proper light dragoon. When Washington wounded Tarleton at Cowpens, trust me, he wasn’t slinging a musket stock.

I love the white coatee with blue facings.  It is white, with Vallejo Light Blue Grey.  I gave the officer white pants, the others have Vallejo Desert Yellow.  I could have opted to do the coat in Vallejo Grey-White and done a bit more with highlighting, but I didn’t. I did highlight the horses, which left them a little lighter and redder than I would have liked. I also highlighted the horse furniture and I’m really happy with how that turned out.

Washington 3

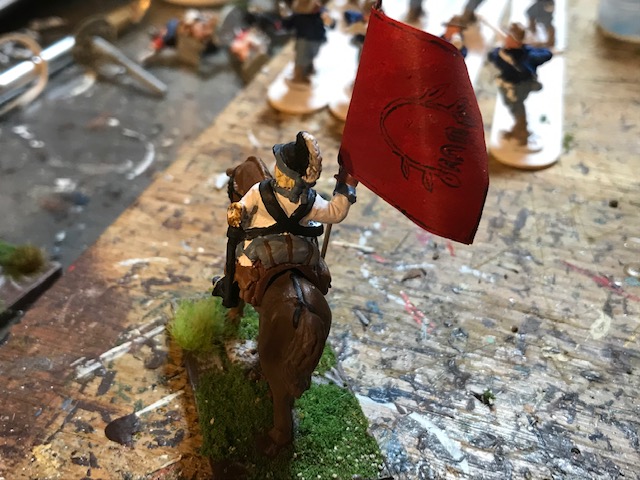
The Eutaw standard, which really isn’t much of one. But it was fun to paint.

The standard, called The Eutaw Flag was the one carried by the 3rd Continental Light Dragoons.  It was made from the tablecloth of Washington’s fiancee. I hand-painted that baby, yessirree. Not a major strain, I assure you.

From here, I’ll pick up the continuing saga of the HMS Orwell.  You’ll recall it is a plastic kit I was struggling a bit with.

Orwell 2

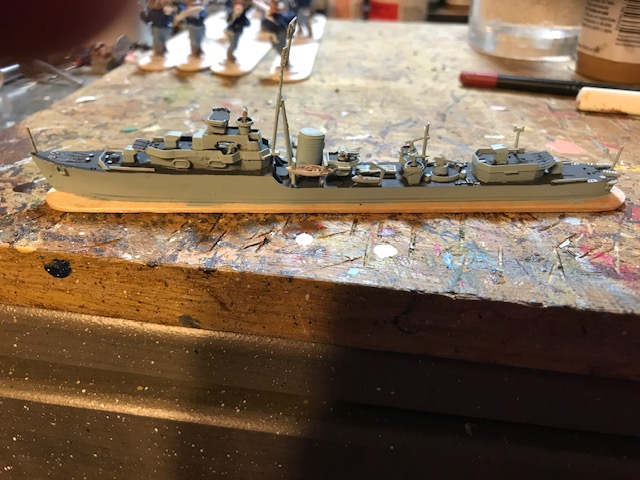
Orwell in Light Sea Grey before the camouflage is painted on.

After spraying it with Humbrol light grey, I took on the real paint job.  Think of the spray as a primer coat.

Orwell 3

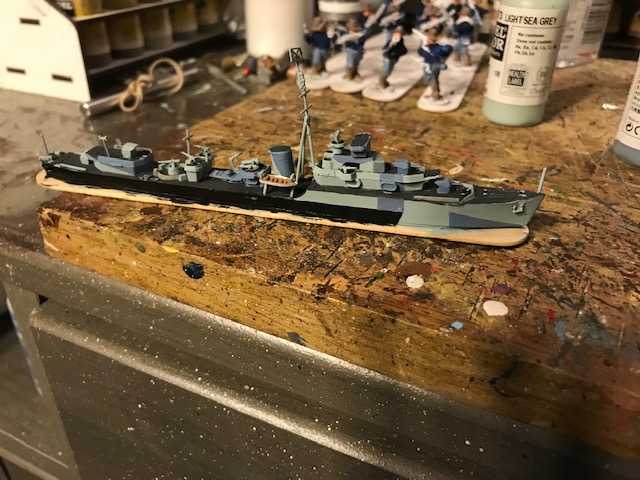
Orwell after camouflage. All that is left are a few decals, and then glue the model to its clear acrylic base.

First I painted all the decking with Ceramcoat Charcoal Gray.  Then I went back and painted the hull and all the non-deck places Vallejo light sea grey.  The camouflage, taken from an illustration of another O class destroyer, the Obedient was applied in Vallejo Black, and Vallejo Light Blue Grey.  Yes, it was all done by hand, and no I didn’t use any kind of mask because I’m basically a lazy sluggard.

All that’s left to do is the decals and there aren’t many of those.

From here, it’s on to finish up some U.S. Volunteers in the Philippines, and I’ll begin assembling my remaining transports for the Museum of Flight convoy game.

Hunting Buffalo at the Veterans Museum

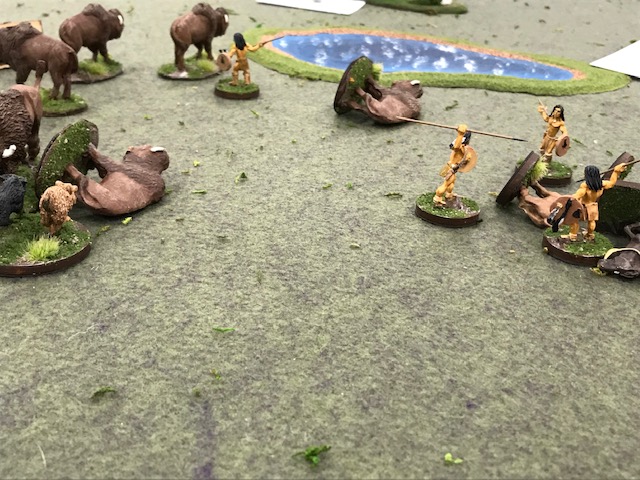
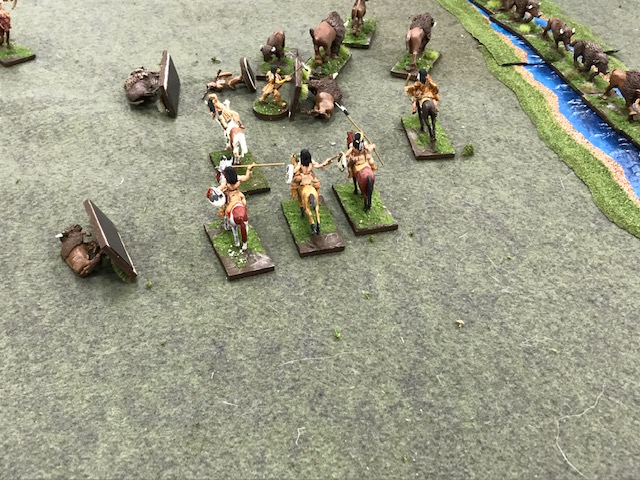
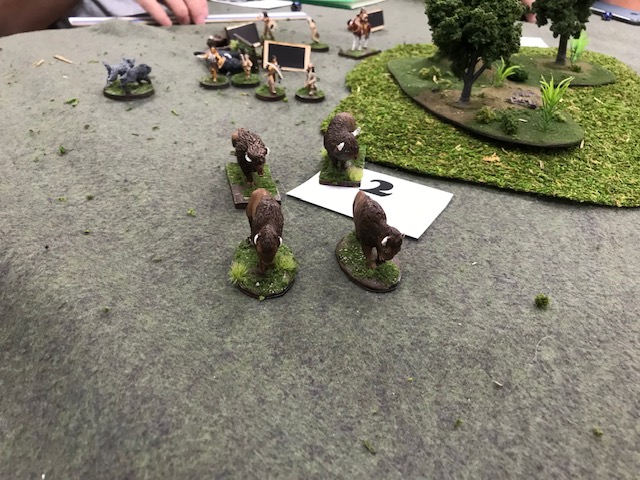
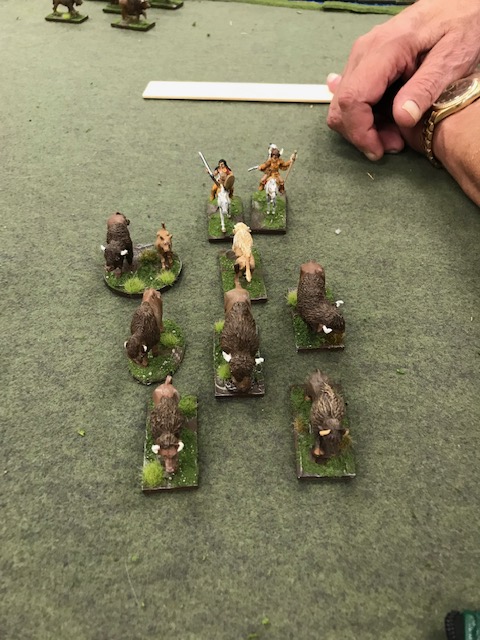
Today was the day I unveiled The Buffalo Hunt.  It was an NHMGS Game Day at the Veterans Museum in Chehalis.  What a great venue. Just south of town, and not far off the highway, it is a terrific museum.  It’s full of small arms and uniforms from American services of the twentieth century.  Most of the exhibits did a great job of tying display pieces to local stories.  Worth your time for sure.

I drove down with David Sullivan and Dave Schueler.  They popped in to Chez Smyth at 9:00.  They endured three barking Australian Shepherds and after downing a cup of coffee we headed south.  We made it to the museum before 10:30.  The Dave’s slipped into a game of What A Tanker while I hung out and kibbitzed.  It was great to see everyone, as always.  We dashed out to lunch, and returned around 1:00 and quickly set up the game.

I always have trepidation running games by myself, but especially a game that’s really never been run before.  While the game owes a lot of inspiration to Matthew Hartley’s Tusk, there is a whole lot of me in this game.  While Tusk has a few mammoths in the game, my game had six obstinacies of seven buffalo each. Each player had four to seven figures in clans, each somewhat different from each other, so the scale of the game is simply larger, and a little more complex.

Buffalo Hunt 1

Neil’s hunting party killed plenty of buffalo, but suffered some figure losses as well.

Al Rivers, Neil Marker, Michael Koznarsky, Dave Schueler, David Sullivan and Dale Mickel all took part in the maiden voyage.  The game, overall, went pretty smoothly.  But we ran into an early snag as I ran out of figure types right away.  In the future, players will simply choose and arm the figures as they wish, and simply pay the appropriate point cost.

Buffalo Hunt 2

The buffalo were spread across the table.  The players rolled for their entry, and set out to kill their buffalo.  Unfortunately the buffalo had other ideas.  In the first turn, as we had two dead buffalo and two dead hunters; it was clear the players weren’t going to have a walk in the park.  Arrows were missing, hunter die rolls were failing, and there were twice as many hunters dead as buffalo.

Buffalo Hunt 3

This group of buffalo is fleeing to the board edge, pursued by Al’s group of foot bowmen as well as a pack of wolves.

By the end of the game, nearly all the players had multiple losses.  Only Al’s party came through unscathed.  While the victory conditions called for killing buffalo, players were also punished for losing party members, and there were plenty of those.

Buffalo Hunt 4

Michael’s party is in pursuit of the white buffalo. Unfortunately, the white buffalo is having none of it.

I think we got in about 13 turns in two and half hours.  We never ran into a major snag in the rules, though I did file away some ideas for the future. In a quick debrief, everybody seemed to have a good time. There were also some great ideas that came out of the discussion.  I can honestly say I’ve never had so much fun running a game.

Huntin’ Buffalo

Clan markings for each of the Comanche hunting parties.  They’ll each have different characteristics for the game.

On Saturday I’ll head down to the first annual Veterans Memorial Museum Day in Chehalis a couple of hours from home.  I’ll be running my first game of The Buffalo Hunt.

I wrote about this project in July.  I thought it would be a simple project with a few buffalo, use my existing Comanches, play a fast and loose set of rules.  Easy cheesy.

Nothing is ever easy cheesy.

I ended up painting six little groupings of buffalo totaling 42 miniatures in all. I also painted some 14 predators, including eight wolves and six bears.

Six obstinacies of Buffalo as they will appear in Saturday’s game.  No, not quite like they’ll appear.  They’ll be spread around the table and there will be terrain.  But you get the idea.

I lost my patience with Wargames Foundry in Great Britain as I waited impatiently eight weeks for my order. E-mails and TMP posts a-go-go.

I re-wrote a fun and easy set of rules and made them a little less easy.  I’m hoping they’re still fun.

Incredible, if ridiculously late bears by Foundry.  Wolves are mixture of figures from Foundry and Alternative Armies.

I painted another twelve Comanche figures, certain I didn’t have enough.  I remounted another 14 or so from bases that seemed like nothing could be removed from them.

Despite the lack of easy cheesy, I’m quite pleased that a scant two months after ordering the first batch of figures, the project is pretty much done. There will be no more Indians, predators or buffalo. Just tweaking of the rules.

Now I can get back to the Philippines, a few AWI figures, and start working on planes for Vietnam.

I’ll letcha know how Saturday went.

You die, he dies, everybody dies: the America Rampant playtest

As promised, today Dave Schueler and I dropped in at Meeples to try out the America Rampant adaptation of The Men Who Would Be King. I knew we’d be playing on a pretty small table, probably 5′ X 3′.  So I couldn’t have too many units out there. Thursday and Friday I took every minute I could to remount enough figures to play the game.

I settled on a simple scenario idea, the search for cannon captured and hidden by the Miamis at the Battle of the Wabash in 1791.  It was a good idea, but the scenario played poorly in execution. But it did give us a good look at my basic ideas and I’ve got to say they were two thumbs up.

TMWWBK plays like a super cleaned up version of Lion Rampant, and why anyone wouldn’t create house rules to adopt those changes is beyond me. Free actions.  An activation failure just means move on to the next unit. It all made for a good flowing game.

America Rampant changes the game from a rifle dominated game to one in which melee in close terrain is more likely.  In our little game, casualties through muskets and close combat played a part in the game.

i hoped to learn two things from our little playtest:

  1. Did my remount make sense from a game context?
  2.  Did the rules adaptation work from a mechanical and historical standpoint?

The Remount

The remount was not easy. Lots of steps.

  1. Figures were pried from their bases.
  2. Glued to their new bases.
  3. Modeling paste applied to bases
  4. Bases painted with Burnt Umber
  5. Bases dry brushed with Trail Tan
  6. Apply Woodland Scenics turf
  7. Glue in clump foliage
  8. Final touch up and Dullcote

It was time-consuming, and it took every spare minute I could summon Thursday, Friday and even a half-hour this morning to finish seven Indian and five American units. I don’t have any more painted natives, but I have tons of American militia and regular units, and a lot of Spanish.  I’ll need to acquire more bases to finish them all, but it’s on the docket to finish all of them this summer.

That said, it seems completely worth it. They don’t rattle around in their cases.  It took much less time to set up a game.  Movement was easy.  Pick up went really fast.  All the objectives were achieved.  They look pretty good too. The remount was a success.

The Rules Adaptation

I chose to take the Americans and Dave took the indians.

Dave had:

  • Two tribal infantry without modifiers
  • Two tribal infantry with veteran +1 to discipline
  • two tribal infantry with veteran +1 to discipline, and fierce.

I had

  • One veteran regular infantry, +1 to discipline
  • Two plain ol’ veteran infantry
  • One unit of irregular infantry, militia
  • One unit of veteran militia, +1 to discipline, armed with rifles.  This was a rule change allowing greater range (18″ vs 12″ for smoothbore muskets,) but allowing only half the figures to fire each turn due to slower loading and shooting.

The two sides were divided by a fordable stream, and Dave set up his units in covering terrain.  Another change to the rules is the Indians have only an 8″ shooting range and always fire at long range (this requires all hits to be halved.) Deciding he was too far away and unlikely to coax me into crossing the stream, Dave launched all six of his units at me.

Because shooting is a free move for regular and irregular infantry, it didn’t make much sense to do a lot of moving around.  The first turn of fire was made at long and short range, depending on the unit. My troops did little damage, and successful pin rolls were made all around.

In the second turn, as some units moved close enough to consider attacking at the double-quick, the Indian units mostly failed their activations. But one of the fierce units did not, and hit a regular infantry units.  Dave rolled 24 dice and hit on eight of them.  I rolled ten dice and hit on two.  Bad news. The unit failed its pin roll. I was not shocked.

But my second turn of fire went much better. All my remaining units hit at a greater than 50% rate, and pinned their targets, rendering them unable to move in turn three.

But our fierce friend struck another unit, inflicting another eight casualties against only three losses. Two of the five units in my command were now shattered, and by a single unit. My center was simply remnants, my left was holding and gradually reducing their attackers, and my veteran rifle unit was isolated, pouring fire at two potential attackers, but firing at half strength was not going to cut it forever.

In turn four, the fierce unit dispatched one of its badly wounded prey, while the two left flank units ended the resistance by their opponents. Three Indian units were eliminated.  But on the right flank, one of the units was across the stream, and the other was finally moving into the stream.  Trouble was coming.

In turn five, the fierce unit was fired on as it advanced toward the last remaining regular unit, and reduced to five figures. One of the Indian units in the right flank attack struck the collection of figures assigned to finding the hidden cannon, driving them back, but suffering loss. More losses came with fire from the rifle unit, and they were pinned. But the fresh unit on the far right was lining up the rifles for destruction.

Turn six was the final turn. The fierce unit attacked the American regulars and were finally worn down to nubs.  But the unit on the right hit the rifles and killed half of them at minimal loss. They were driven back and pinned, but failed their pin recovery.  The two American left flank units advanced toward the carnage in the center as the game end. By the end of the game, far more stands were removed than were still in the game.

Our verdict was the game played as intended.  The rules were simple.  Lots of bases were removed.  No real snags in the flow of play.  We didn’t use the officer characteristics rules. One other rule change, was the addition of a leader to each command.  The leader could give a +1 to activation or pin rolls to one unit per turn. This played a minor role int he game.

I’m pronouncing these a success, but I want to play them again soon.

Cortes is ready

After taking time away to begin work on the Aztecs, I decided to polish off the rest of the Spanish I’ve purchased for Quetzacoatl Rampant. It’s been two weeks since our playtest of the game at Meeples and I spent last weekend working on my mounted Spaniards. This week, aided and abetted by our strange day off on Tuesday.  I finished painting on Wednesday, took care of all the washing and basing on Friday, and tried my hand at workable flags Saturday while listening to the Huskies devastate the hated Ducks in Quackland.

All my Spanish are done. There are nine units, each of six figures. In our rules they are nasty, but their small size makes them quite brittle.

I have one mounted unit. The Spanish had a handful of mounted men-not your basic Gendarme from the Italian battlefield, but the horses were fear inspiring, and the riders were motivated, very tough on the Aztecs whose largest domestic animals were small dogs raised for food.

I also have four units of missile troops, two each of arquebusiers and crossbowmen. Both weapons did terrible damage to the native Mexicans who were unarmored or wore cloth padded armor.  But these weapons also had limitations.  They were very slow firing, especially in comparison to the Aztec dart throwers, slingers and archers who could literally rain missiles down on the small Spanish forces. The gunpowder weapons, though fearsome and deadly, like all black powder weapons, were great on their first fire, but prone to misfires as their users reloaded with loose powder and shot.

Finally, the core of all conquering Spanish armies were the swordsmen. Armed with Toledo steel versus cloth armor, light wooden shields and wooden club-like Aztecs, the swordsmen were the most effective of Cortes’ troops. I have four units of Spanish swordsmen, and I my add two more.

All figures are from Eureka, ordered from Eureka USA in Massachusetts.  They are great figures and I very much enjoyed painting them.  They are nicely shaped, and detailed enough, without being difficult to paint.

I’ll be moving on to my last two units of Aztecs, in the hope that I’ll have both twelve figure units finished by Sunday, a week from today. That will leave only the 36 Tlaxcallan warriors to complete.  My goal is for everything to be completed before Thanksgiving so I can turn my attention to terrain for this project and move on to other things. That is about a 250 figure turnaround since I began working on this project in April.  I’m pretty happy with all of it.