Making Rice Paddies

One of the important aspects of this hobby I feel less skilled for is building stuff.  I’m always amazed when my friends are able to create.  One of the best parts of working with Mark Waddington was the man could build ANYTHING.  Well that, and he’s just one of my favorite people.  Those who can imagine and build buildings, a town, a waterfront, my hats are off to you.

Me, I usually just buy stuff, so my boards are boring and sterile.  But the for the Philippines, I simply have to have terrain bits and lots of it.  I’ve built my bamboo forests, there will have to be jungle terrain.  And one other important feature of all Southeast Asian campaigns whether it’s the Philippines, Indochina/Vietnam, Malaysia or Burma is the rice paddy.  If people live near your battlefield, rice paddies are a must.

There are lots of different approaches to take.  This is a link to the paddy project on the Tactical Painter blog.  His approach looks great, but I have different plans.

One important difference is I want to make rice paddies for 28mm.  I also chose some different materials.  That doesn’t mean my way is better, it’s just my way.
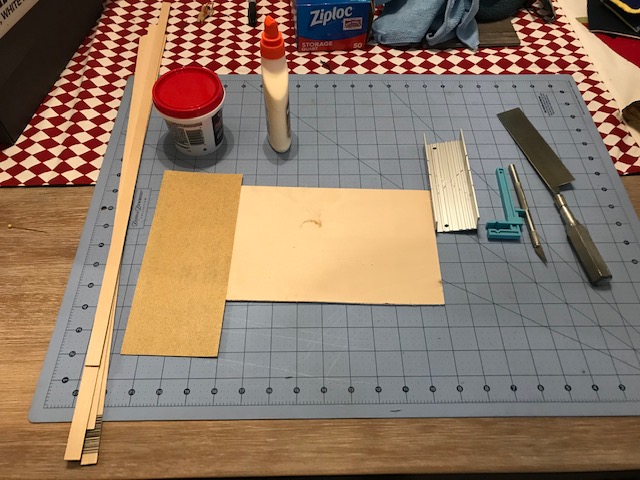
Paddies 1

These are all the materials and tools I used to to cobble together the four paddies after cutting the 12″ squares in half with my jigsaw.

I started with craft plywood for the bases.  I buy it from Michael’s, and it’s easy to get.  It’s 1/8″ thick, so thin enough to work with.  It comes 12″ square and I divided those in half, two sheets to make four 6″ X 12″ rice paddies. I built an elevated border around each paddy to represent the path that most grunts had to walk along in Vietnam, and figured they were probably the same in the Philippines. I used basswood strips.  I like basswood better than balsa because it’s sturdier and less porous.
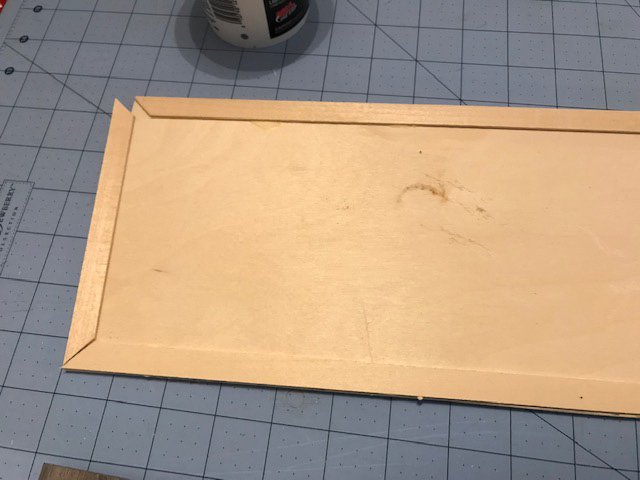
Paddies 2

My carpentry skills are about as bad as they come, but I decided to miter the edges of the basswood sticks that form the edge of the fields. Made some mistakes, but it worked out in the end.

I actually invested in some stuff for this project.  I bought a new razor saw for my X-Acto gear, as well as a miter box.  I actually cut the 45 degree angles because . . . well just because.  Made a few mistakes along the way, but it all seemed to eventually work.  I glued everything down with Elmers wood glue and let it sit for a good long time.
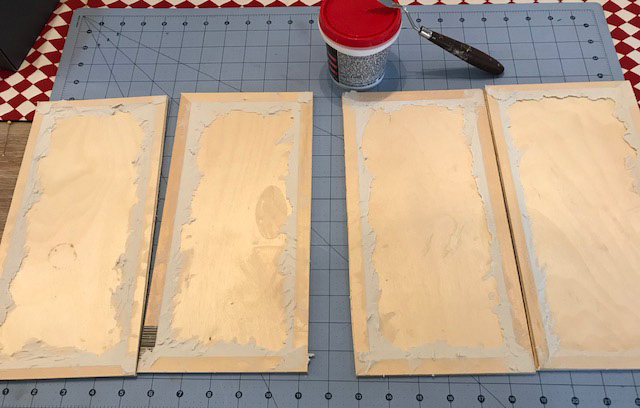
Paddies 3

I used lightweight spackling compound to form the slopes and fill the joints on the paddy fields. I left it to dry overnight before sanding.

The next step is to fill gaps between the basswood and create a slope down to the growing area.  I couldn’t quite decide what to use.  I considered using modeling paste that I use for my bases.  It dries fast, and because it is acrylic, dries hard.  I decided to use lightweight spackling compound instead.  It is a little harder to work with, but easy to sand.  I didn’t worry about keeping straight lines along the edges from top to bottom.  Those slopes wouldn’t be perfect.

I finished applying spackle and let it dry overnight and into the following afternoon. The next step was sanding most of the rough edges. I started with fine sandpaper, and moved to my Dremel tool’s sanding discs.  It went faster and achieved my purpose.  It also allowed me to even up the outer edges of wood which I didn’t manage to get entirely straight with my jigsaw. After each paddy was sanded, they were sprayed with Testor’s Flat Olive green as a base coat.  They were left to dry overnight.
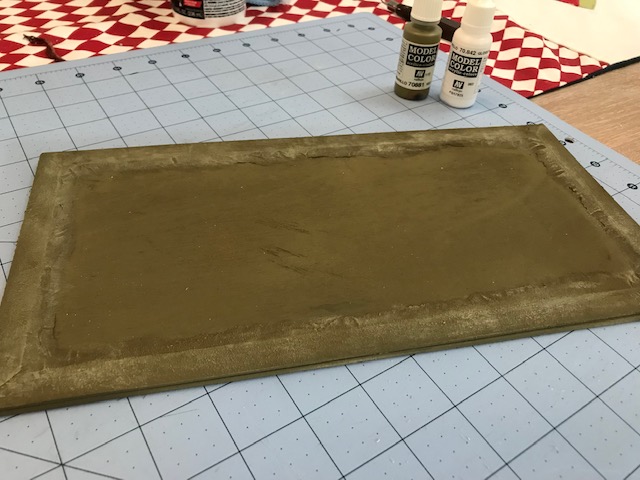
Paddies 4

I sprayed each field with Testor’s Olive Drab. It’s what I had and it’s a good base color. After that I mixed Vallejo Yellow-Green and White to create a contrasting color for dry brushing the edges. Then I created an even lighter version for further contrasts.

The next step was dry-brushing the the paddies.  I wanted to lighten the slopes and tops while darkening the paddies themselves a bit.  To lighten I dry brushed using Vallejo Yellow-Green, lightened with some Vallejo White. I used a large flat brush.  I did two coats, the second lightened even further.  A final round of dry brushing used a little bit of Vallejo Burnt Umber to darken up the middle of the paddy where the rice would be planted.  It was fine for it to be splotchy.  I just wanted it to darken up a little bit and provide a good contrast with lightened edges.
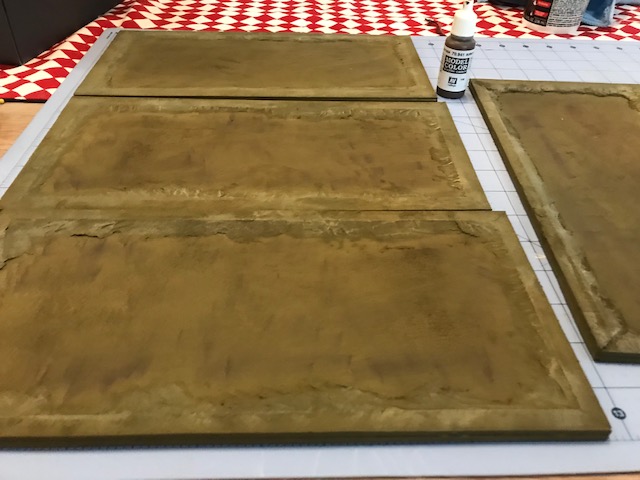
Paddies 6

A final step in the dry-brushing was to use Vallejo Burnt Umber in the middle of the fields. I was just looking for a splotchy, irregular darkening that would show through the gloss gel I’d use over the top.

I followed that up by adding some turf and tufts by Army Painter.  I put the groundcover in random areas, to allow the dry brushing to show through.  After each paddy was completed.  I sprayed each with dullcoat twice.  I wanted to be sure to keep everything in its place.
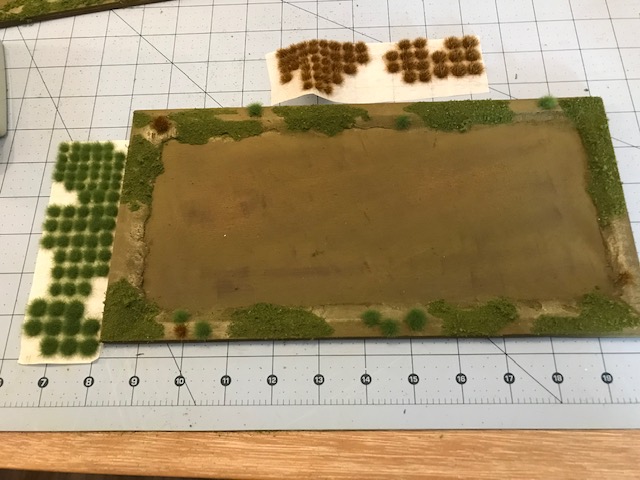
Paddies 7

I flocked the edges irregularly and applied tufts. I tried to let the dry brushing show through where possible. I wanted an irregular, natural look. Then I added some tufts. I sprayed each paddy with Dullcote twice, to keep things in place. Note: It’s critical to do this before applying the clear gel medium or it will flatten your shiny surface.

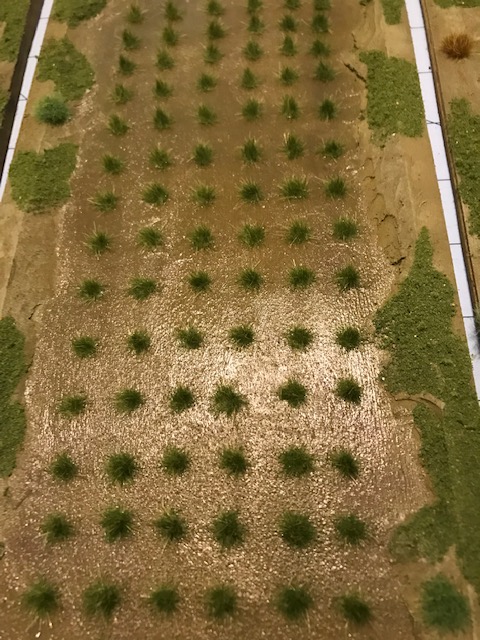
Because the paddies are wet, I needed to show the shining surface of the flooded field. There are so many great products available now, from simple clear varnishes to liquid epoxies.  I took a middling approach and brushed all with Liquitex Super Heavy Clear Gloss Gel Medium. Again, I applied it with a large flat brush.  It took about half and hour to paint it on all four paddies.  Then I listened to Steely Dan’s excellent Aja from 1978, and applied a second coat.
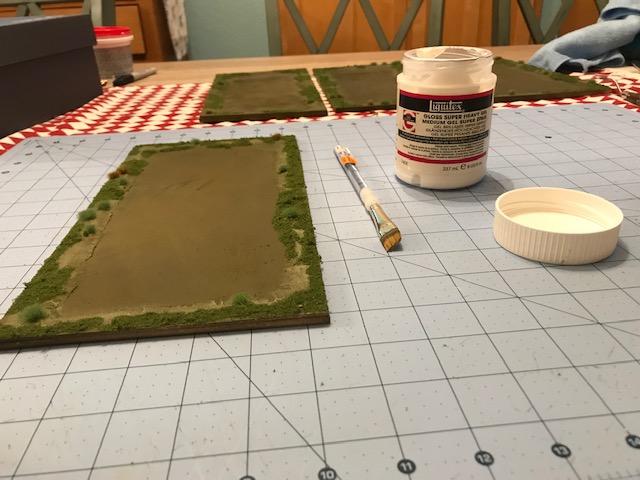
Paddies 12

I used Liquitex Gloss Gel Medium applied with a wide flat brush to create the water effects. I did one coat, making sure to get in the crannies of the slope I’d created, then did a second coat of just straight strokes covering the swirls I’d made the first time.
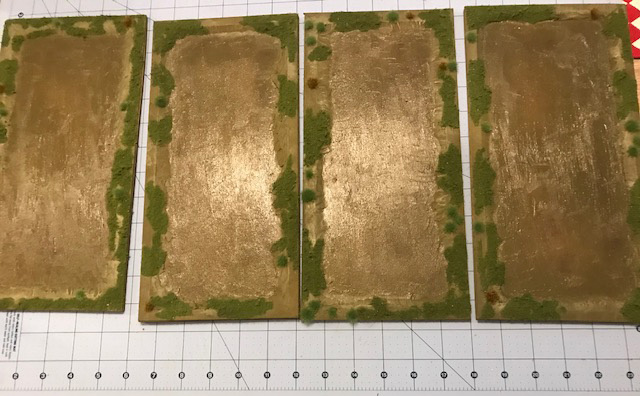
Paddies 8

Voila!! We’re ready for the terminal stage.
Paddies 13

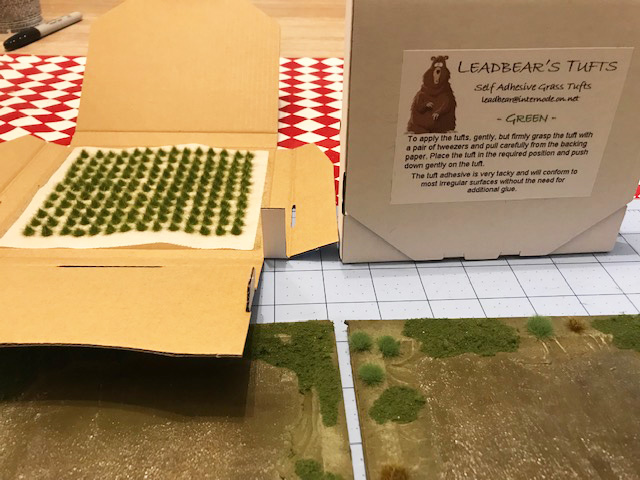
Leadbear’s excellent tufts. 140 of the small tufts per box cost about seven bucks US. They are the best of the tufts I’ve worked with.

To represent the growing rice, I decided to use tufts.  I didn’t want the tufts to be too tall, for fear putting figures on them would just smush them.  I also wanted something easy.  Tufts are a lot easier than attempting to clump together static grass in a pool of clear Elmer’s so tufts were certainly an answer. I’d seen a blurb on Facebook from a friend that he’d recently purchased tufts from Leadbear.  Another friend showed me his considerable collection of Leadbear tufts, and I was impressed.  It happens that Leadbear also has a Facebook page, so I decided to give him a try. Leadbear is Barry from Australia.  He’s a great guy.  His range of products is considerable.  Prices are inexpensive and the shipping isn’t bad.  I’d received my order in August, but hadn’t used them yet-because I always use up what I already have.

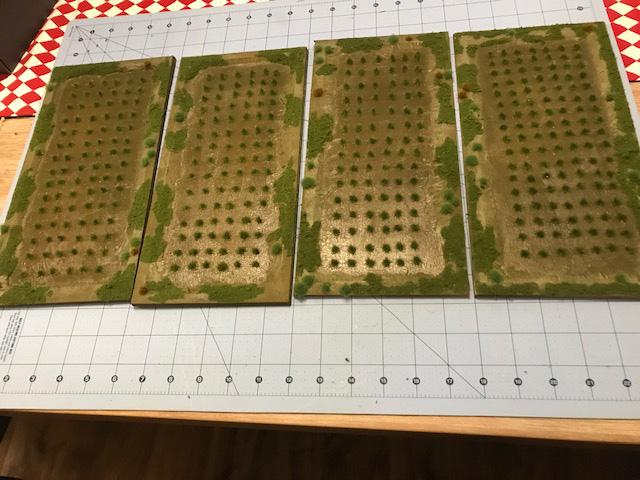
I used the 4mm green tufts I’d ordered.  I thought I would keep them in tidy rows.  Great idea.  The tufts themselves were great.  They were irregular in ways those by others I’ve tried aren’t.  They are super sticky in the ways that others aren’t, so no glue.  I hope I don’t regret it later. Of course, because I’m old and half blind, my straight lines and tidy rows wander a bit, as I expect they might in real life.  I used up some two and a half boxes of the three I purchased for the four sets of fields.
Paddies 10

Paddies 11

Done. I think I worked on these over three days. It did require some patience and waiting time, but I feel like it was worth it.

That’s it.  I’m happy with the way they look.  It’s always fun to make something.  I’ve had the materials to do this for some time.  I didn’t feel like painting figures this week, so this was needed and enjoyable diversion.  It did require some patience, which is so unlike me, but it’s one less thing to do later at then end of this project.
The Inaugural Truant’s Session: The Guns of Fort Pickens

One of my post retirement goals has been to create one Friday per month for a game day for we ne’er-do-well retirees as well as those who might have Fridays off.  I posted on our Facebook page and our yahoogroup about doing this and received a fair number of responses.  I was concerned  whether it would actually happen or not, but when I pulled up to Game Matrix, Al Rivers was there to meet me, and all was right with the world.

I decided to run an Ironclads game. It was a game I ran at Enfilade a few years ago.  Probably more ships than I should, but at least I knew the game well.  The hypothetical game was based on a hurricane wiping out Farragut’s fleet outside Mobile Bay, followed by a Confederate attack on Fort Pickens and Pensacola.

I set up the fort on its island in Pensacola Bay.  There is a relatively narrow channel, thinned even further by a dangerous bar.  At either end of the shallows are even narrower ship channels.  The Confederate victory conditions required bombarding the 1830’s era fort with their interesting and mixed forces, hoping to compel a surrender.

For the game, Dean and Al commanded Franklin Buchanan’s Mobile Defense force.  Al ran the three wooden gunboats Morgan, Gaines and Selma, as well as the ironclad ram Tuscaloosa, the weakest of the ironclads available to the Confederates. Dean ran the ironclads Tennessee and Nashville.  Tennessee was the best armed and armored vessel in Buchanan’s fleet.

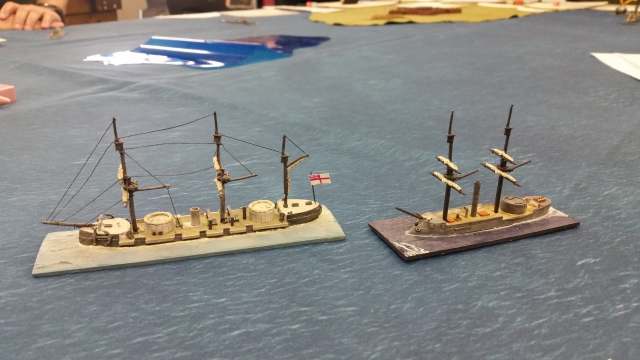
Scott ran two English-built vessels, the Stonewall and North Carolina (aka, HMS Scorpion) commanded by Raphael Semmes.  Both were well armored and had powerful armament.

Pickens 4

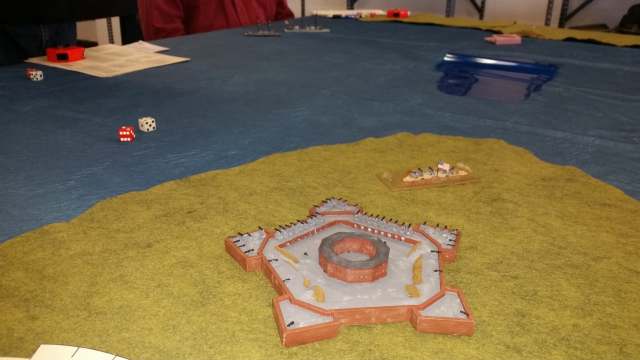
Bay Area Yards excellent Fort Jackson model which stood in for Fort Pickens. Pickens was actually a pentagonal fort, much like Sumter. But I loved having the excuse to play with it. The view across the table shows Scott’s armored frigates. heading away from the fort toward the opposite ship channel

In the Enfilade game the Confederates all gathered at the entry point, closed with the fort and pounded two faces of the fort to pieces, and Pickens surrendered to easily win the game.  I changed things a little bit to even things up.  The earlier game was played on a six foot wide table.  Yesterday we played on a five foot wide table.  That meant the Union relief forces would get into the action that much faster.  I also added two earthworks commanding each of the ship channels to the harbor’s defenses.  Things were about to get tougher for the Johnnies.

Yes, there was Union relief.  For the Enfilade game, there was a complicated series of choices for the Union player to meet about their composition.  I didn’t know who I would have to play and how much they knew about the period, so I chose their forces.  I gave them the Saugus, one of the larger Canonicus class monitors, and the Lehigh, one of the smaller Weehawken class monitors. Ralph ran the Lehigh, and Phil ran the Saugus.

Pickens 7

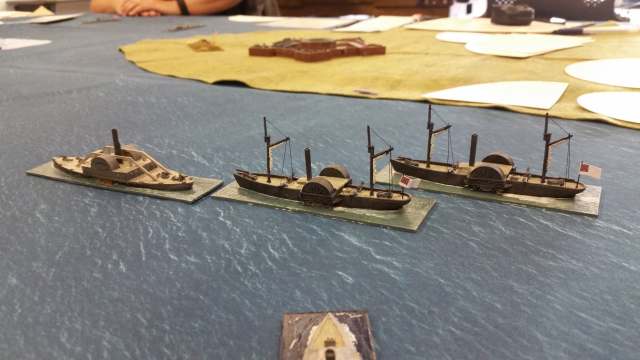
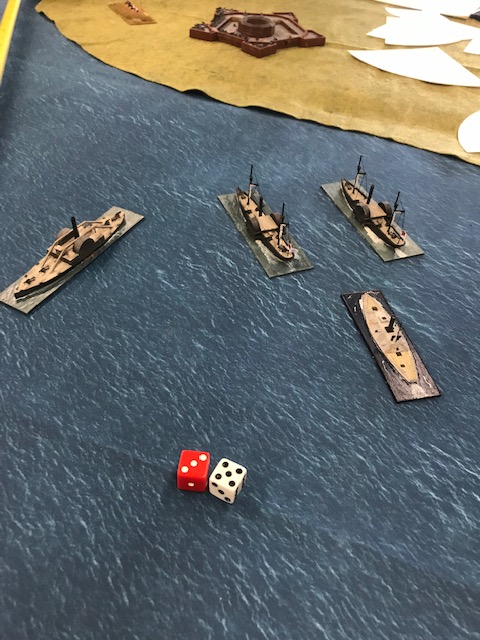
Al’s gunboat flotilla presses toward the fort. The little wooden ships will suffer terribly from fire.

Pickens 8

Dean’s Nashville and Tennessee begin to line up the fort and earthwork for fire. Phil’s Saugus can be seen around the point advancing on the Confederates.

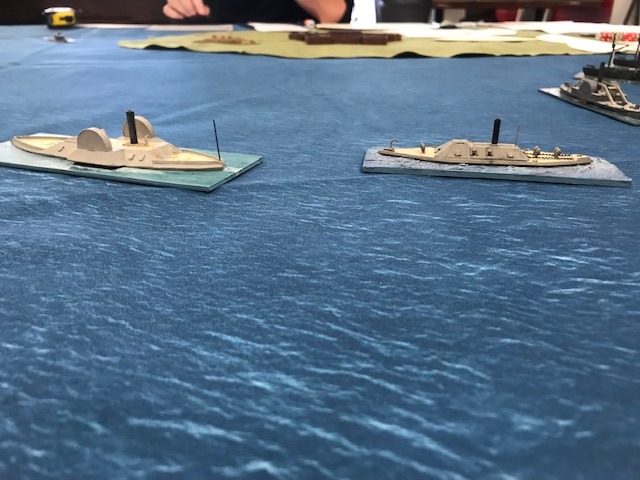
The game began with both sides moving on to the table. Scott drew his two large ironclad frigates off toward the far ship channel and away from Fort Pickens.  This had an important effect on the game, as his ships had the largest guns, effective for fighting the Union ironclads, but also most effective for reducing the fort. Al and Dean cautiously closed with the fort, firing as they went.  Dean’s ironclads suffered minor damage.  But Al’s wooden vessels, though randomly targeted, rapidly took serious penetrating fire from the fort.

Pickens 3

The North Carolina and Stonewall wait for the Lehigh in left background.

Ralph and Phil split their monitors.  Ralph moved to engage Scott’s ironclads.  At long range, it was a fairly even fight.  The Lehigh, unique among her class, had a heavy rifle to go with its 15″ smoothbore. Engaging the North Carolina with its four heavy rifles kept things fairly desultory, but when the ships closed, the Confederate vessel pounded the little Union ironclad to wreckage.  Though Lehigh managed to wound the bigger frigate, the monitor was forced to strike. However, it bought something just as important-time.

Dean and Al continued to pound Pickens.  But Buchanan’s ships were chiefly armed with 6.4 inch and 7 inch Brooke rifles, an admirable weapon, but mostly a medium gun.  To be effective required pretty close quarters.  Al tried that and his wooden vessels paid the price.  The Selma suffered a steam critical.  Then Phil steered the Saugus into the action, Firing his 15″ guns at Al’s wooden ships at close range, the Gaines was ripped apart and sank, and the Morgan was badly damaged.

Pickens 2

The Tuscaloosa follows Selma, Morgan and Gaines as they get their broadsides ready to unleash on Fort Pickens.

Dean’s ironclads remained at medium range, peppering the fort and doing some damage, engaging the Saugus when it entered the battle.  But the Nashville also began to accumulate damage from fire from the fort and the earthwork.

As the clock neared 3:30 I had to shut down the game.  In the final turn the Lehigh was wrecked and the North Carolina suffered a steam hit, and the Stonewall was sailing toward the fort.  All of Al’s gunboat fleet was severely damaged, except the Tuscaloosa which was relatively untouched. Dean’s Nashville was nicked up, and the Tennessee was still blazing away.  Phil’s Saugus had been knocked around, but could still effectively deal 600 lb projectiles every other turn.  Fort Pickens, while pretty beat up, hadn’t suffered the critical damage in crew, gun losses or magazine explosions that would force its surrender. Union wins.

Our next gathering is October 24th at the Game Matrix.  Maybe we’ll see you there.

Pickens 5

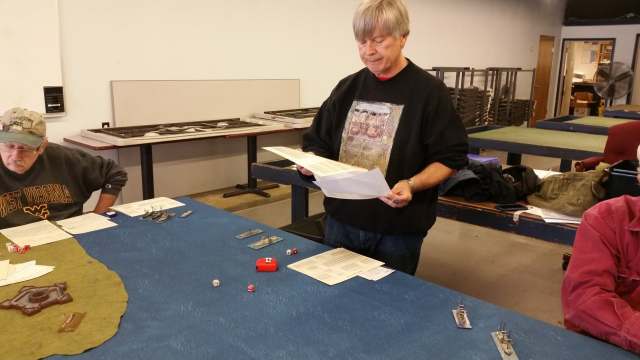
I claim the role as chief truant for this game. Al Rivers studies his charts.


Fix Bayonets: The Day of the Horsemen


Franco-Prussian 1

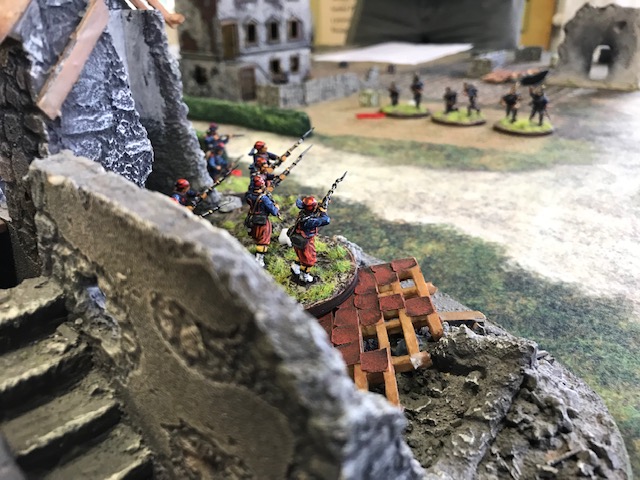
A view from Maison Smyth in Dean Motoyama’s Franco-Prussian War game adapting over the Bolt Action rules. The miniatures and the terrain was spectacular.

Yesterday was our annual Fix Bayonets game day.  Like the trip to Chehalis, it is a fun little gathering, now in its seventh year.  Lawrence Bateman, Damond Crump and Bruce Smith take responsibility for hosting the game day at historic Fort Steilacoom, and the ten dollar entry goes toward buying new stuff for the fort.

Fix Bayonets offers two game periods and I participated in both of those.  In the Morning David Sullivan and I hosted a Rebels and Patriots game.  David chose a scenario out of the rule book and created “Barlowe’s Necessary.”  The British and American forces were created out of roughly equal points for six different players, three per side.  Three of the players in the game were school-age and fairly new to miniature wargaming.  But they were a pleasure to play with and did pretty well.

I was an American player, pretty much in the middle of the table, and paid for that privilege.  David was on the left side, slogging through slow, rough terrain, which also shielded him from a lot of fire.  Chris, my young cohort, was on the right side, and though the British facing him scalded him with hot fire at times, was able to take cover behind a fence line and some woods.

My command, was in the open.  Which means about the same thing as my personal motto: “Shoot me again.” If I had a piece of heraldry, it would feature a green cross, with a red heart in the middle, full of bullet holes.

I actually had some cool units.  My best unit was Lee’s Legion light infantry, and they did some great work, trading shots with several units and making an important charge during a key turn.  My unit of William Washington’s 3rd Continental Dragoons made their debut.  I also had a unit of militia skirmishers.  Finally, by a sheer order of luck I rolled up a unit of raw militia, shooting poorly, that I figured wouldn’t be too useful.  I’m glad I did.

A lot of the British units were lights or grenadiers, with a couple of line units.  That meant that point-wise, there were fewer Brits to fight, but they had  much better staying power than the Americans.  I faced a unit of light infantry skirmishers, a unit of line infantry and a unit of lights firing at my guys.  Tough.

But I also fought with my own damn die rolls which were pretty terrible for the first two- thirds of the game.  I was able to activate okay, but just wasn’t able to hit much.  The worst was when I sent my cavalry crashing into the woods woods to rout out the annoying and destructive fire of the British skirmishers, hit them, but couldn’t inflict a single casualty.  They returned to my lines at half strength, having accomplished nothing.

Things were brightening on my right flank, as Chris inflicted casualties on Mark’s lights.  A bad die roll saw the Brits take to the hills and Mark withdrew his grenadiers to cover a source of victory points. But David was being pressed on the left as troops from the center were being drawn into the the fight around the Barlowe house due to my ineffective performance.  My skirmishers fled the field after taking serious damage from the British skirmishers.  The dragoons cowered behind Lee’s Legion.  The Legion troops soldiered on, firing ineffectively, slowly accumulating casualties, but tough as nails. The green militia, gamely advanced, looking for something to do.

Then, it was like a light bulb was turned on. A round of fire sent a unit of British line running.  A British light infantry unit advanced just a little too far, were charged by the Legion, and even though the Legion lost the combat, they didn’t break.  The militia advanced and successfully fired at the British skirmishers. Dragoons, advancing behind the Legion charge were perfectly positioned to deal some death.

Washington's Dragoons Charge

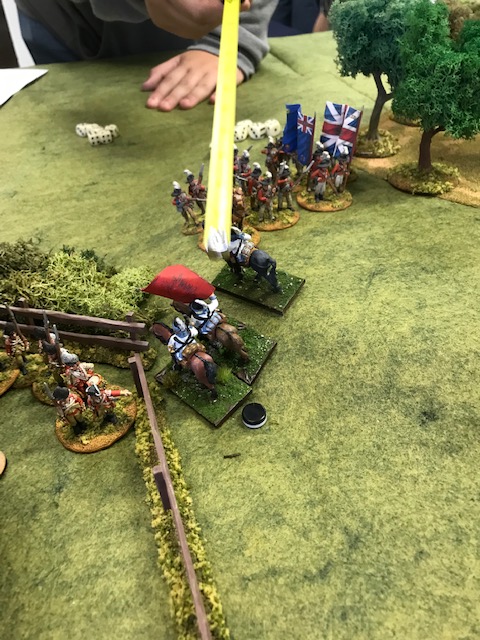
The British line infantry to the right prepare to dispatch Col. William Washington’s dragoons after their successful charge eliminated a key British light infantry unit. Only Washington would survive.

In the following turn, the last of the game, the dragoons charged the light infantry, surprising the startled Brits, inflicting enough casualties for them to break, both sides taking losses.  However, the redcoats retreated just far enough to be contacted again by the pursuing Continentals.  The lights disintegrated, and the cavalry dispersed.  In the end, only Washington rode back to the American lines.

David held the Barlowe house, the Legion lights earned two honor points, and the British forces were all damaged enough to win the Americans a convincing victory. The Continental dragoons rocked.

In the afternoon, I played in Dean Motoyama’s Franco-Prussian War game using Bolt Action as a rule mechanism.  I found it easy to play and the WWII rules set worked pretty well for the 19th century conflict.

Dean devised a six-turn game in which both of the evenly matched sides could easily control two of four ruined buildings on the table. The side that could control one of the other side’s building would win.  The Germans had an artillery piece, while the French advantage lay with their Chassepot rifles, out-ranging their foe’s Dreyse needle-guns.

Mark Serafin and I ran the French.  We committed half our force against the building directly to our front, while holding off units to our flank.  To my right, I occupied one of our buildings with one unit, supported by a unit of mounted chasseurs.  Mark took the building on the right side supported by a unit of Algerian Tirailleurs.

With the clock ticking, we immediately pinned the unit in the house to our front, without doing a lot of damage.  Meanwhile three units of Prussians crossed the stream protecting my fortified flank.  What to do?

The chasseurs were a deterrent to do too much too quickly, and I eventually drew two units to support my building.  Fire into a wood full of Prussians neutralized one unit.  Twice, the Prussians advanced to fire on the chasseurs, but using Dean’s emergency escape rules allowed them to retreat to safety.

Jim Sagen, commanding the Prussians threatening my command, decided to assault on my position on turn four.  He advanced his artillery to get within close range. He chased my chasseurs away for the last time.  Things looked bad.  In his bloody assault, Jim destroyed my defending unit, but in the process, lost all but one of his figures. My cavalry crept ever closer to one of his supporting units.  It was now turn five.

I counter-attacked an unblemished unit of Zouaves into my building, tossing out the lone surviving Prussian.  When the time was right, I launched my horse into the supporting Prussian unit.  With no pre-measuring, I wasn’t quite sure whether they were within the chasseurs’ 18 inch charge range.  Made it by a quarter of an inch.  I managed to kill five of the eight Prussians before they could fight back, and that was their end.

Franco Prussian 2

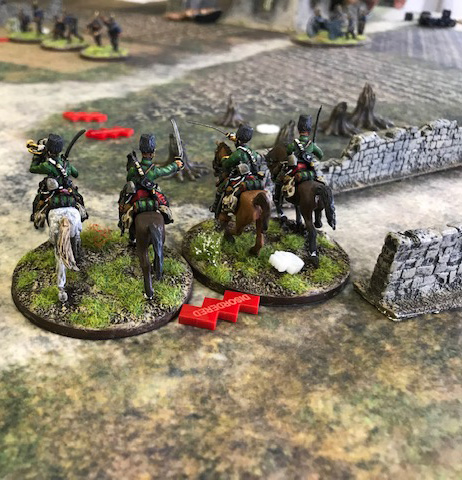
The chasseurs rule the my end of the table in Dean Motoyama’s Franco-Prussian War game.

In the final turn it was pretty clear the building was secure, but there was one more Prussian unit ripe for the taking. The damaged unit in the woods fell victim to the chasseurs.  With that, the game was over and it remained tied, as it began.

Dean’s experiment with the rules was successful for a first test.  I think there is still some fiddling to be done with the assault rules, but the firing and casualties seemed to work quite nicely.  I had a lot of fun with his beautifully painted miniatures.

So two awesome games in which cavalry played a major role in both.  That doesn’t always happen.


I Got Stuff Done!

Late Sunday night I was still struggling to get some stuff finished for the week, despite putting in a fair amount of painting time for the week. But, it finally happened.

Let’s be clear, I do have some busy distractions right now.  In early October Lorri and I are going on vacation to Hawaii.  We’re excited.  We’ve never been there before, so it’s a big hoo-hah deal.

While we’re gone we are doing a major remodel at Chez Smyth. The remodel will require moving all the furniture out of the living room and dining room.  We’re renting a POD to store furniture, but I have about 700 books and 300 records that will have to be packed so bookcases and record storage can be moved.

It’s a job.  The benefit is that I’ve been able to weed out some of my books, which will create better storage for other books I’d like to move to more desirable places and creating a bit more storage for other things.  Like miniatures.

But, I have gotten some painting done.

Washington 2

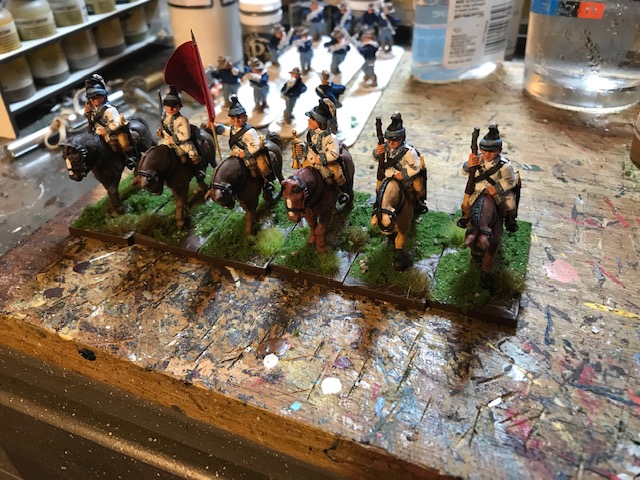
Washinton’s 3rd Continental Light Dragoons is one of my very favorite units from the War of Independence.

I completed my first mounted unit for Rebels and Patriots.  I’ve long loved William Washington’s 3rd Continental Dragoons.  They fight everywhere throughout the Southern Campaign.  Washington, a cousin of that George guy, was a terrific leader.  Even though his unit totaled less than a hundred men, they always seemed to be in the right place.  At Cowpens and Guilford Courthouse, key counterattacks really turned the tide of those battles. Unfortunately, Washington’s luck ran out at Eutaw Springs when he led his cavalry into wooded ditch defended by British regulars.  He was unhorsed and captured.

My figures are from Front Rank.  I’ve had them for a while, and I’d like to start painting a lot of these stray figures.  As will al Front Rank figures they are pleasingly chunky.  If I have a quibble, it is that the troopers all have their carbines out, which I think is dumb. The British light dragoons don’t have their firearms out.  They have swords, like any proper light dragoon. When Washington wounded Tarleton at Cowpens, trust me, he wasn’t slinging a musket stock.

I love the white coatee with blue facings.  It is white, with Vallejo Light Blue Grey.  I gave the officer white pants, the others have Vallejo Desert Yellow.  I could have opted to do the coat in Vallejo Grey-White and done a bit more with highlighting, but I didn’t. I did highlight the horses, which left them a little lighter and redder than I would have liked. I also highlighted the horse furniture and I’m really happy with how that turned out.

Washington 3

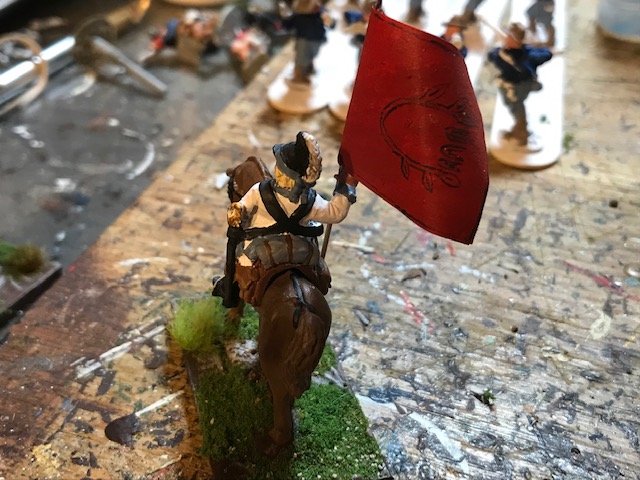
The Eutaw standard, which really isn’t much of one. But it was fun to paint.

The standard, called The Eutaw Flag was the one carried by the 3rd Continental Light Dragoons.  It was made from the tablecloth of Washington’s fiancee. I hand-painted that baby, yessirree. Not a major strain, I assure you.

From here, I’ll pick up the continuing saga of the HMS Orwell.  You’ll recall it is a plastic kit I was struggling a bit with.

Orwell 2

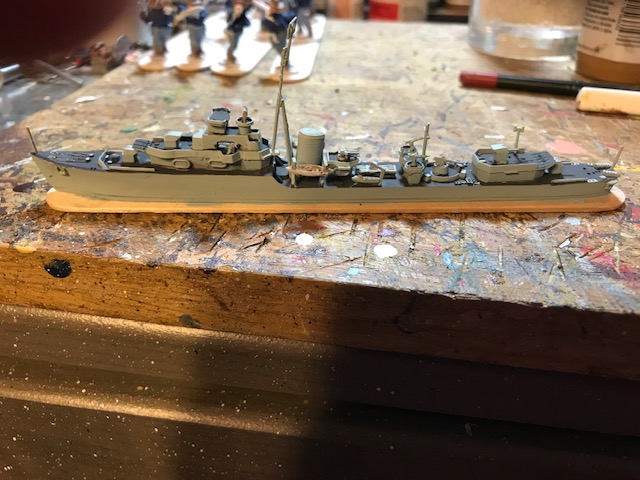
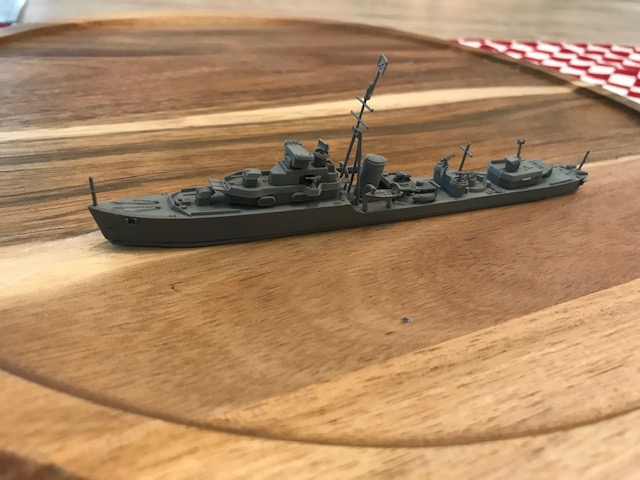
Orwell in Light Sea Grey before the camouflage is painted on.

After spraying it with Humbrol light grey, I took on the real paint job.  Think of the spray as a primer coat.

Orwell 3

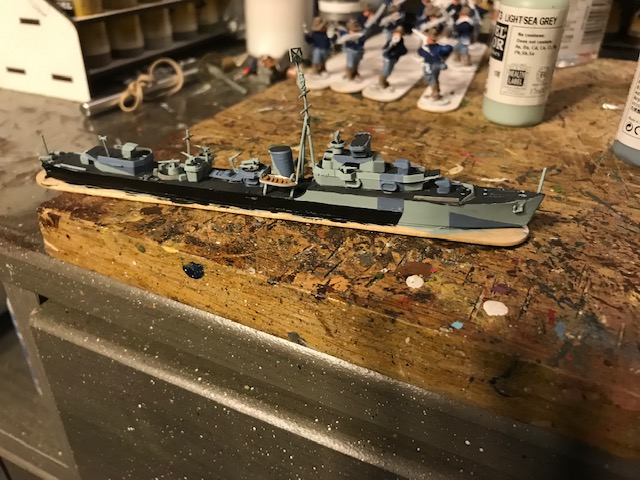
Orwell after camouflage. All that is left are a few decals, and then glue the model to its clear acrylic base.

First I painted all the decking with Ceramcoat Charcoal Gray.  Then I went back and painted the hull and all the non-deck places Vallejo light sea grey.  The camouflage, taken from an illustration of another O class destroyer, the Obedient was applied in Vallejo Black, and Vallejo Light Blue Grey.  Yes, it was all done by hand, and no I didn’t use any kind of mask because I’m basically a lazy sluggard.

All that’s left to do is the decals and there aren’t many of those.

From here, it’s on to finish up some U.S. Volunteers in the Philippines, and I’ll begin assembling my remaining transports for the Museum of Flight convoy game.

Cod Wars: More of the Weird Stuff

I’m a huge fan of David Manley’s games. He’s done tons of them.  My favorites are Action Stations for coastal combat in WWII, soon to be superseded by a slimmed down version newly published called Narrow Seas. I really like his two air games, Air War C. 21 for modern air combat and his hopefully his WW II version Air War 1940.  They are elegant, easy to learn, and easy to play which you can’t say about many air rules. Finally, and this is going to sound like a back-handed compliment, but it isn’t intended as such at all, I really like his naval rules for the American Civil War, Iron and Fire.  Based on my limited play, I feel like Manley is the only Brit who gets this conflict at sea and can put it into game terms.

Lots of other great Manley rules, but the most recent set to lure me into something new is his game for the Cod Wars. What, you may rightly ask, are the Cod Wars?  They were a series of three international incidents between Iceland and Great Britain that occurred between 1958 and 1975.  They grew out of an effort by Iceland to protect its cod resources, continually extending its exclusive fishing zone, while British fishing fleets continued to fish in ancestral fishing grounds in defiance of Icelandic law.

While no lives were lost, the presence of Icelandic coast guard vessels among the British fishermen, cutting nets and impounding trawlers, precipitated difficult relations between the two NATO allies.  During the third Cod War in 1975 following the extension of 200 mile fishing exclusion zone, the British fishermen were escorted by frigates from the British navy, featured more cut nets, and ramming that put both the coast guard ships and the frigates in dry dock for repair.  After each of the Cod Wars, Iceland’s right to protect its cod resource was affirmed by international law.

So, I know what you’re thinking: “Smyth, don’t be ridiculous.  Nobody makes miniatures for the Cod Wars.  Fishing trawlers my ass.”

Hah! Let me just respond that you are wrong, wrong wrong. Not only are they made, sort of, well made on demand by Shapeways, but you can get them in a variety of different scales.  They are available in 1/600, 1/1200, and 1/1800 scale.  It was my original intent to do them in the largest scale, but the game really requires several of the British frigates and in 1/600 they would be about 60 bucks, so I went with 1/200.

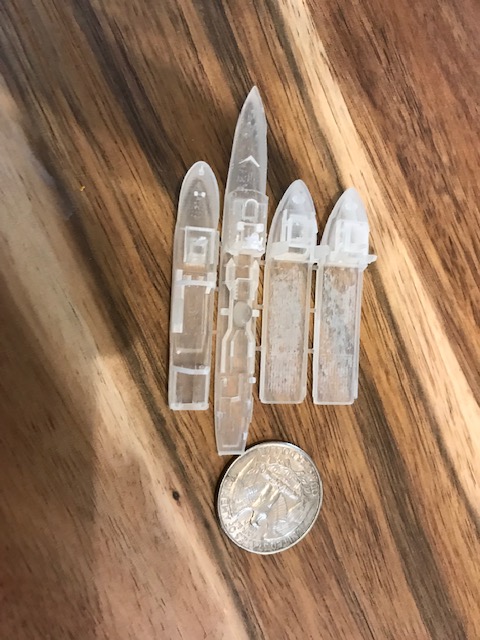
I ordered my first batch of vessels about ten days ago, and they arrived on Saturday.  They look really nice. They’ll need to be cleaned according to the Shapeways protocol, before priming and painting. The first batch include the British frigate Exmouth, the Iceland Coast Guard Vessel (ICGV) Baldur, and two support vessels to the fishing fleet, Star Aquarius and Star Polaris.  They are all about three inches long.

Cod Wars 2

The first batch of stuff in clear plastic. From left to right, ICGV Baldur, HMS Exmouth, Star Aquarius, and Star Polaris. Exmouth is just short of three inches. They have a fair amount of detail for their size. I’m impressed.

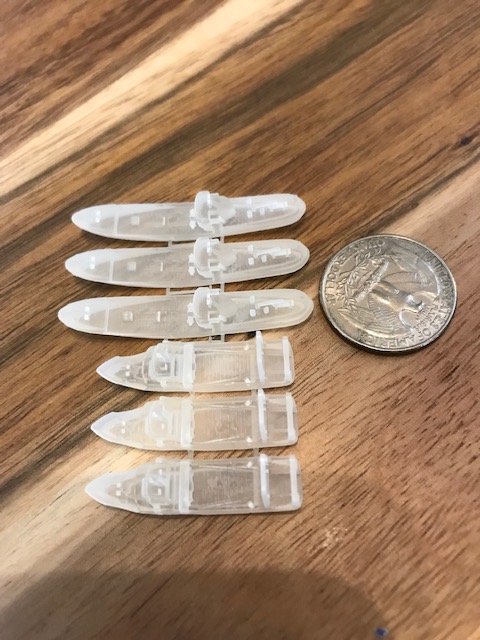
The second group of ships I received are a collection of British fishing trawlers. There are three stern trawlers and three side trawlers.  They are all pretty generic.

Cod Wars 1

British fishing trawlers. The top three are side trawlers and the bottom three are stern trawlers. They perform differently in the game. Really nice miniatures, the side trawlers are just short of two inches. The trawlers offer the best opportunity for interesting paint schemes.

I’ll add more ships offered in sets by Decapod, as well as more of the Leander class frigates.  I won’t start painting them, however, until I also order some clear acrylic bases for the ships from Litko, and I’m still a ways away from making that order.

Cod Wars!, the rules for fighting actions or a campaign are great.  They are available as a .pdf download from Wargame Vault for $12 normal price, but David’s Long Face games often have sales. They include rules for engagements, and include plenty of ship cards for the vessels that took part.  The included mini-campaign looks pretty interesting too.

With all the other projects I have floating around, this may seem like one more thing to do.  But as my friend Michael Koznarsky once told me, when he was explaining me to someone else it was “Kevin, he does the weird stuff.”

Tiny Searchlights: or Why I Can Never Be a Great Modeler

I took some time off from painting last week. The rush to finish The Buffalo hunt kind of wore me out.  I’ve managed to pick up a brush the last couple of days, though I’ve been torn about what to work on. I still have a couple of units on my painting table: William Washington’s 3rd Continental Dragoons, all six figures of them for Rebels and Patriots; and twelve figures of Old Glory Volunteers for the Philippines. I’m making progress and hope to finish them soon.

Volunteers by Old Glory and #rd Continental Light Dragoons are under way, but a ways from being completed.  Hoping for this weekend (Sept. 8th.)

But on the horizon are a couple more important game days.

In September David Sullivan and I will host a Rebels and Patriots game at Fix Bayonets in Steilacoom.  I think we probably have all the figures we need, so I just want to wrap up those dragoons.

In November there is the Museum of Flight game.  I’ve suggested to Dave Schueler that we run an air attack on a convoy.  I have bombers suitable for the purpose to raid Italians, Germans or British, and can likewise put up defenders and escorts for all the nationalities.  All I need is a convoy. And maybe some escorts.

I’ve started putting together some British escorts.  I have a box of the 1/700 scale British O Class Destroyers from Tamiya.  The kit was cheap, and it comes with two destroyers!!  I think I ordered directly from Japan. It was ten bucks plus reasonable shipping, and did I say it came with two models?

I started assembling the first ship last night.  As I was doing so I realized either how terrible my vision was or how poorly I can manipulate small pieces, or why I should just never be a modeler.  The kit is pretty straightforward and actually has very nice detail  There are a bunch of sub-assemblies to put together before putting attaching them to the hull.  Makes sense. But some of the parts are oh so small.  There are the individual 20mm guns that are very nice but pretty little. Getting them to fit into those tiny little holes is really a challenge.  I was able to pull it off only by using tweezers.

But the absolute death of me is the eeny-teeny searchlights.  Each ship has three.  One is very small, the other two are grain-of-sand sized.  I did everything I could do to try to align them properly in their very small spaces, arriving many times at some version of upside down, glued to the hull, or adhered to my fingers.  When two of them finally fell on the floor, invisible to my 64-year old eyes, I gave up and called it good.

O-Class

This is the ship assembled.  No you won’t find any searchlights, but the rest of the pieces are there to the best of my ability.  Note the slight list to the main mast. The ship will be the G98 Orwell, because I just can’t help myself. Orwell was a 4-inch armed destroyer.  The second model will be the G 04 Onslaught, a 4.7 inch armed version. The model was spray primed with Humbrol light grey.  More painting to come.

The August Tally

I have no idea what I actually completed in August.  Not much from my historical projects.  I did complete the Buffalo project.  I think that was:

12 Comanches on foot

6 Foundry grizzly bears

8 wolves by Foundry and Alternative Armies

16 buffalo by Acheson, Westwind and Foundry.

That’s 42 figures in about three weeks of painting time.  Not bad.  Not great.

August is also my little work gig for the Washington State Journalism Education Association, and I get a paycheck for that.  Lorri usually allows me to invest part of it in game goodies. So I did some buyin’

By far the biggest purchase was a big pile of Litko bases that should keep me pretty well stocked for the year.  Mostly bits for the Daniel Mersey rules.

I also bought some planes for up and coming projects.

Daveshoe, George Kettler and I really want to do some Vietnam era stuff.  Dave and I have most of the planes for the Navy, but I wanted some A-4C’s for the Air Force.  I decided this was a job for Raiden miniatures, so I ordered the Phantoms.  Of course I couldn’t help but pad things out a bit, so I also picked up six of the excellent Bristol Beauforts.  They were the prime torpedo bombers for RAAF, and participated in the air campaign against Rabaul, so that’s a future side project.

Dave and I also plan to run a game based on the American bombing of Ploesti.  I have some of Phil Bardsley’s beautiful B-24D’s, but needed six more, so I sent off an order to Scotia for more.  Well, actually I ordered ten B-24’s and I’ll figure out what to do with the rest.  Probably something to do with Rabaul.  Hey,  the RAAF flew those too.  I also slipped in some Beaufighters, which the Australians also flew against Rabaul.  Anyway, there are plenty of airplanes to keep me busy.


Hunting Buffalo at the Veterans Museum

Today was the day I unveiled The Buffalo Hunt.  It was an NHMGS Game Day at the Veterans Museum in Chehalis.  What a great venue. Just south of town, and not far off the highway, it is a terrific museum.  It’s full of small arms and uniforms from American services of the twentieth century.  Most of the exhibits did a great job of tying display pieces to local stories.  Worth your time for sure.

I drove down with David Sullivan and Dave Schueler.  They popped in to Chez Smyth at 9:00.  They endured three barking Australian Shepherds and after downing a cup of coffee we headed south.  We made it to the museum before 10:30.  The Dave’s slipped into a game of What A Tanker while I hung out and kibbitzed.  It was great to see everyone, as always.  We dashed out to lunch, and returned around 1:00 and quickly set up the game.

I always have trepidation running games by myself, but especially a game that’s really never been run before.  While the game owes a lot of inspiration to Matthew Hartley’s Tusk, there is a whole lot of me in this game.  While Tusk has a few mammoths in the game, my game had six obstinacies of seven buffalo each. Each player had four to seven figures in clans, each somewhat different from each other, so the scale of the game is simply larger, and a little more complex.

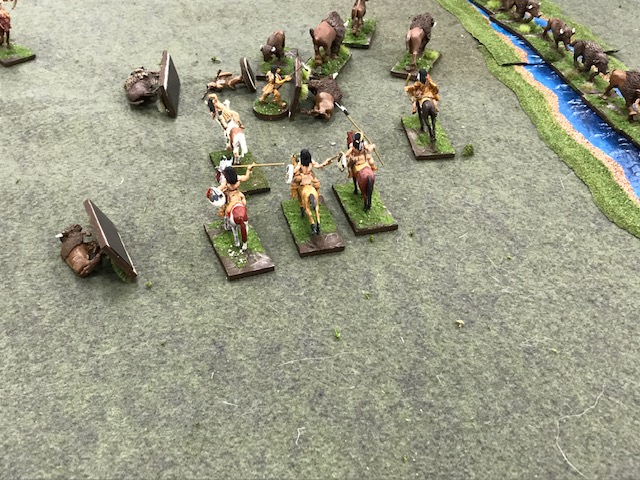
Buffalo Hunt 1

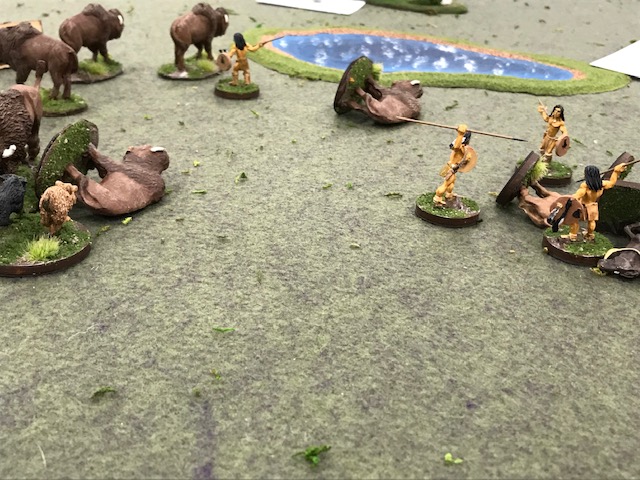
Neil’s hunting party killed plenty of buffalo, but suffered some figure losses as well.

Al Rivers, Neil Marker, Michael Koznarsky, Dave Schueler, David Sullivan and Dale Mickel all took part in the maiden voyage.  The game, overall, went pretty smoothly.  But we ran into an early snag as I ran out of figure types right away.  In the future, players will simply choose and arm the figures as they wish, and simply pay the appropriate point cost.

Buffalo Hunt 2

The buffalo were spread across the table.  The players rolled for their entry, and set out to kill their buffalo.  Unfortunately the buffalo had other ideas.  In the first turn, as we had two dead buffalo and two dead hunters; it was clear the players weren’t going to have a walk in the park.  Arrows were missing, hunter die rolls were failing, and there were twice as many hunters dead as buffalo.

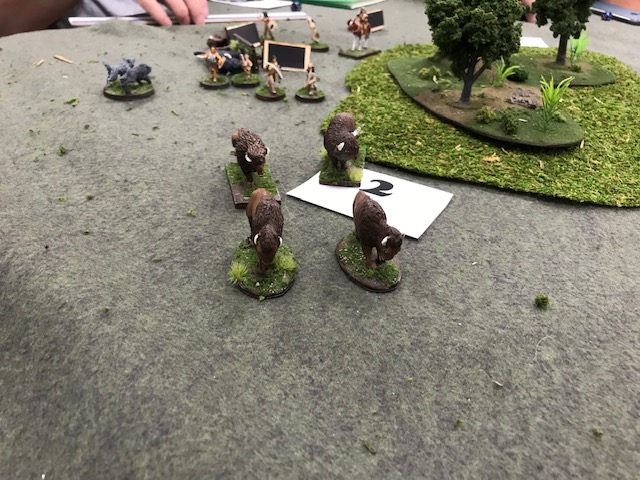
Buffalo Hunt 3

This group of buffalo is fleeing to the board edge, pursued by Al’s group of foot bowmen as well as a pack of wolves.

By the end of the game, nearly all the players had multiple losses.  Only Al’s party came through unscathed.  While the victory conditions called for killing buffalo, players were also punished for losing party members, and there were plenty of those.

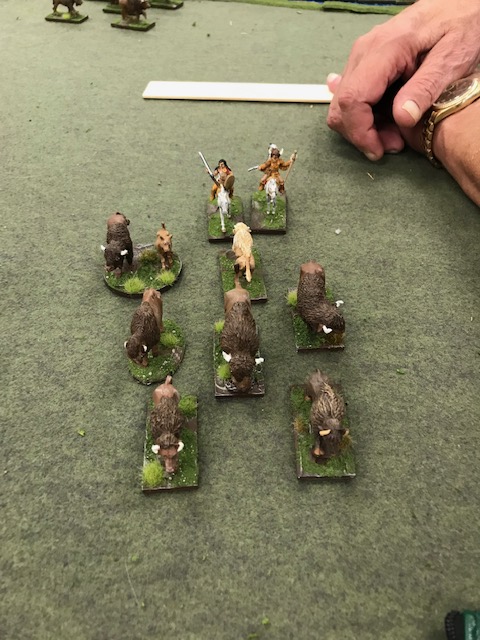
Buffalo Hunt 4

Michael’s party is in pursuit of the white buffalo. Unfortunately, the white buffalo is having none of it.

I think we got in about 13 turns in two and half hours.  We never ran into a major snag in the rules, though I did file away some ideas for the future. In a quick debrief, everybody seemed to have a good time. There were also some great ideas that came out of the discussion.  I can honestly say I’ve never had so much fun running a game.

Huntin’ Buffalo

Clan markings for each of the Comanche hunting parties.  They’ll each have different characteristics for the game.

On Saturday I’ll head down to the first annual Veterans Memorial Museum Day in Chehalis a couple of hours from home.  I’ll be running my first game of The Buffalo Hunt.

I wrote about this project in July.  I thought it would be a simple project with a few buffalo, use my existing Comanches, play a fast and loose set of rules.  Easy cheesy.

Nothing is ever easy cheesy.

I ended up painting six little groupings of buffalo totaling 42 miniatures in all. I also painted some 14 predators, including eight wolves and six bears.

Six obstinacies of Buffalo as they will appear in Saturday’s game.  No, not quite like they’ll appear.  They’ll be spread around the table and there will be terrain.  But you get the idea.

I lost my patience with Wargames Foundry in Great Britain as I waited impatiently eight weeks for my order. E-mails and TMP posts a-go-go.

I re-wrote a fun and easy set of rules and made them a little less easy.  I’m hoping they’re still fun.

Incredible, if ridiculously late bears by Foundry.  Wolves are mixture of figures from Foundry and Alternative Armies.

I painted another twelve Comanche figures, certain I didn’t have enough.  I remounted another 14 or so from bases that seemed like nothing could be removed from them.

Despite the lack of easy cheesy, I’m quite pleased that a scant two months after ordering the first batch of figures, the project is pretty much done. There will be no more Indians, predators or buffalo. Just tweaking of the rules.

Now I can get back to the Philippines, a few AWI figures, and start working on planes for Vietnam.

I’ll letcha know how Saturday went.

International Naval Wargaming Day


Thunder

It’s August 6th, and you know what that means.  It’s the birthday of Fred T. Jane, the author of Jane’s Fighting Ships, as well as a set of naval wargame rules long before it was fashionable.

Stop your laughing right now, dammit!

A. This is the first year I remembered it was International Naval Wargaming Day, so I beg indulgence.

B. I didn’t actually get to play a game today.  Pretty much all of my friends are working because they have real jobs, and I don’t have to have a job.

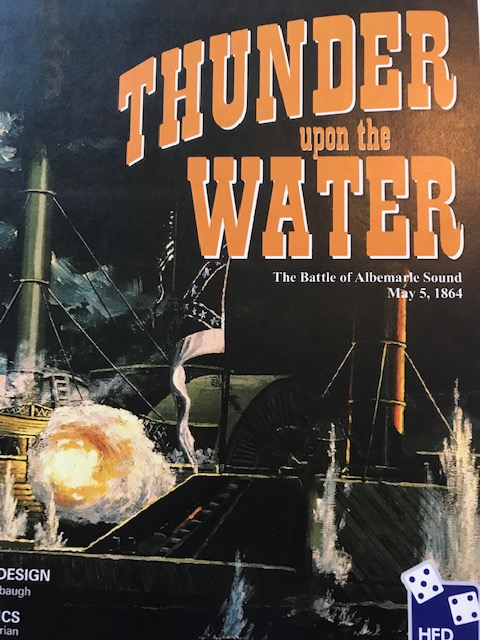
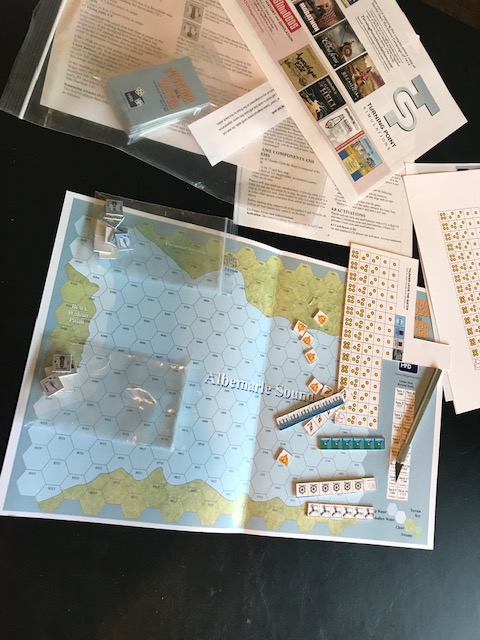
C. But I did recently get a kind of cool looking board game, Thunder Upon the Water, on the Battle of Albemarle Sound from the American Civil War just before I headed to Pullman.  I haven’t played it yet, but I did take time to start preparing to play it solo.  This is the action between the Confederate ironclad Albemarle and its consorts and the blockading Union fleet.  It’s an interesting and bloody battle and I’m anxious to give it a whirl.

It’s published by High Flying Dice games, and designed by Paul Rohrbach.  It looks pretty easy to play.  Definitely best as a two player game, but very playable solo. It also has miniature influences and could inspire an Ironclads scenario.

Thunder On the Water

Cutting apart cards and counters took all my time today. But I’m ready to give it a try tomorrow. The game looks interesting and fairly easy to play, with some nice twists. Can’t wait to give it a try.

There is a fair amount of preparation.  I ordered mounted counters which all have to be separated with an X-Acto knife.  The cards used to play the games all have to be separated with a pair of scissors.  But there was other things to do that required my attention today, so maybe I’ll get to play tomorrow.

I hope  you had a chance to remember this special day.  And if you didn’t, well maybe next year.  Fred won’t mind.

Big Bamboo: Terrain for the Philippines

Bamboo 4

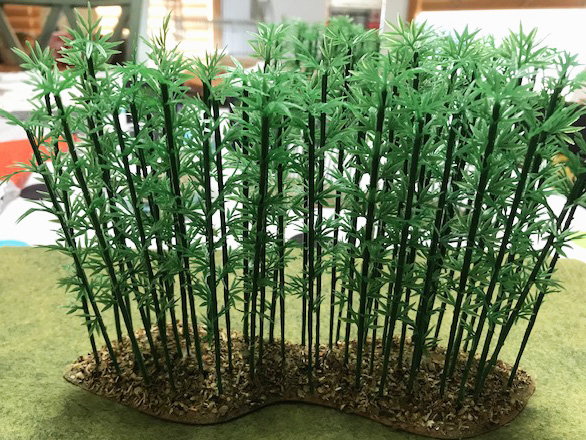
The Philippines calls for some interesting terrain pieces.  Much of the the islands are covered with jungle, so I’ve tried to acquire some bits I can make jungle-like terrain from.  I’ve gotten materials I can use to make rice paddies from.  I’ve also picked up some of the Pegasus banana trees.  I haven’t done anything with those yet. But, yesterday, my first since returning from J-Camp, I did sit down to work with materials to build a bamboo forest.

There are some great bamboo trees.  They are available from Amazon.  They are by WINOMO and come 100 trees for $14.95.  They are nice, but I don’t really think I got 100 of them.  100 sounds like a lot, but bamboo forests are very dense.  Think of your average hunk of bamboo.  Thin trunks with some leaves.  They can pack ’em in really tight.  So, you use a lot.

They need to be drilled into a suitable base.  I was poking through my piles o’ stuff and found some very small hills we used for micro armor back in the day.  They are made of resin, and I hauled out the ol’ Dremel tool and drilled lots of holes to an appropriate size and super-glued the bamboo in.  I got through one and half of these hills and ran out of models.  I’ve ordered two more packs for the remaining bits I have.  The resin is nice because they are heavy enough to provide ballast for the all the bamboo.

Bamboo 3

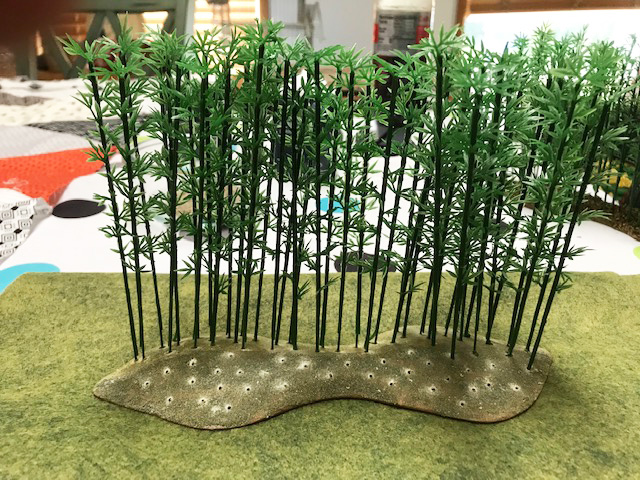
This is my partly completed forest The resin base is drilled out waiting for more bamboo. These may look familiar, and are products of the middle eighties. They are about 7 1/2 inches long and at the widest point about 2 1/2 inches. Something I can use them for rather than sitting in my unused DBA terrain chest. Note the holes are really drilled close together so they can be planted densely.

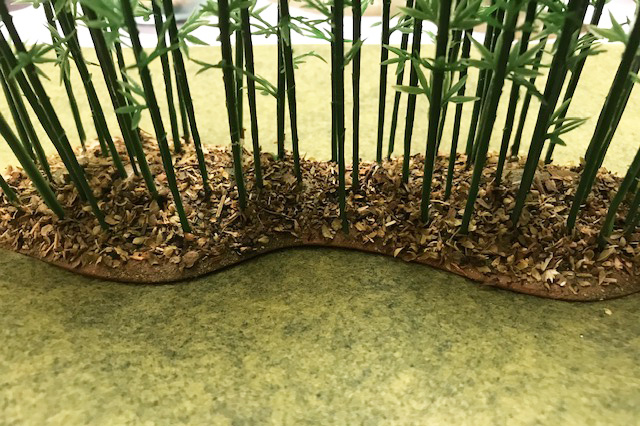
I use an unusual ground cover for the base.  Spices.  That’s right spices.  The jungle forest floor tends to be covered with leaves, so I wanted something largely representative. I use oregano and basil combined together in a little bowl.  I put down my PVA glue and water and just cover the base with the mixture and let it sit for an hour until good and dry..  Spray with Dullcote and I think it looks pretty good. Even if it doesn’t, it smells like spaghetti. Note, I just use the cheap dried stuff. I also use it on my miniature bases for the Philippines.

I dunno if it looks good but it sure smells great.

And this is the finished product.
Bamboo 5

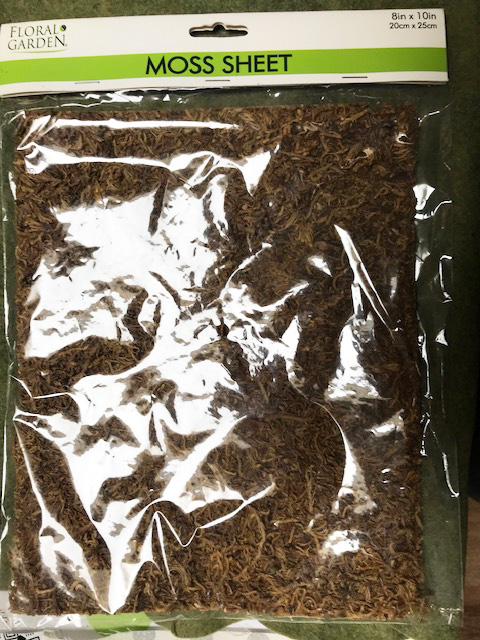
I’ll have several of these.  There is often lots of bamboo forest in these jungle campaigns.  Very rough going.  American soldiers in Vietnam talk about making about 100 yards per hour cutting through these forests.  I’ll probably make as many as six of these in various sizes and put them on irregular shaped moss sheets available at Jo Ann’s Fabrics for not a ridiculous amount of money.

Moss Sheet

Yes, I know the glare makes this largely unhandy.

The first of several terrain types I’ll be making and I’m pleased to at least get started on them.