Bladensburg and the myth of the rockets

The Battle of Bladensburg was fought under a blazing sun on August 24, 1814. It was a river port town on the East Branch of Potomac River and lies in a valley between two commanding heights to the north and south.  I had the good fortune to visit Bladensburg twice, in 2004 and again in 2012.  It is still a quiet Maryland town that’s seen better days just outside the District of Columbia.  But in 1814 it was a bustling commercial town with warehouses alongside the river trading tobacco, like many other river towns in the Tidewater region.

By the end of of August 1814, many of the waterborne defenses to Washington and Baltimore were gone.  Joshua Barney’s fleet of row gunboats were in ashes.  The naval and land forces commanded by Rear Admiral Cockburn and Major General Robert Ross determined to capture Washington and inflict a humiliating defeat on President James Madison’s government.

Writers across two centuries have spilled many words about the battle that became known as the Bladensburg Races–to denote the speed American militia displayed in departing the battlefield.  My first exposure to this humiliating American defeat came when, as a boy, I read Robert Leckie’s Wars of America, volume 1.  In that book, the journalist historian noted that the American militia were overcome with fear when British rocket troops fired their unreliable missiles at the American defenders and simply fled.  Leckie noted that not even the Zulus at Insandlwana showed more than contempt for these primitive projectiles.

Down through the ages we’ve bought into the notion that the Americans, despite their superior numbers and defensive dispositions, were driven off by a bunch of over-sized skyrockets. Wrong.  Though the Americans held highly defensible ground, their poor dispositions and their lack of training combined with superb British qualities of fire and movement  to doomed the American defense and the nation’s capital. Rocket fire was just a marachino cherry on the sundae.
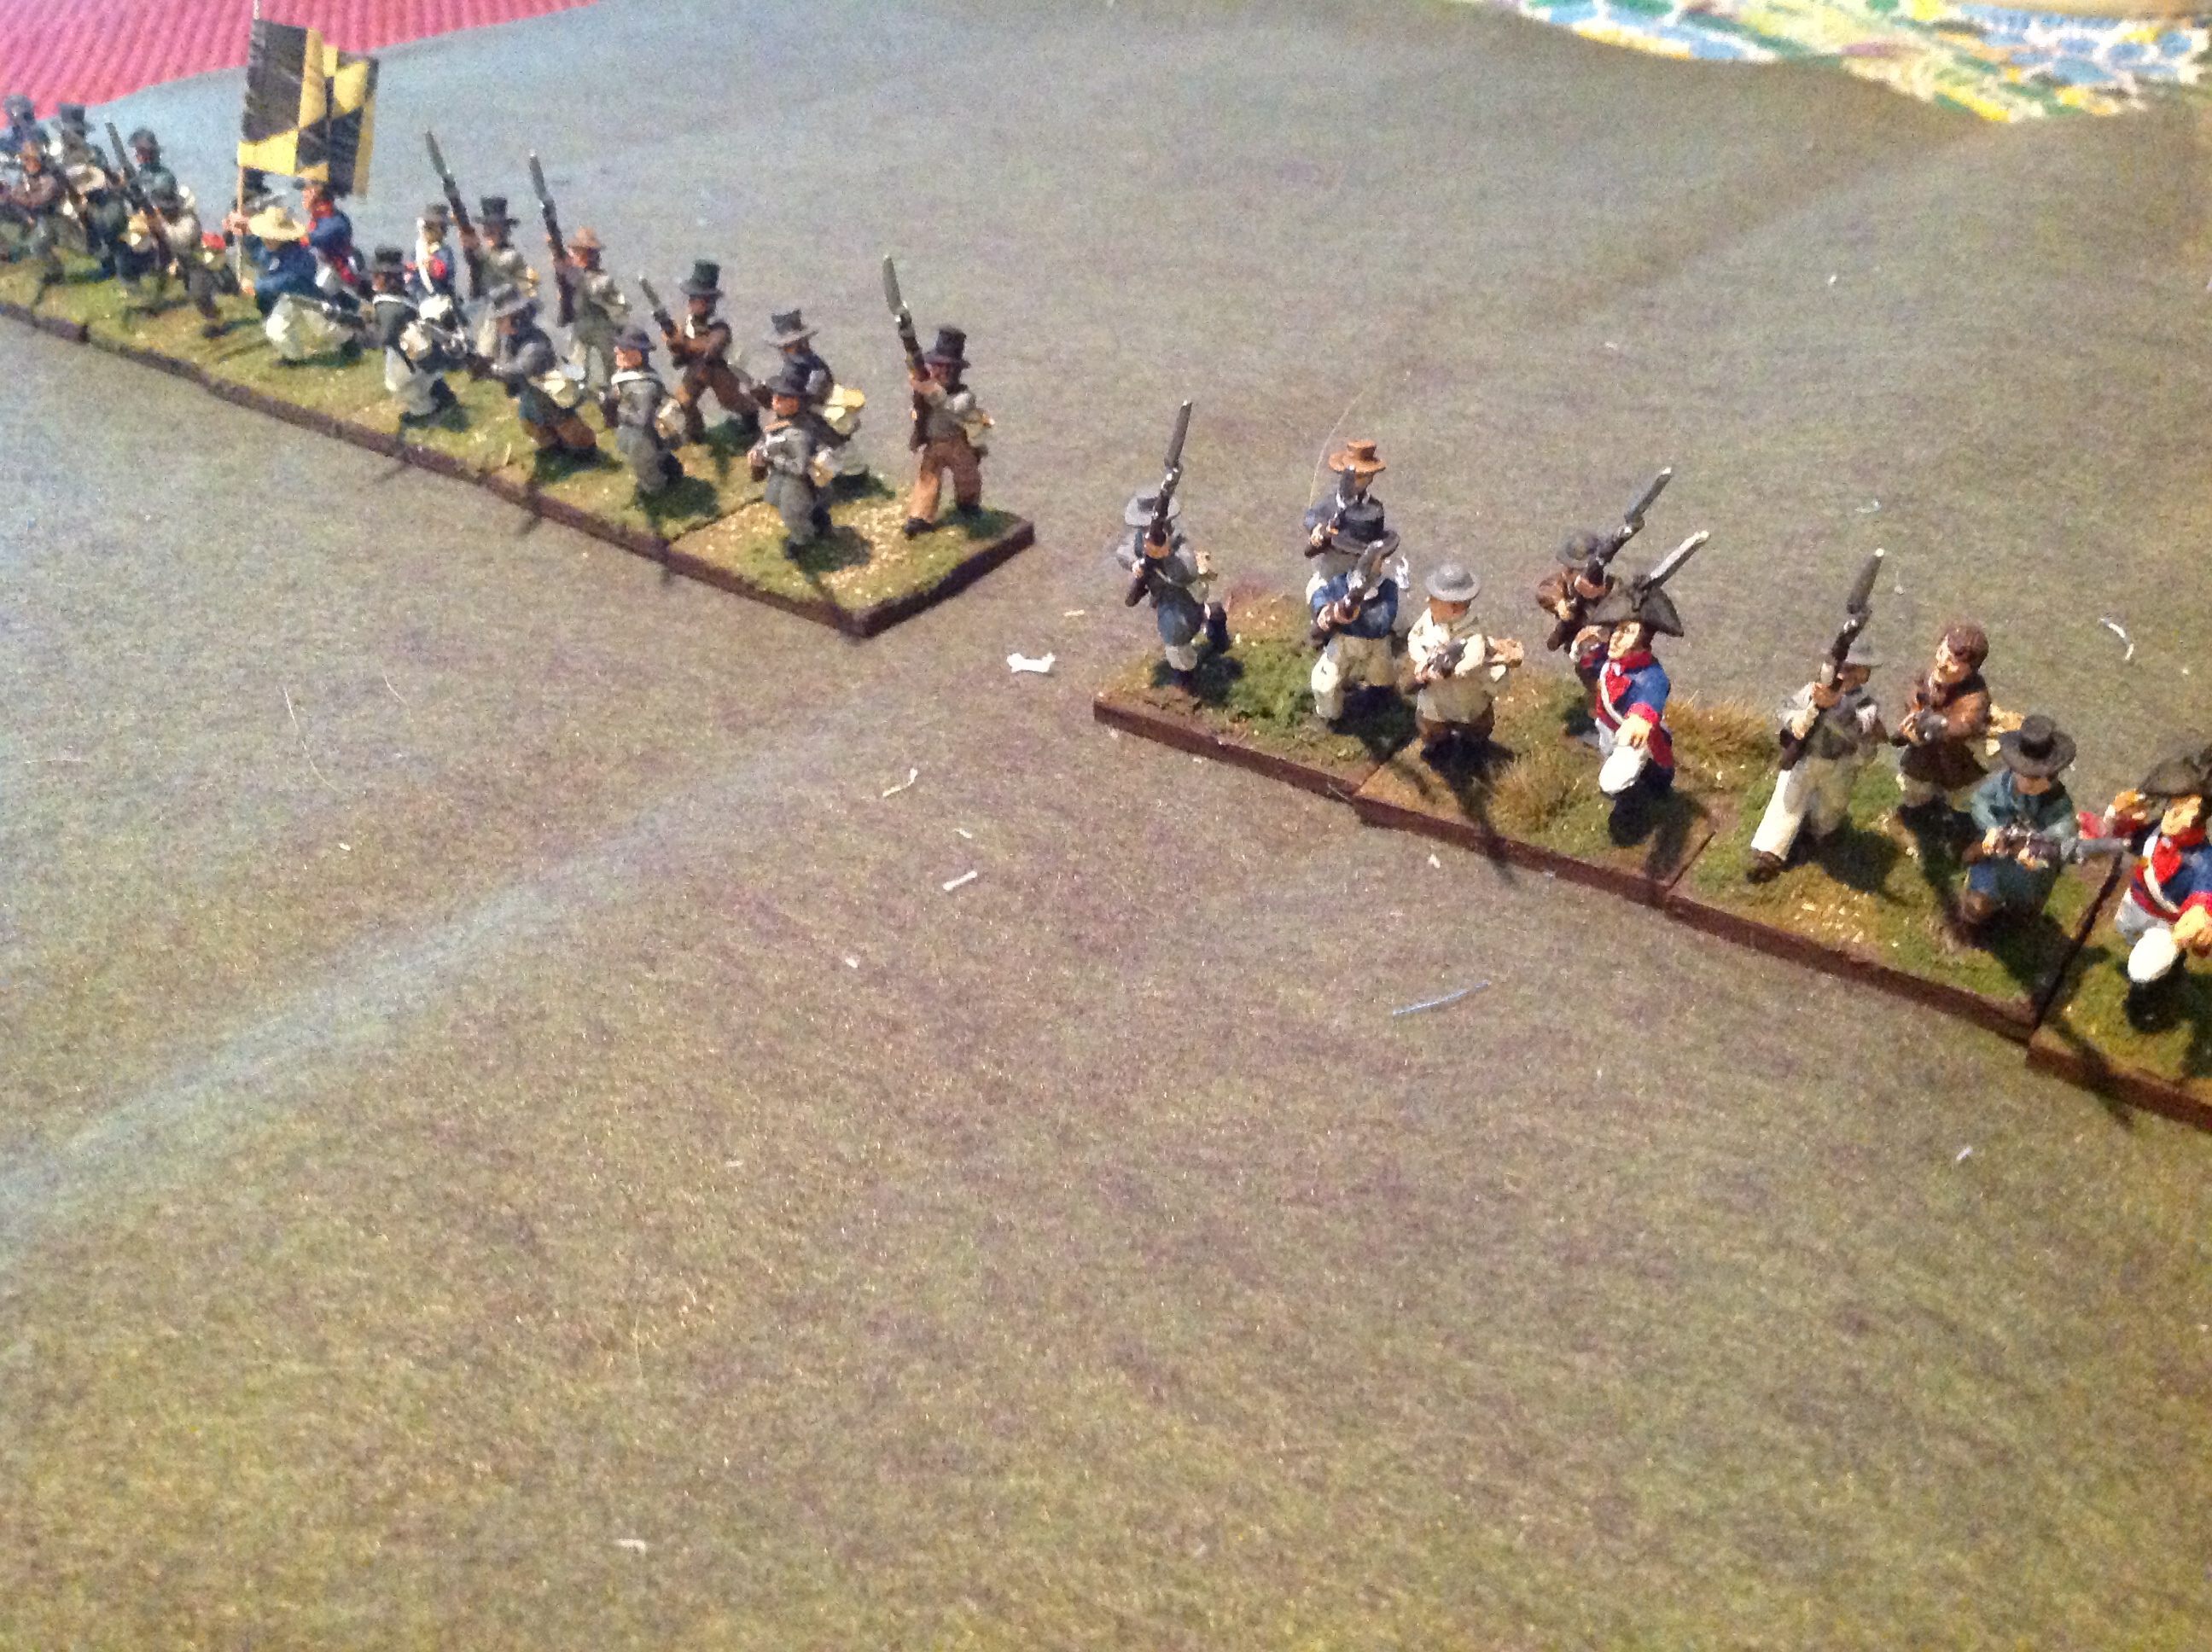
Ragan's and Schutz's regiments of Maryland militia.  That they are un-uniformed represents their general lack of preparedness for action.

Ragan’s and Schutz’s regiments of Maryland militia. That they are un-uniformed represents their general lack of preparedness for action.

First, let’s take a look at the numbers involved in the battle. The Americans numbered some 7, 000 troops, while the British totaled about 4,400.  In addition, the Americans had 18 guns on the battlefield from 6- to 18 pounds, the British had only three light guns that arrived late, plus the 60 or so inaccurate rocket launchers. In game terms the differences become more stark.  The Americans have 72 stands of infantry and 10 sections of artillery.  The British have considerably fewer troops and guns: 54 bases and one section of artillery, plus three sections of rockets.

However, when we break down the armies in terms of quality a vast difference appears between the British and Americans:

Rating/Quality      British bases     American Bases

Elite                        18                        0

Veteran                  35                       9

Trained                    3                       15

Raw                          0                       48

With the exception of Barney’s naval guns, all the American artillery is raw.  Raw troops, infantry or artillery, are likely to shoot poorly, move more slowly and panic under stress. Elite and veteran units are more likely to move faster, accept casualties and shoot better. Add to this, the high quality of the British commanders, the poor quality of the American commanders and the British are much better disposed to move quickly under fire and take advantage of poor American troops.

Though the Americans outnumbered and outgunned the Brits, it’s instructive to examine the battlefield and the American positions.
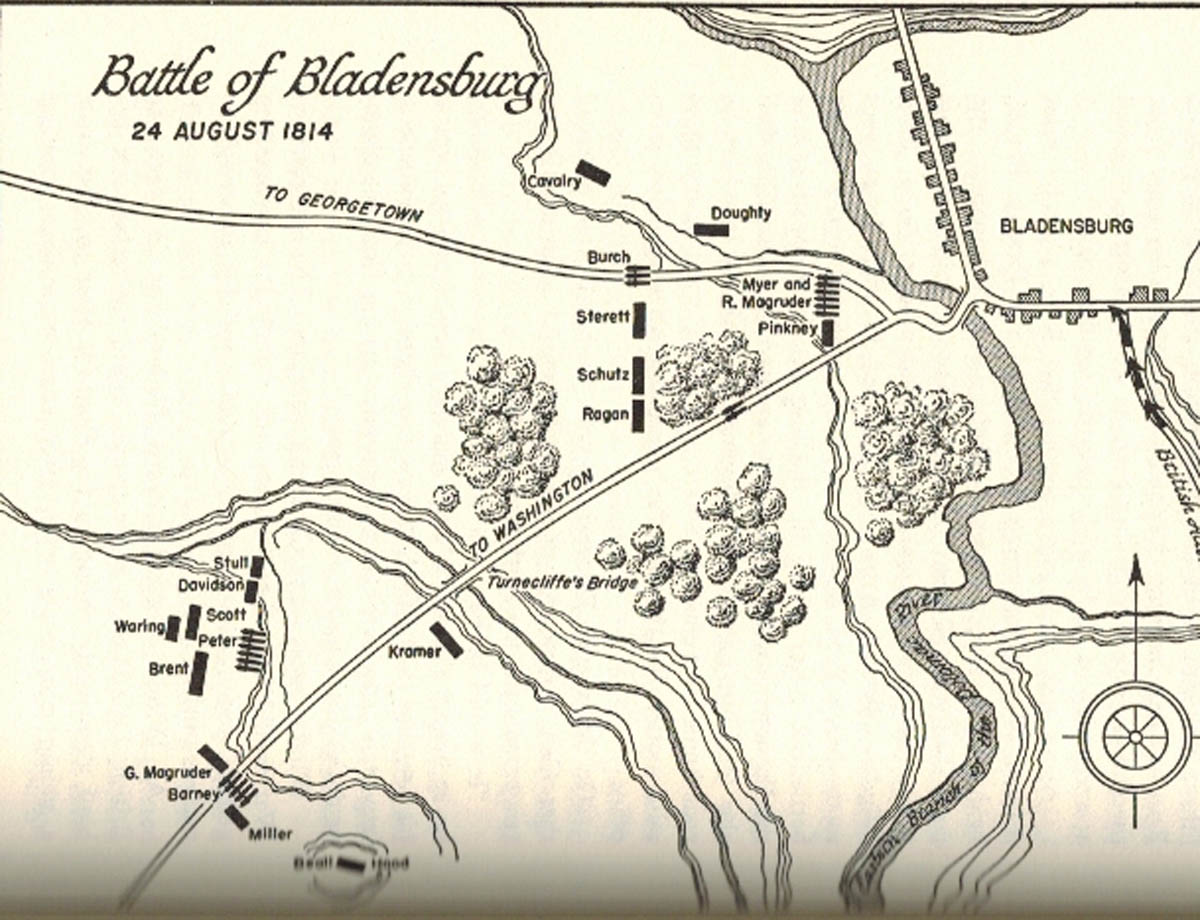
The battlefield is pie-shaped, with the Americans fighting in depth.  The British enter the field across a bridge at the apex of the pie.

A re-run of the Muller map clearly shows the Americans’ position.  The Light Brigade marched straight up the Washington Road, while Brooks’ Brigade works around the American left flank.  Though Barney’s third line inflicted casualties on Thornton’s advance across Turncliffe’s Bridge, they were doomed when Brook’s advanced against his flank from the Georgetown Road.

The American defense is divided between three non-supporting positions.  Facing the bridge over the East Branch are Pinkney’s three stands of raw militia riflemen and three sections of 6-lb artillery behind a poorly constructed earthwork.  Directly behind them, out of supporting musket range is Stansbury’s Maryland militia 23 stand of mostly raw troops and two stands of raw artillery.

The British had to cross a narrow bridge over the East Branch of the river and go through or around the Americans.  However, there were 37 stands of high quality troops to oppose them.  Historically, the light brigade attacked and was driven into the town by heavy fire.  However, when Brooks’ brigade came up in support, they recrossed the bridge and formed skirmish order while Brooks’ brigade moved quickly around the American left flank to the Georgetown Road.  Outflanked and outnumbered, and probably peppered by the annoying rockets, the raw American troops bolted, running away down the Georgetown Road.

It’s unlikely the British even saw the American third line forming on the hillside south of Stansbury’s position.  Eventually Winder would assemble his best troops, Barney’s flotillamen and Miller’s Marines along with semi-trained regulars and raw militia on the high ground blocking the Washington Road.  The Americans 37 stands, mostly raw troops and five sections of artillery held back the Light Brigade for a time, but were flanked out of their positions by Brooks swinging around their left from the Georgetown Road.

American defenses crumbled, despite stubborn resistance by Barney’s troops, and the Americans retreated down the Washington Road.  The road to the capital was wide open.

The British won the Battle of Bladensburg, but the rockets played a very minor role.  The Americans lost because their troops were of generally poor quality, and their disposition was such that their opponents were  were able to fight the Americans in small packets that gave the British qualitative and quantitative superiority against each of the three American lines.
A quick look at the Bladensburg battlefield

I borrowed the map from Charles Muller’s excellent book The Darkest Day so the reader could suffer along with me as I plot some of the challenges of gaming Bladensburg.

The American dispositions require a fairly deep table.  I’m going to try to cram it all on to a 7 1/2′ X 8′ table.

The British enter at the apex of a trianglular road net and must cross the bridge over the East Branch of the Potomac River (the Anacostia.)  Facing the bridge withing a foot will be three sections of artillery and three stands of militia riflemen.  Fifteen inches behind  them are three large battalions of militia infantry and more guns, filling the triangle between the Georgetown and Washington roads before climbing the hill to face the second American position manned by Joshua Barney’s sailors, a few Marines and a host of raw militia.

The challenge is to allow enough space for the British units to maneuver on both sides of the Washington and Georgetown roads and not have them slaughtered by the superior numbers of American cannon. Another challenge is to factor in the poor quality of the American militia, without having them vanish at the drop of a hat.

The battlefield is pie-shaped, with the Americans fighting in depth.  The British enter the field across a bridge at the apex of the pie.

The battlefield is pie-shaped, with the Americans fighting in depth. The British enter the field across a bridge at the apex of the pie.

A Bladensburg OOB

Believe it or not I’m just a few short steps from the finish line on completing my Bladensburg painting.  I may try to make some terrain pieces: possibly some warehouses for Bladensburg town, and a second wooden bridge for the second crossing over the ravine on the Washington D.C. road.  Pictures will follow soon.

Late last week I took a night off from painting and put together an Order of Battle for Regimental Fire and Fury.  It’s my plan to use these rules for our Enfilade game.  Mark used them successfully for Crysler’s Farm and I’ve run Hobkirk’s Hill using these rules. In any case here is what I came up with. Incidentally, Osprey will be issuing a battle book on the Chesapeake Campaign of 1813-14, so I’ll be interested to see if they come up with some numbers.

The Americans have a superior tactical position to the British and vastly outnumber them in artillery.  However, most of the troops, including the guns, are raw, which is a minus both to fire and morale. The British Army is very good, and though they must cross the lower bridge under fire, maneuver quickly, and must take advantage of their superior mobility.  I’ll post a map and some pictures soon.

Americans

C in C General Winder-poor

Pinckney’s Command-poor

Pinckney ‘s Rifles (3 stands)

3/-/2  Raw

Myer and Magruder’s  Maryland artillery

Three  sections light guns-raw

Doughty’s Rifles (smoothbore armed)

3/-/2  Raw

Doughty begins the scenario as independent and must move out of command

Stansbury’s  Brigade-able

5th Maryland  Militia Regt.

9/7/5     Trained

Schutz’s  Maryland Miliitia

7/6/5 Raw

Ragan’s Maryland Militia

7/6/5  Raw

Burch’s Maryland Artillery

Two sections light guns-raw

Winder Arrives with reinforcements on turn one

Scott’s Regulars

6/5/3 Trained

Joshua Barney-Gallant

Miller’s  Marines

3/-/1  Veteran

Barney’s  Flotillamen

6/4/2  Veteran

Barney’s Naval Artillery

One section siege gun, one section heavy gun (move as siege guns)

Turn three arrival

Magruder’s  Brigade–poor

Beal’s Annapolis Militia

6/5/4  Raw

Morrison’s Annapolis Militia

6/5/4  Raw

Kramer’s  Maryland Militia

4/-/3  Raw

Peter’s District artillery

Three sections light guns-raw

Turn four arrival

Smith’s District Brigade—poor

Waring’s  Battalion

4/-/3  Raw

Stull’s  Battalion

4/-/3  Raw

Maynard’s Battalion

4/-/3  Raw

1.        Pinckney’s command  begins behind an earthwork 8” in front of the lower bridge across the Anacostia River.  Myer and Magruder’s  artillery may not fire at targets closer than 4” because their embrasures were poorly constructed.

2.       Stansbury’s  command was recently placed in “improved” positions by Secretary of State Monroe and may not advance until turn seven, or unless personally led by General Winder

3.       Magruders Brigade and Smith’s Brigade may not deploy if they are outside Winder’s command radius

British Order of Battle

Commander in Chief

General Ross-Gallant

Thornton’s Light Brigade-Gallant

Converged Light Infantry

6/4/2  Elite

85th Regiment

12/8/5  Elite

Marine Light Infantry

3/-/1  Veteran


Arriving turn 2

2nd Brigade-Brooks-Able

4th Regiment

8/5/3  Veteran

44th Regiment

8/5/3  Veteran

Royal Marine and Royal Artillery Rocket troops

Three sections rocket artillery

 Arriving turn 5

3rd Brigade-Patterson-Able

21st Regiment

8/5/3  Veteran

3rd Battalion Royal Marines

8/5/3  Veteran

Colonial Marines

3/2/1  Trained

One section light artillery

Turn one begins with the Light Brigade in march column attempting to force the bridge crossing over the Anacostia.  Turn three, the British can discover the ford guarded by Doughty’s pitiful unrifled riflemen.

Plodding toward the finish line

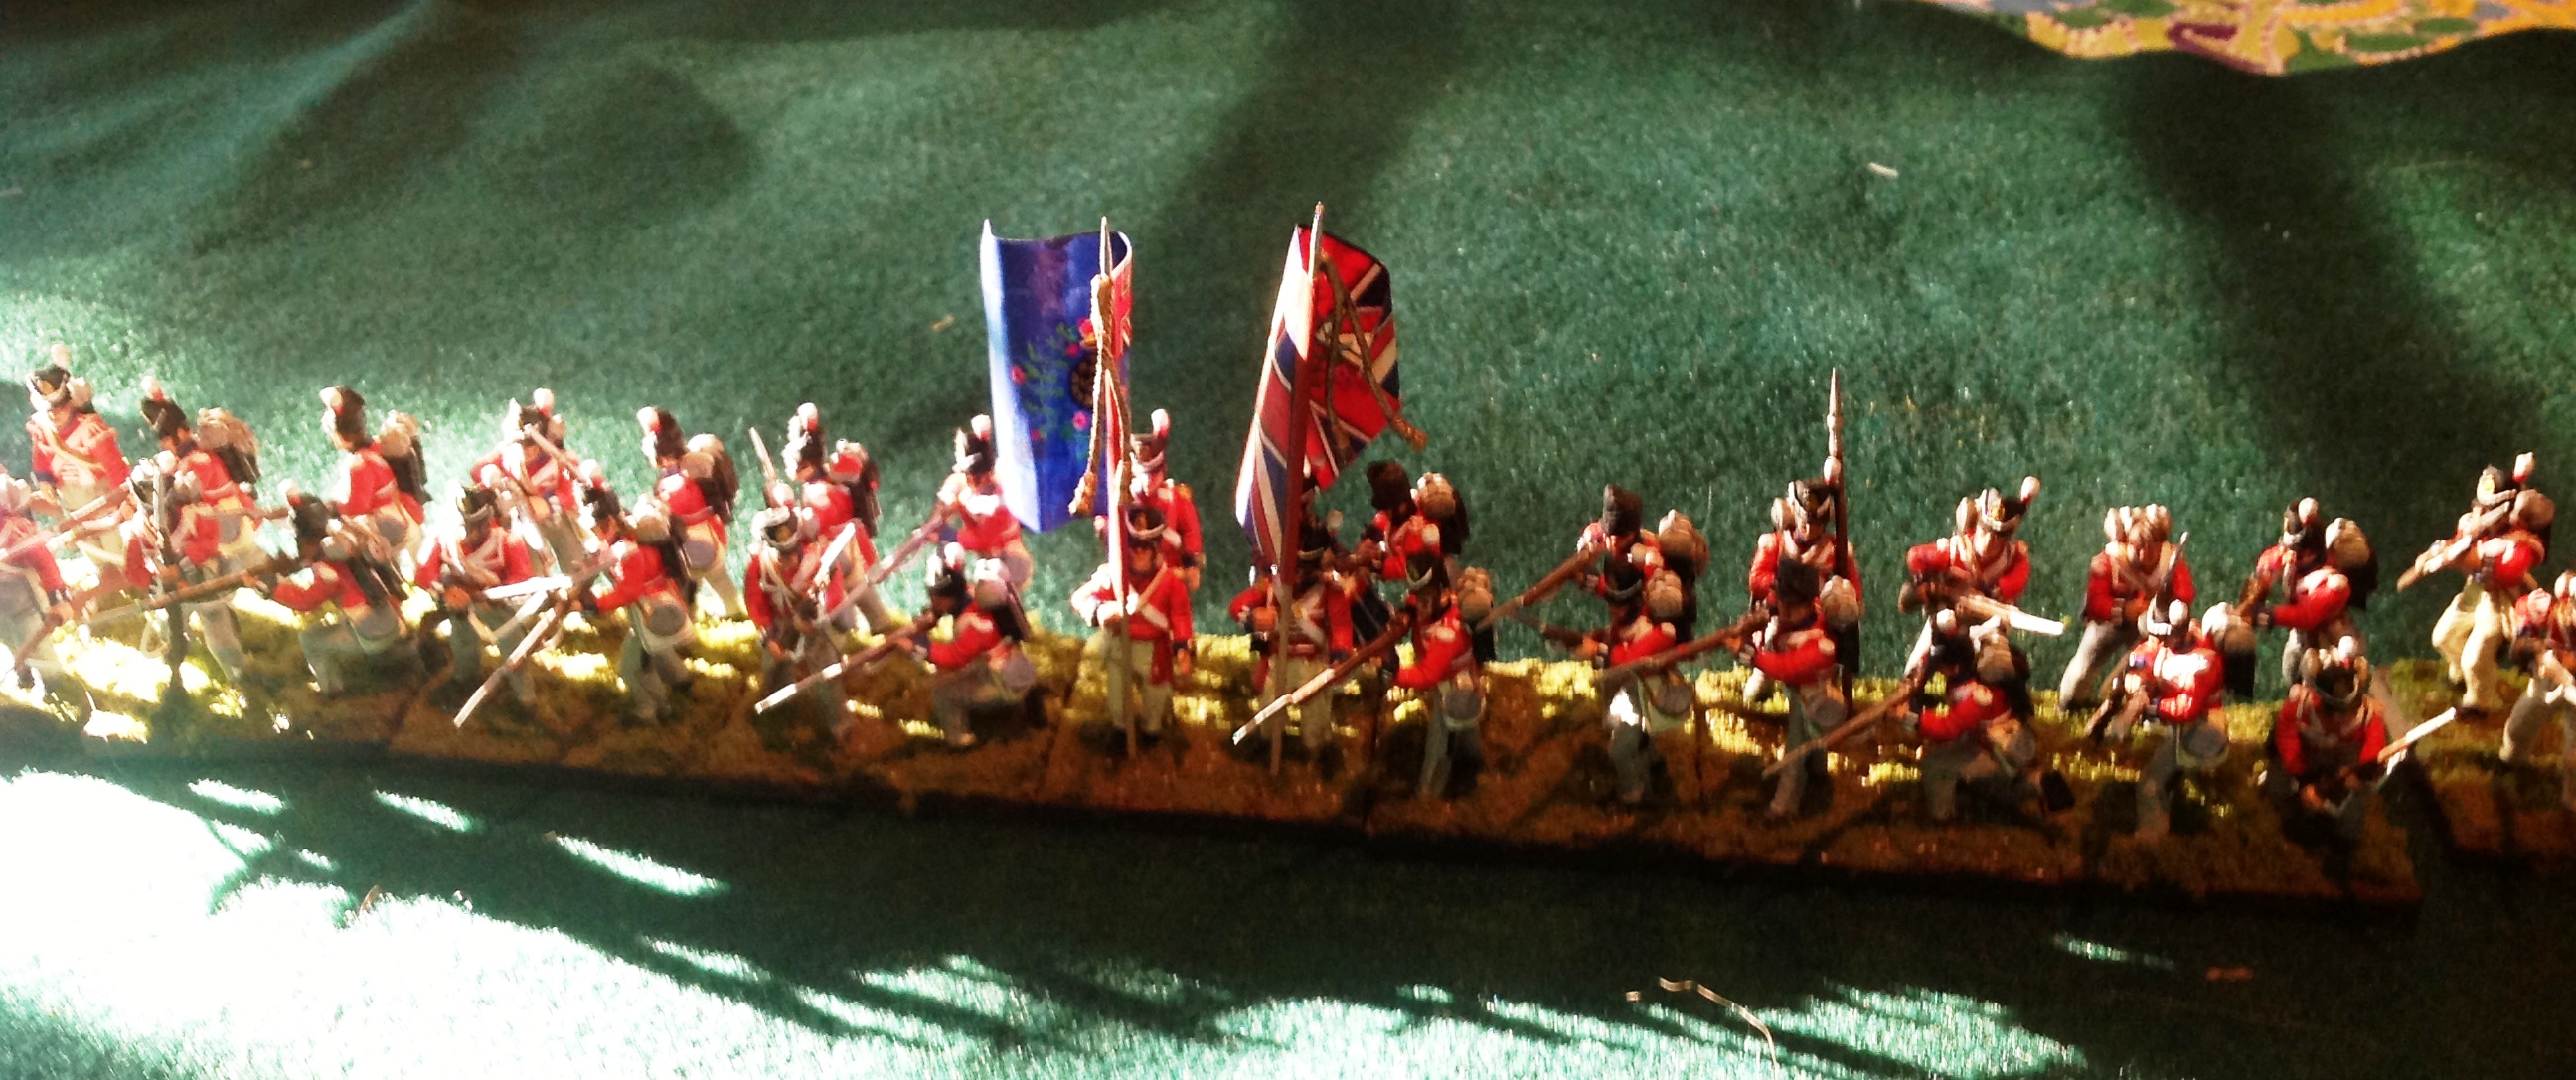
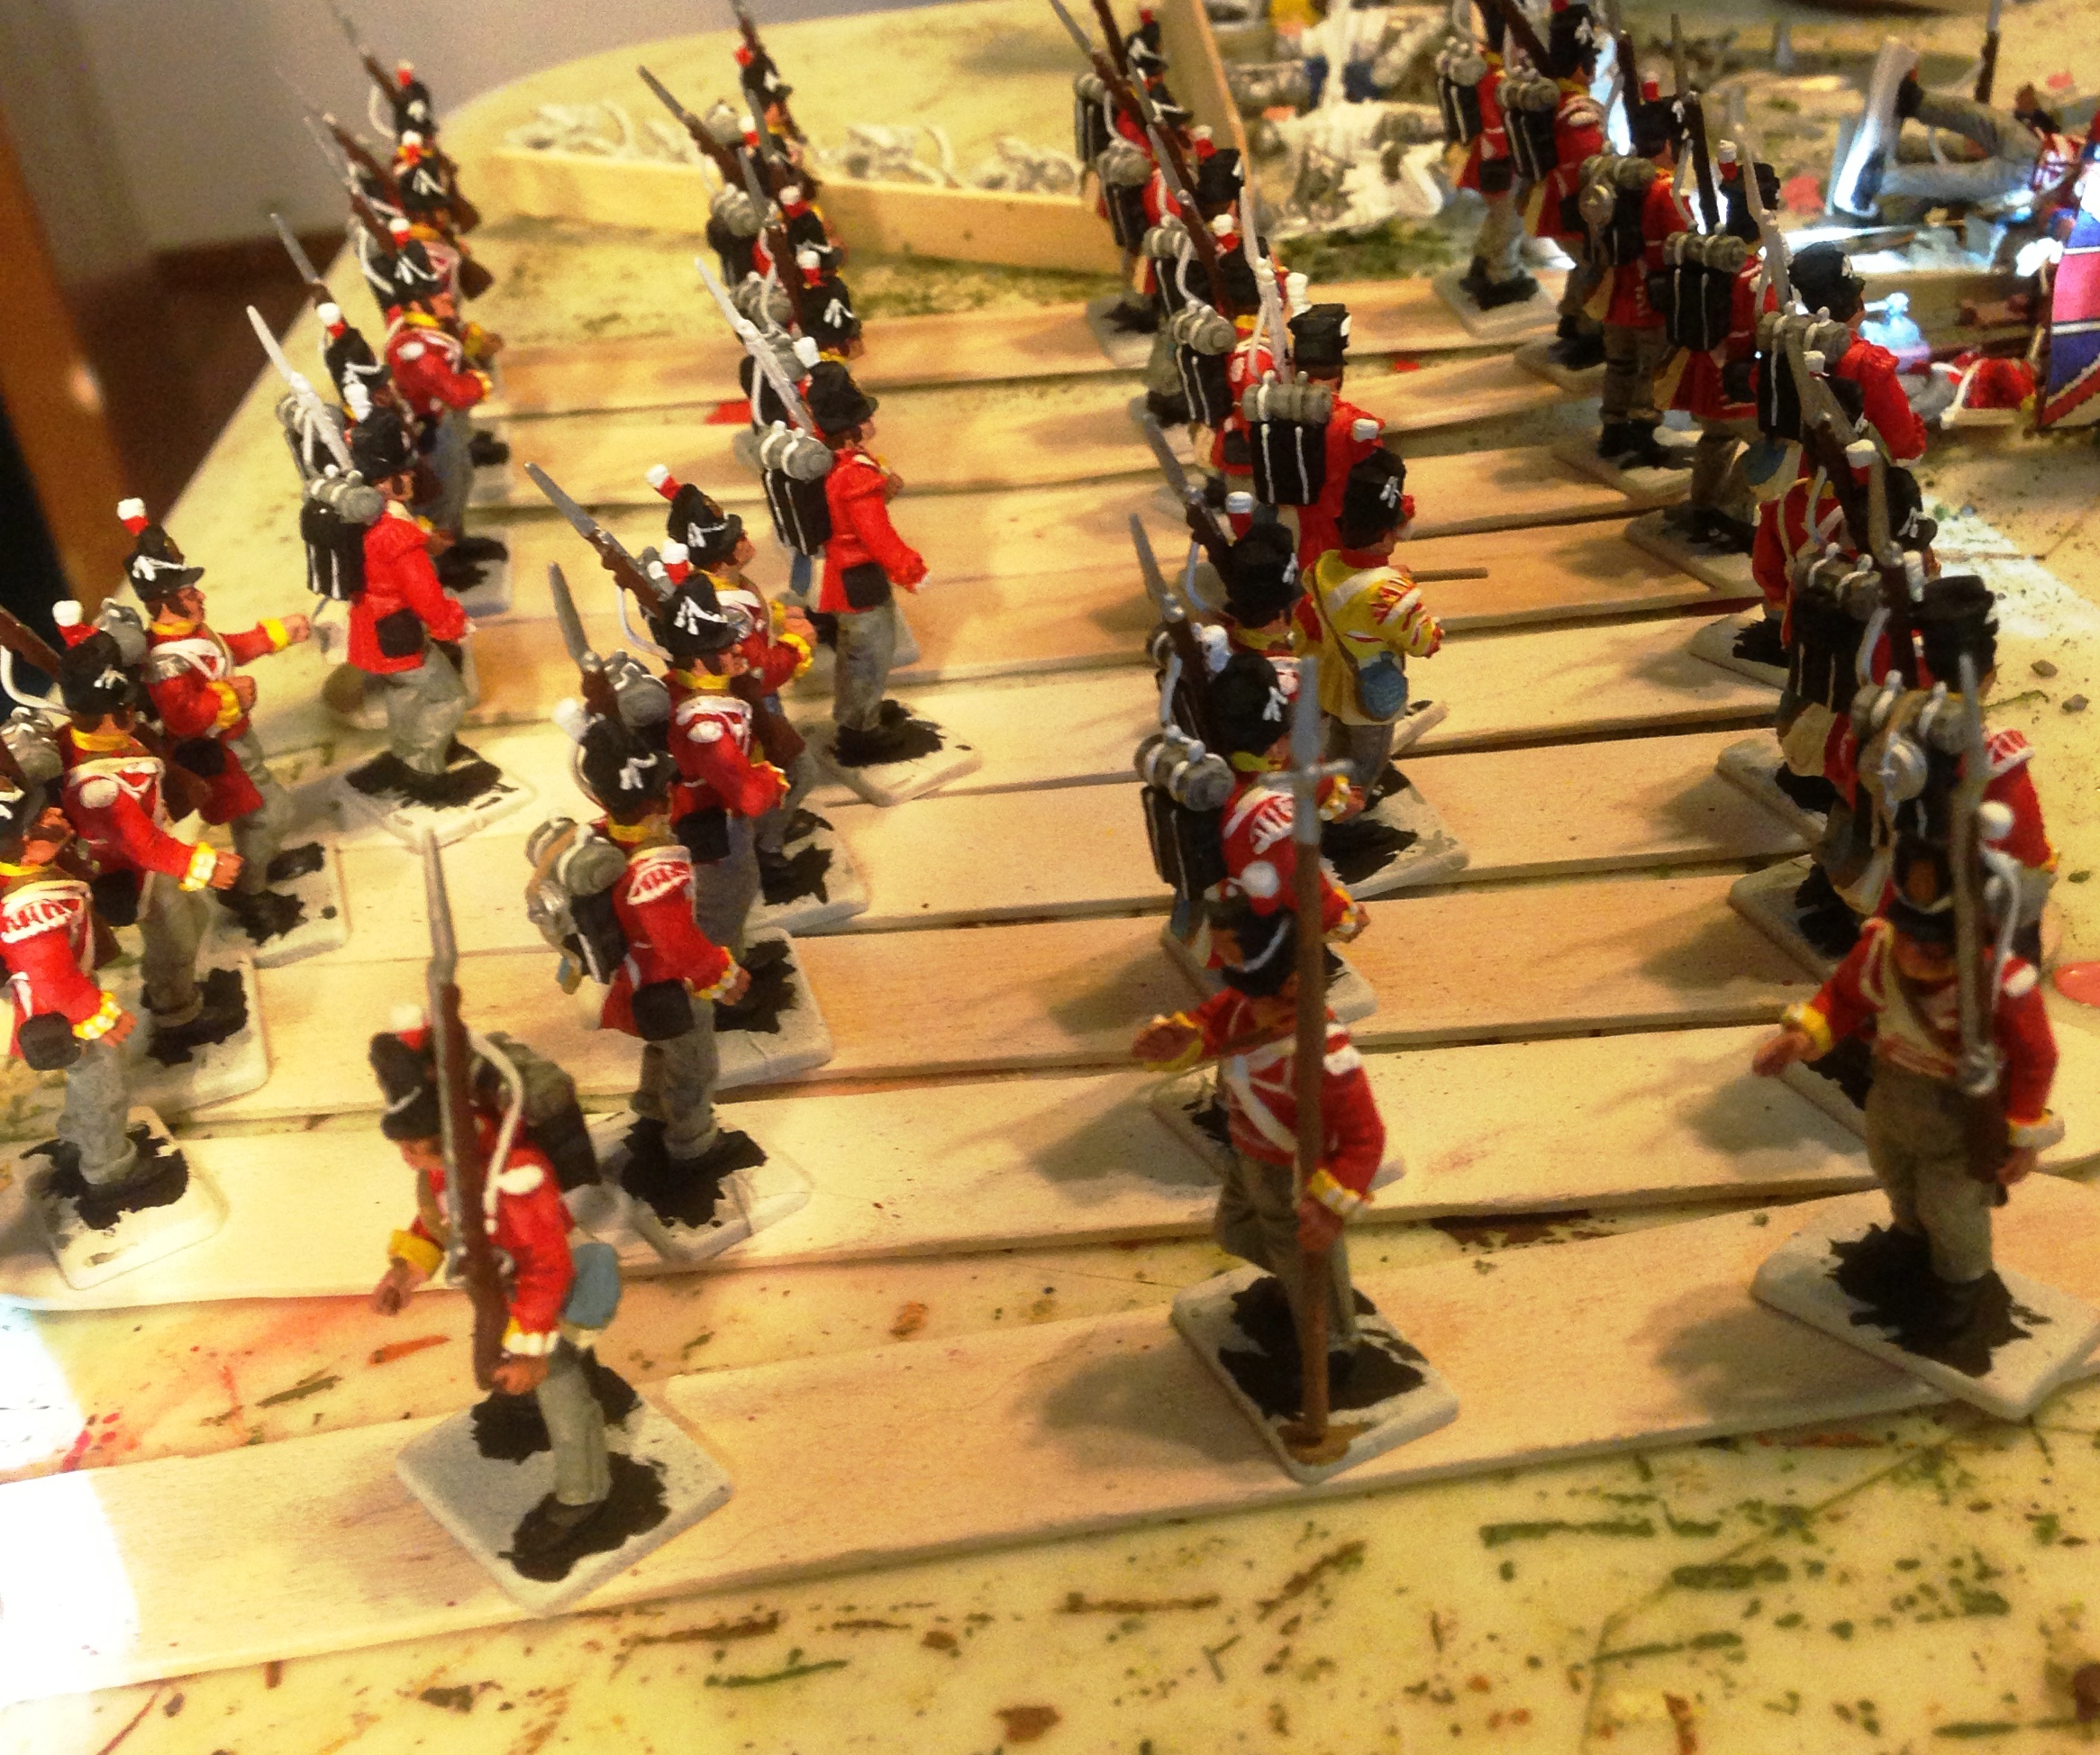
The 44th Regiment waits to be mounted and flagged.  There is an extra stand not quite finished in the middle of my painting sticks.

The 44th Regiment waits to be mounted and flagged. There is an extra stand not quite finished in the middle of my painting sticks.

I’ve been working on just my Bladensburg project since May.  With so many other things I want to do, it’s beginning to feel a little like the Chinese water torture.  Even though I seem to have acquired the September version of this year’s school-directed biological warfare, I’ll likely drag myself into my den for an hour or so painting.  Why?  So I can be free, of course.

I whine, I fuss, I whine and I fuss, but I have been productive.  Here’s what I have painted since Enfilade:

Two-24 figure un-uniformed battalions of Baltimore militia:     48 figures

One-48 figure British light Infantry battalion (85th Bucks L.I.): 48 figures

Three-32 figure British line infantry  (4th, 21st and 44th regts.) 96 figures

This weekend, all things being equal, I will finish Scott’s battalion of U.S. regulars (elements of 12th, 36th, and 38th regts.) 24 figures.

That will leave 24 more of the evil Victrix Brits to assemble and paint, and seven mounted British commanders by Old Glory.  All that will remain of Bladensburg is the playtesting and some terrain making.

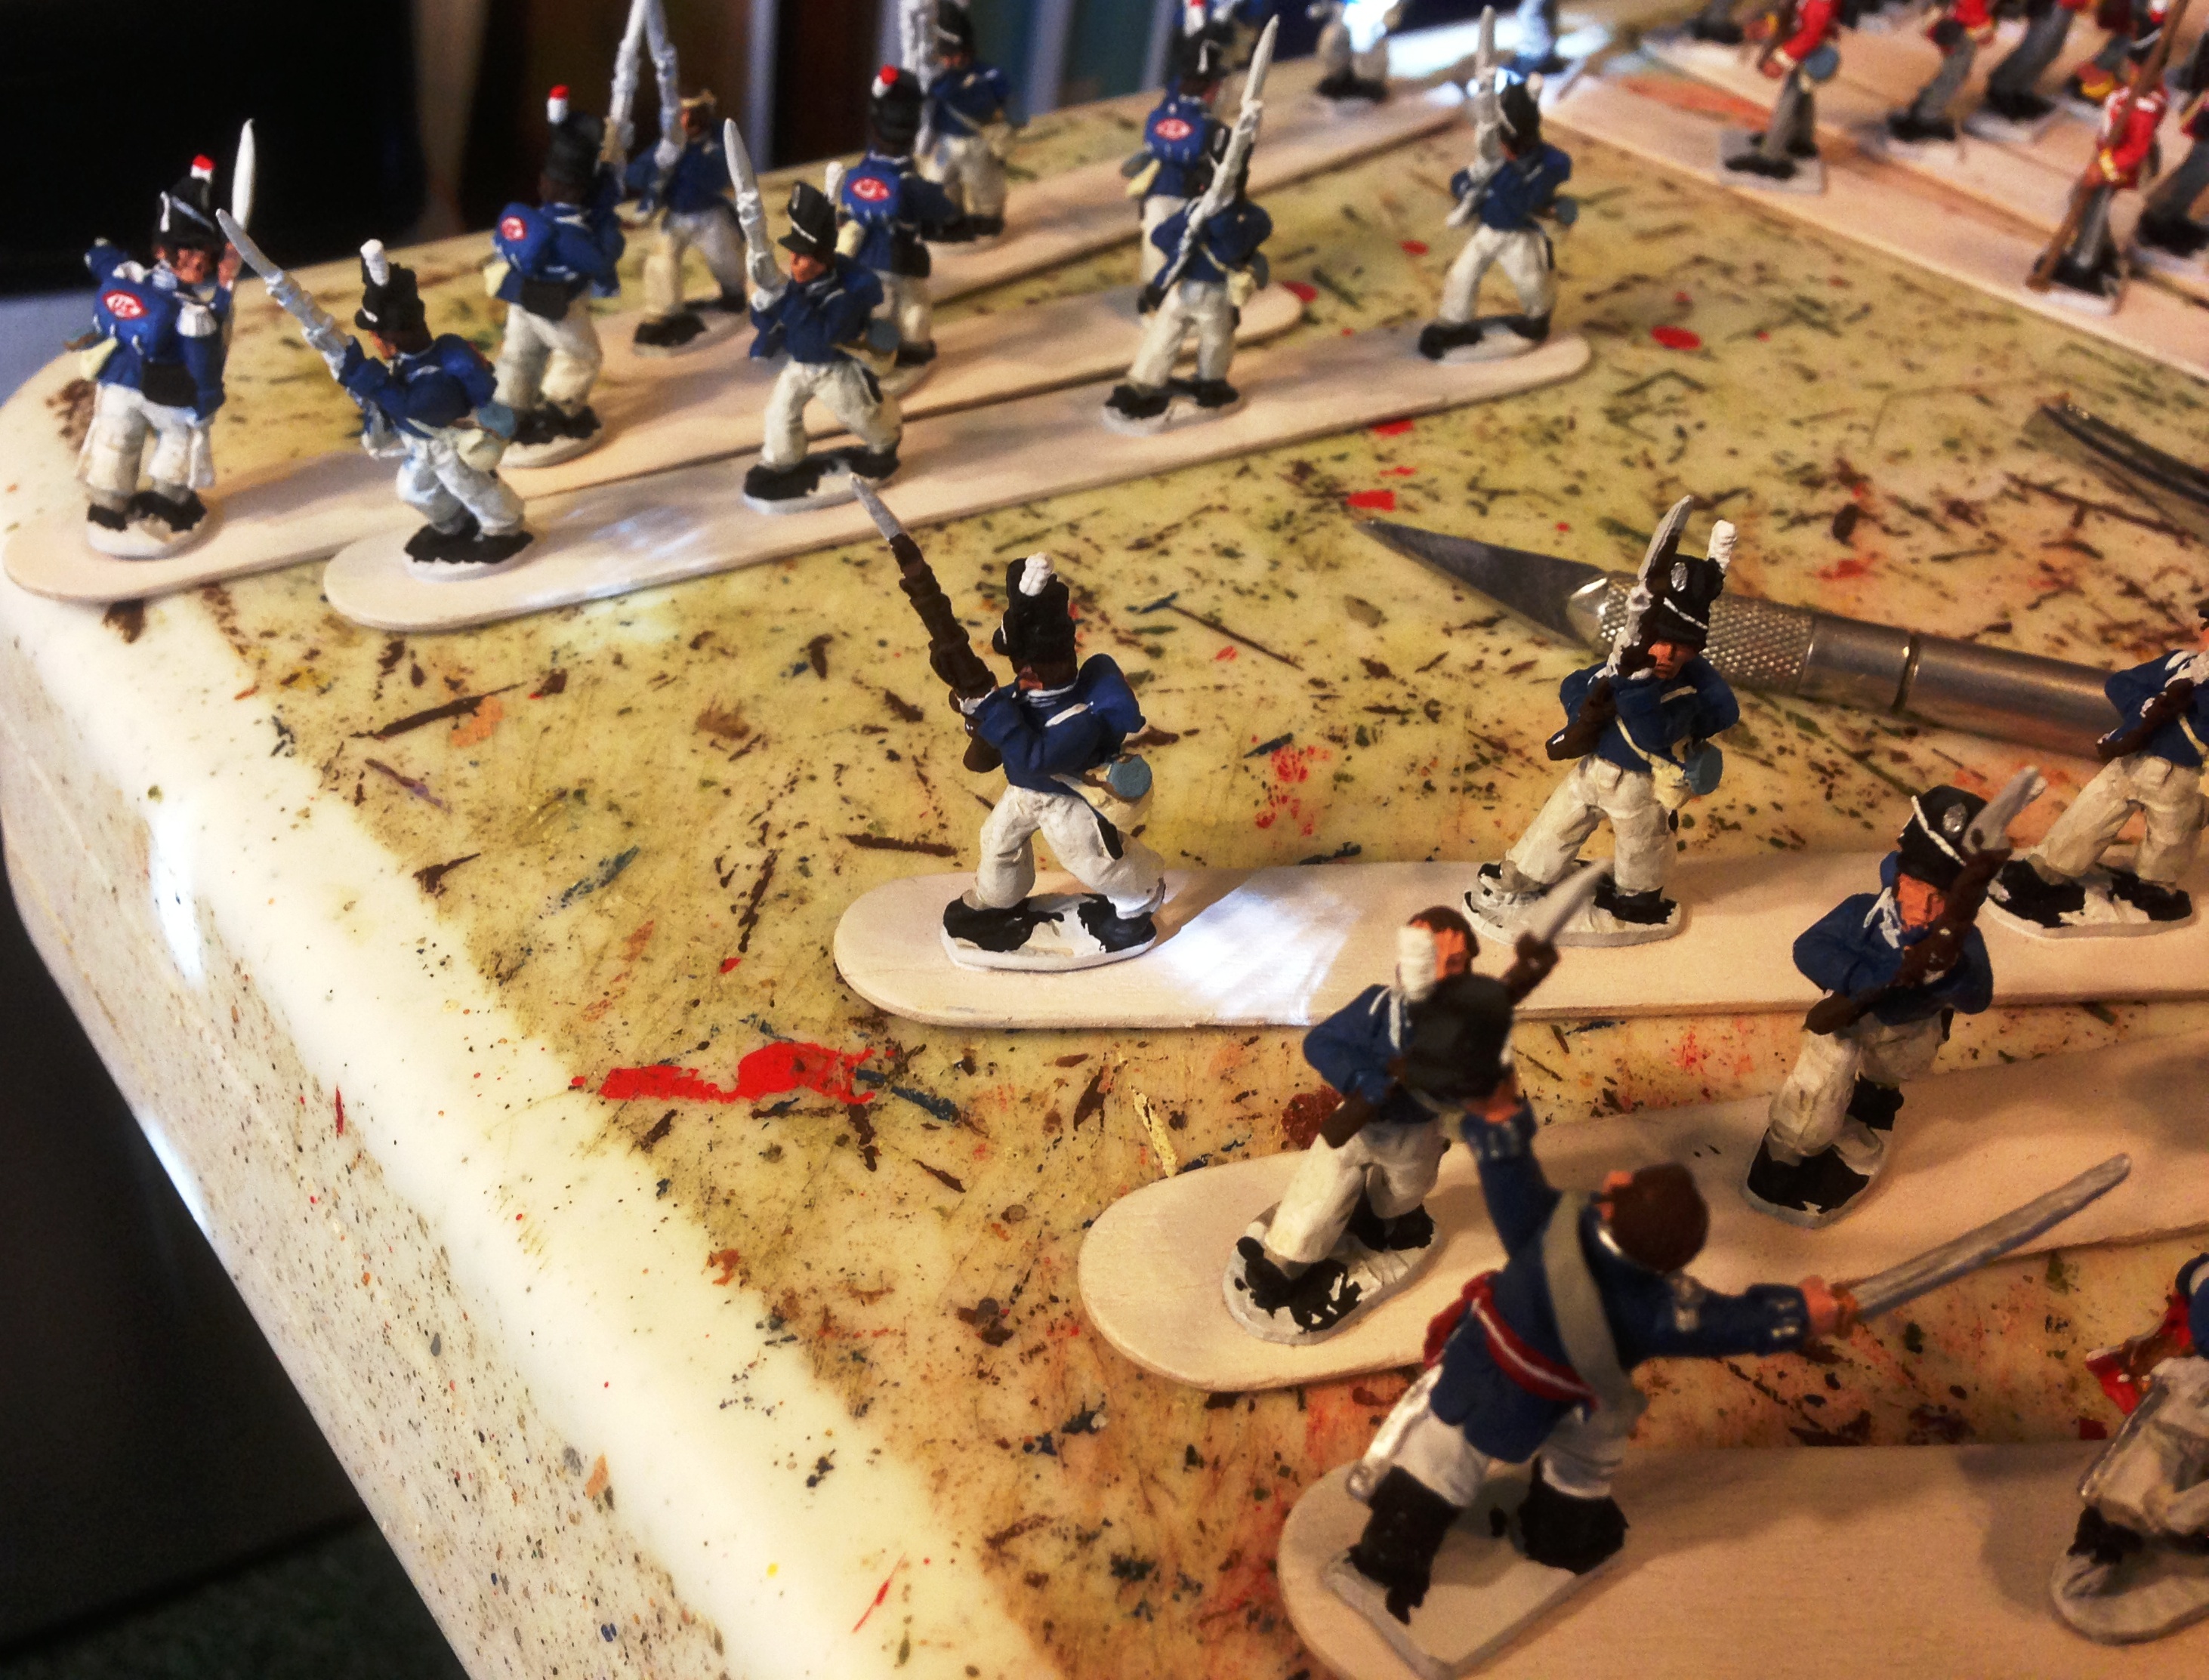
Scott's regulars are nearly finished.  I'll probably put an hour or so into painting them tonight, sick or not.

Scott’s regulars are nearly finished. I’ll probably put an hour or so into painting them tonight, sick or not.

On the positive side of all this, I’ve always wanted to do Bladensburg.  Sheer distance between Surrey and Puyallup makes it difficult to playtest it effectively sharing figs with Doug, and it’s a damn fiddly game if the British are to have a chance.  So I’m excited to have the whole kit and kaboodle under my own roof.  Needless to say, when, it’s all over I’ll have painted 225+ figures toward completing the project as well.

Fix Bayonets: Back to the Future

I love Fix Bayonets.  It’s a small gathering hosted by the Fort Steilacoom Historical Association (or something like that,) a preservation group aimed at keeping up the oldest buildings in Western Washington.  Each year Lawrence Bateman and Damond Crump host a modest gathering in one of the original fort buildings and we play a day’s worth of games for a modest entry fee that goes toward the many needs of the maintaining the site.  It’s a nice fundraiser for them and we certainly have a good time.

I was particularly looking forward to yesterday’s event, because I hoped to see an old friend there.  Scott Appleby recently joined the NHMGS Facebook page, and I had my fingers crossed he would be at this event.  I played Fire and Steel Napoleonics with Scott back in the 70’s and 80’s.  But as I gradually became more involved with NHMGS and took on different projects we lost touch.  I hadn’t seen him in twenty years.  So when he came to the event I was thrilled.  It made my day.  A semi-truck could have backed over my hydroplanes, and it still would have been a very good day.

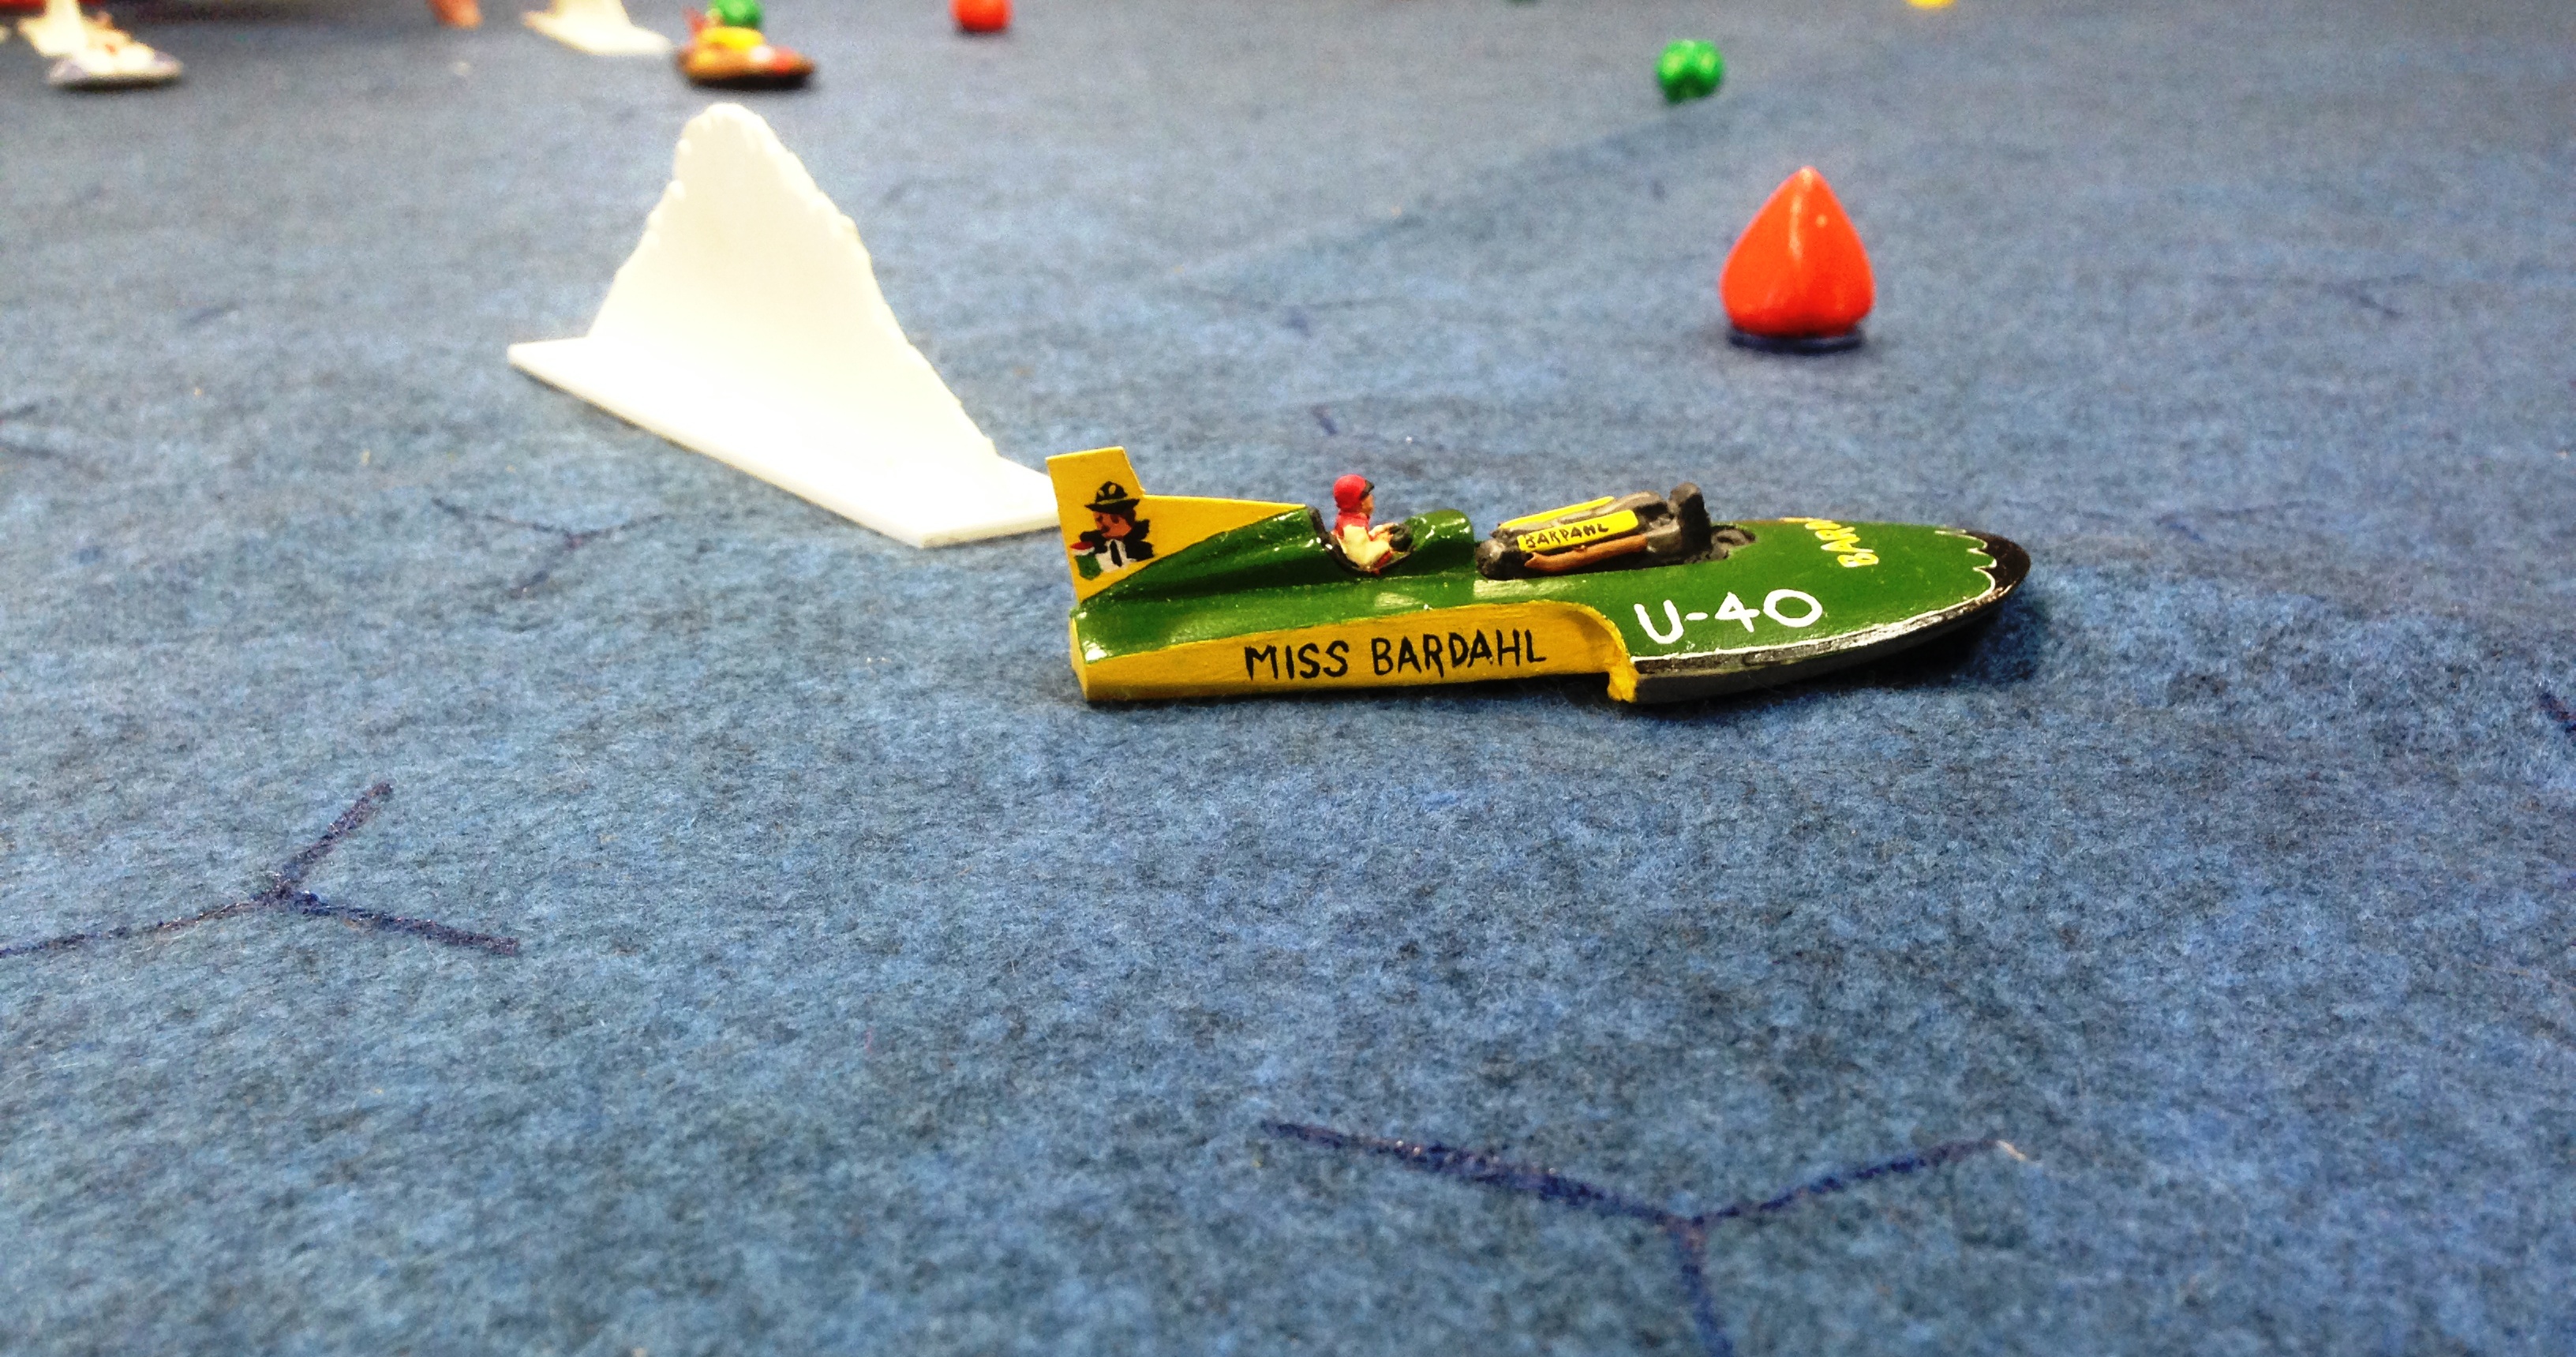
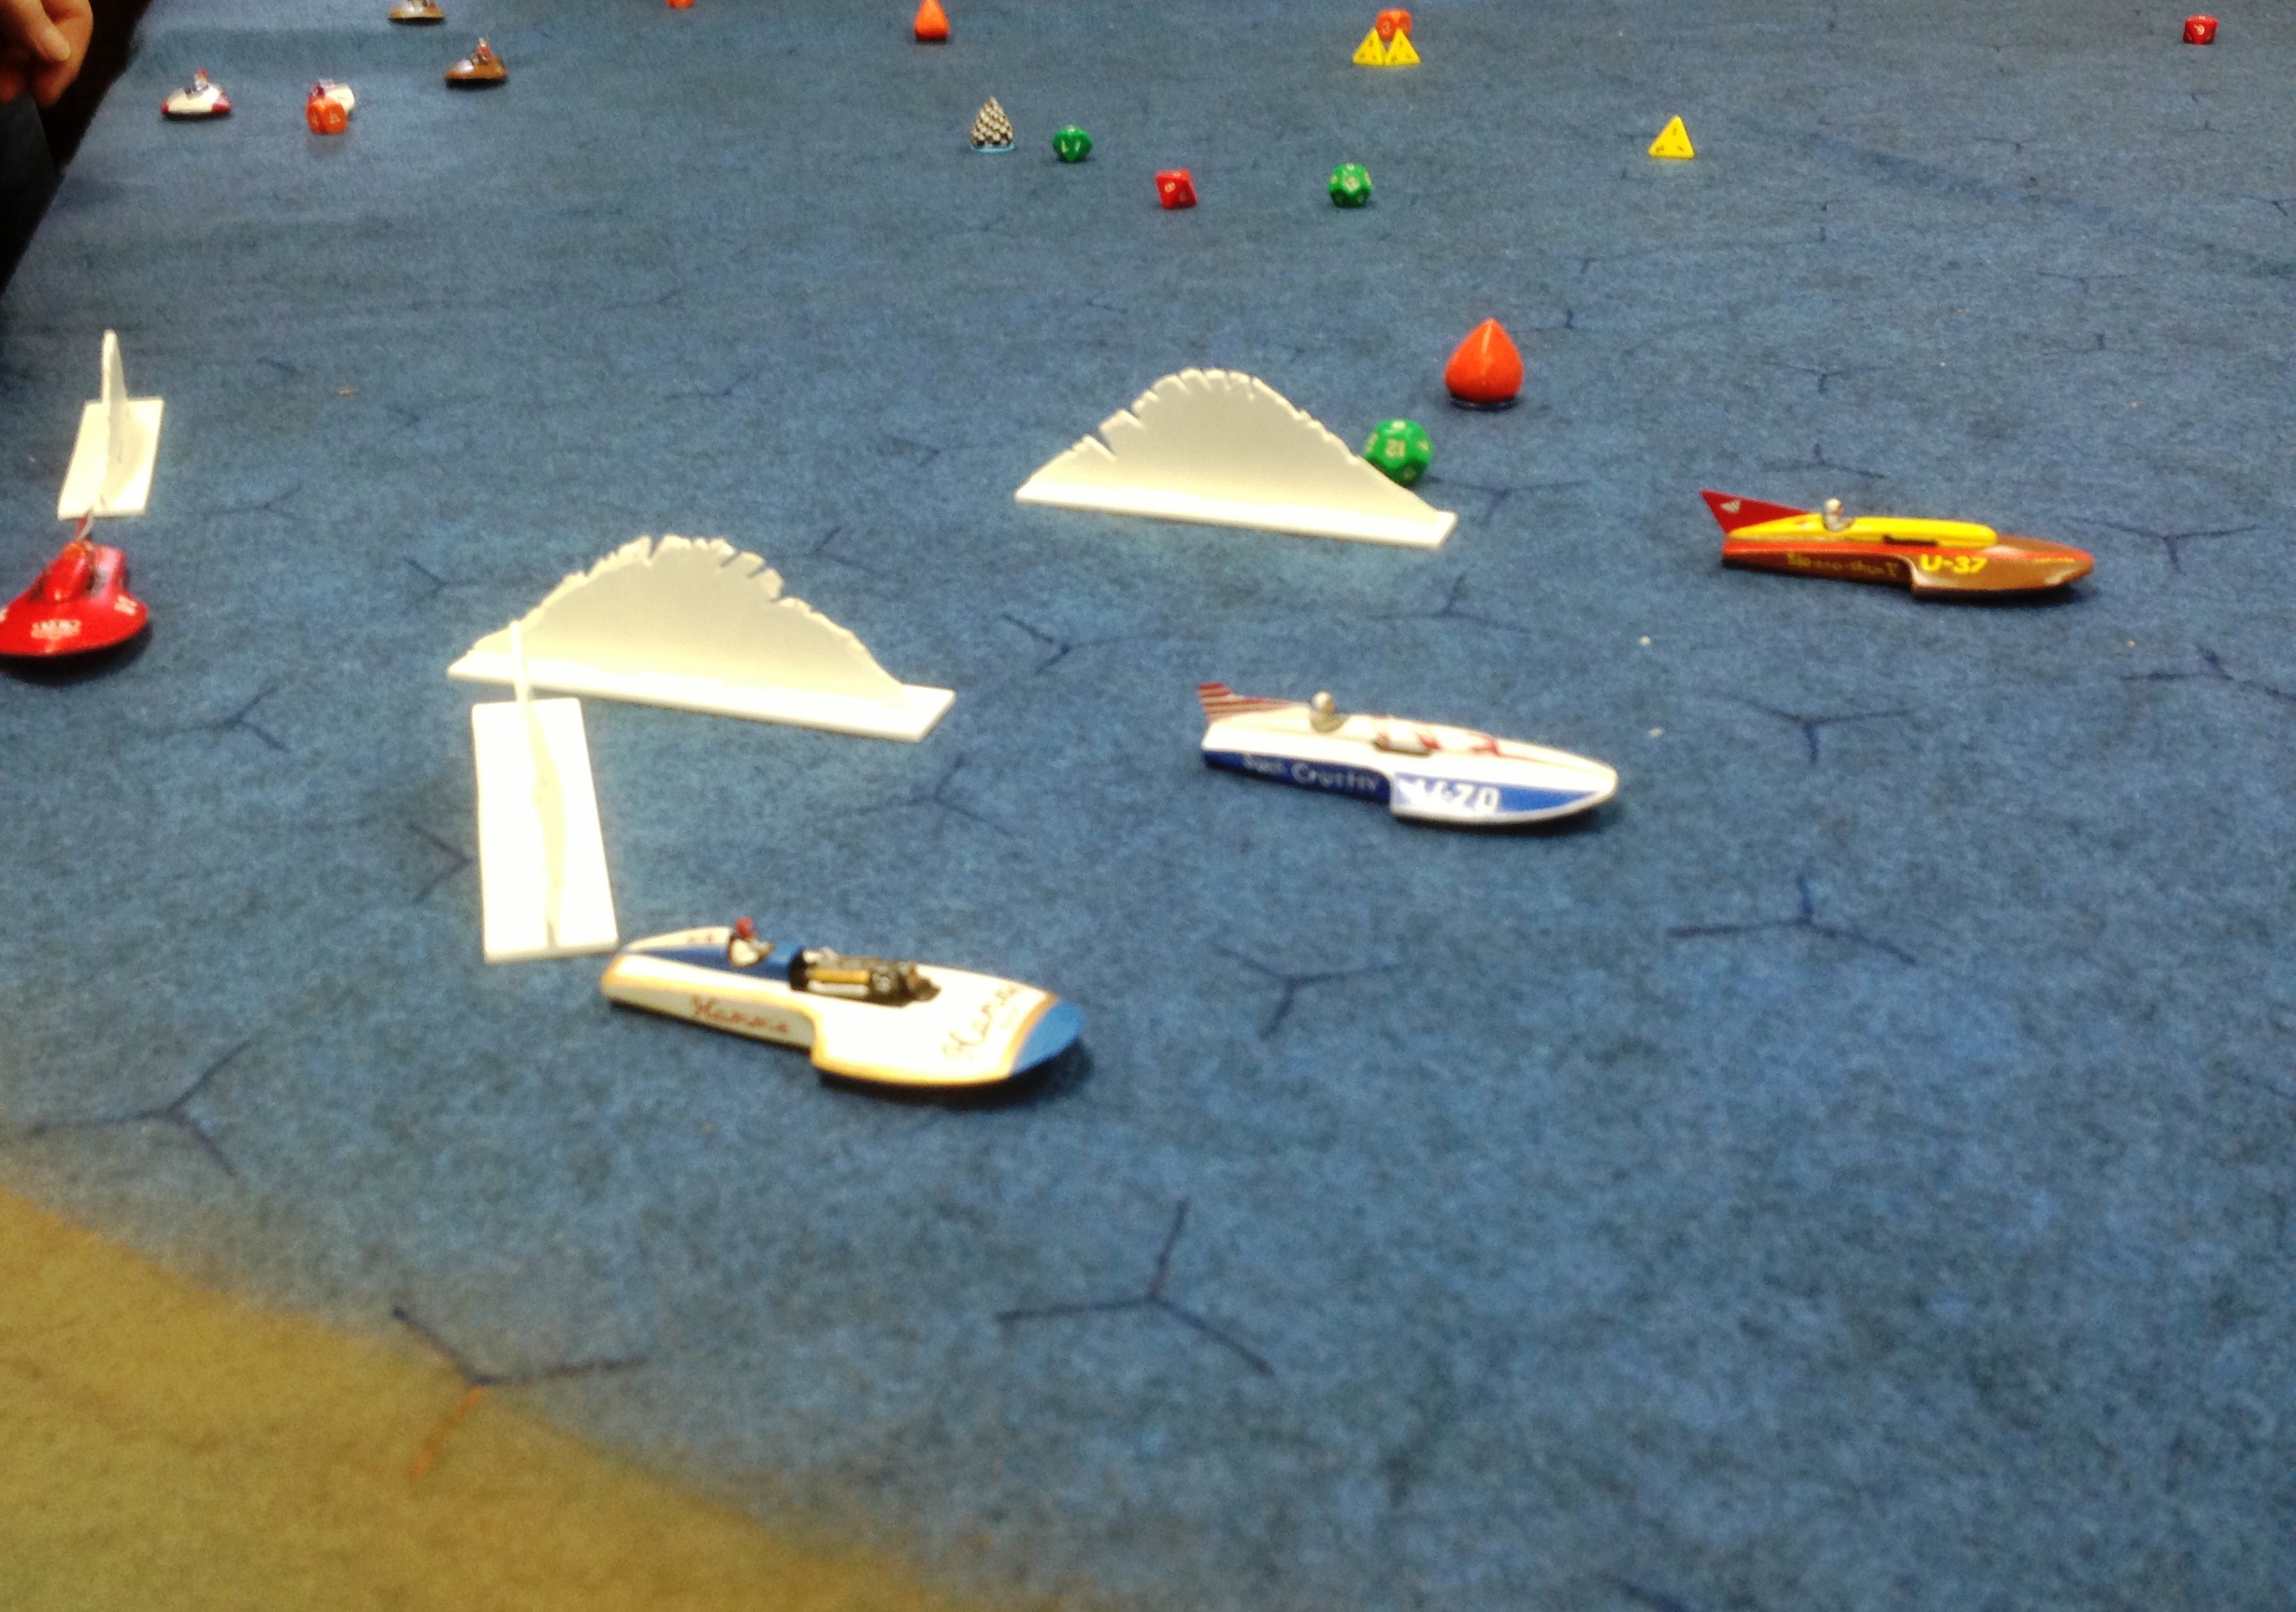
I ran a Thunderboats game in the morning period.  It’s a great game for gatherings like this because after the first twenty minutes it almost runs itself.  It was actually an exciting game because my friend Chris Bauermeister, who always has terrible die rolls in my games, had stupendously good die rolls.  He got off to an early lead in the Miss Bardahl that he never relinquished.  In fact it was never even that close.  Bill Vanderpool and Al Rivers both bought nitrous bottles, used them and both had some interesting moments with flames. There was lots of risk-taking, which makes for a fairly fun game.  I went through an entire deck of event cards-a first.  But, with a lot of risk taking goes a high attrition rate, and four boats did not finish.  Still a lot of fun, as Thunderboats usually is.

Chris Bauermeister rolled a twelve on a 12-sided die on turn one and never looked back.  Miss Bardahl won the race quite comfortably.

Chris Bauermeister rolled a twelve on a 12-sided die on turn one and never looked back. Miss Bardahl won the race quite comfortably.

A look at the also-rans coming into turn one.  Scott Appleby, racing Doug's Hamm's Beer boat didn't survive turn two.

A look at the also-rans coming into turn one. Scott Appleby, racing Doug’s Hamm’s Beer boat didn’t survive turn two.


There some other interesting looking games in the morning session. Scott Williams brought up his Galactic Knights game from Olympia.  Bruce Smith also ran a pre-dreadnought naval game.

We dashed down to Steilcoom to our favorite sandwich shoppe for lunch and I got to talk to Scott and some of the guys a bit longer.  Scott is also a teacher so we talked some shop, as well as about the Huskies.  So it was a good time.

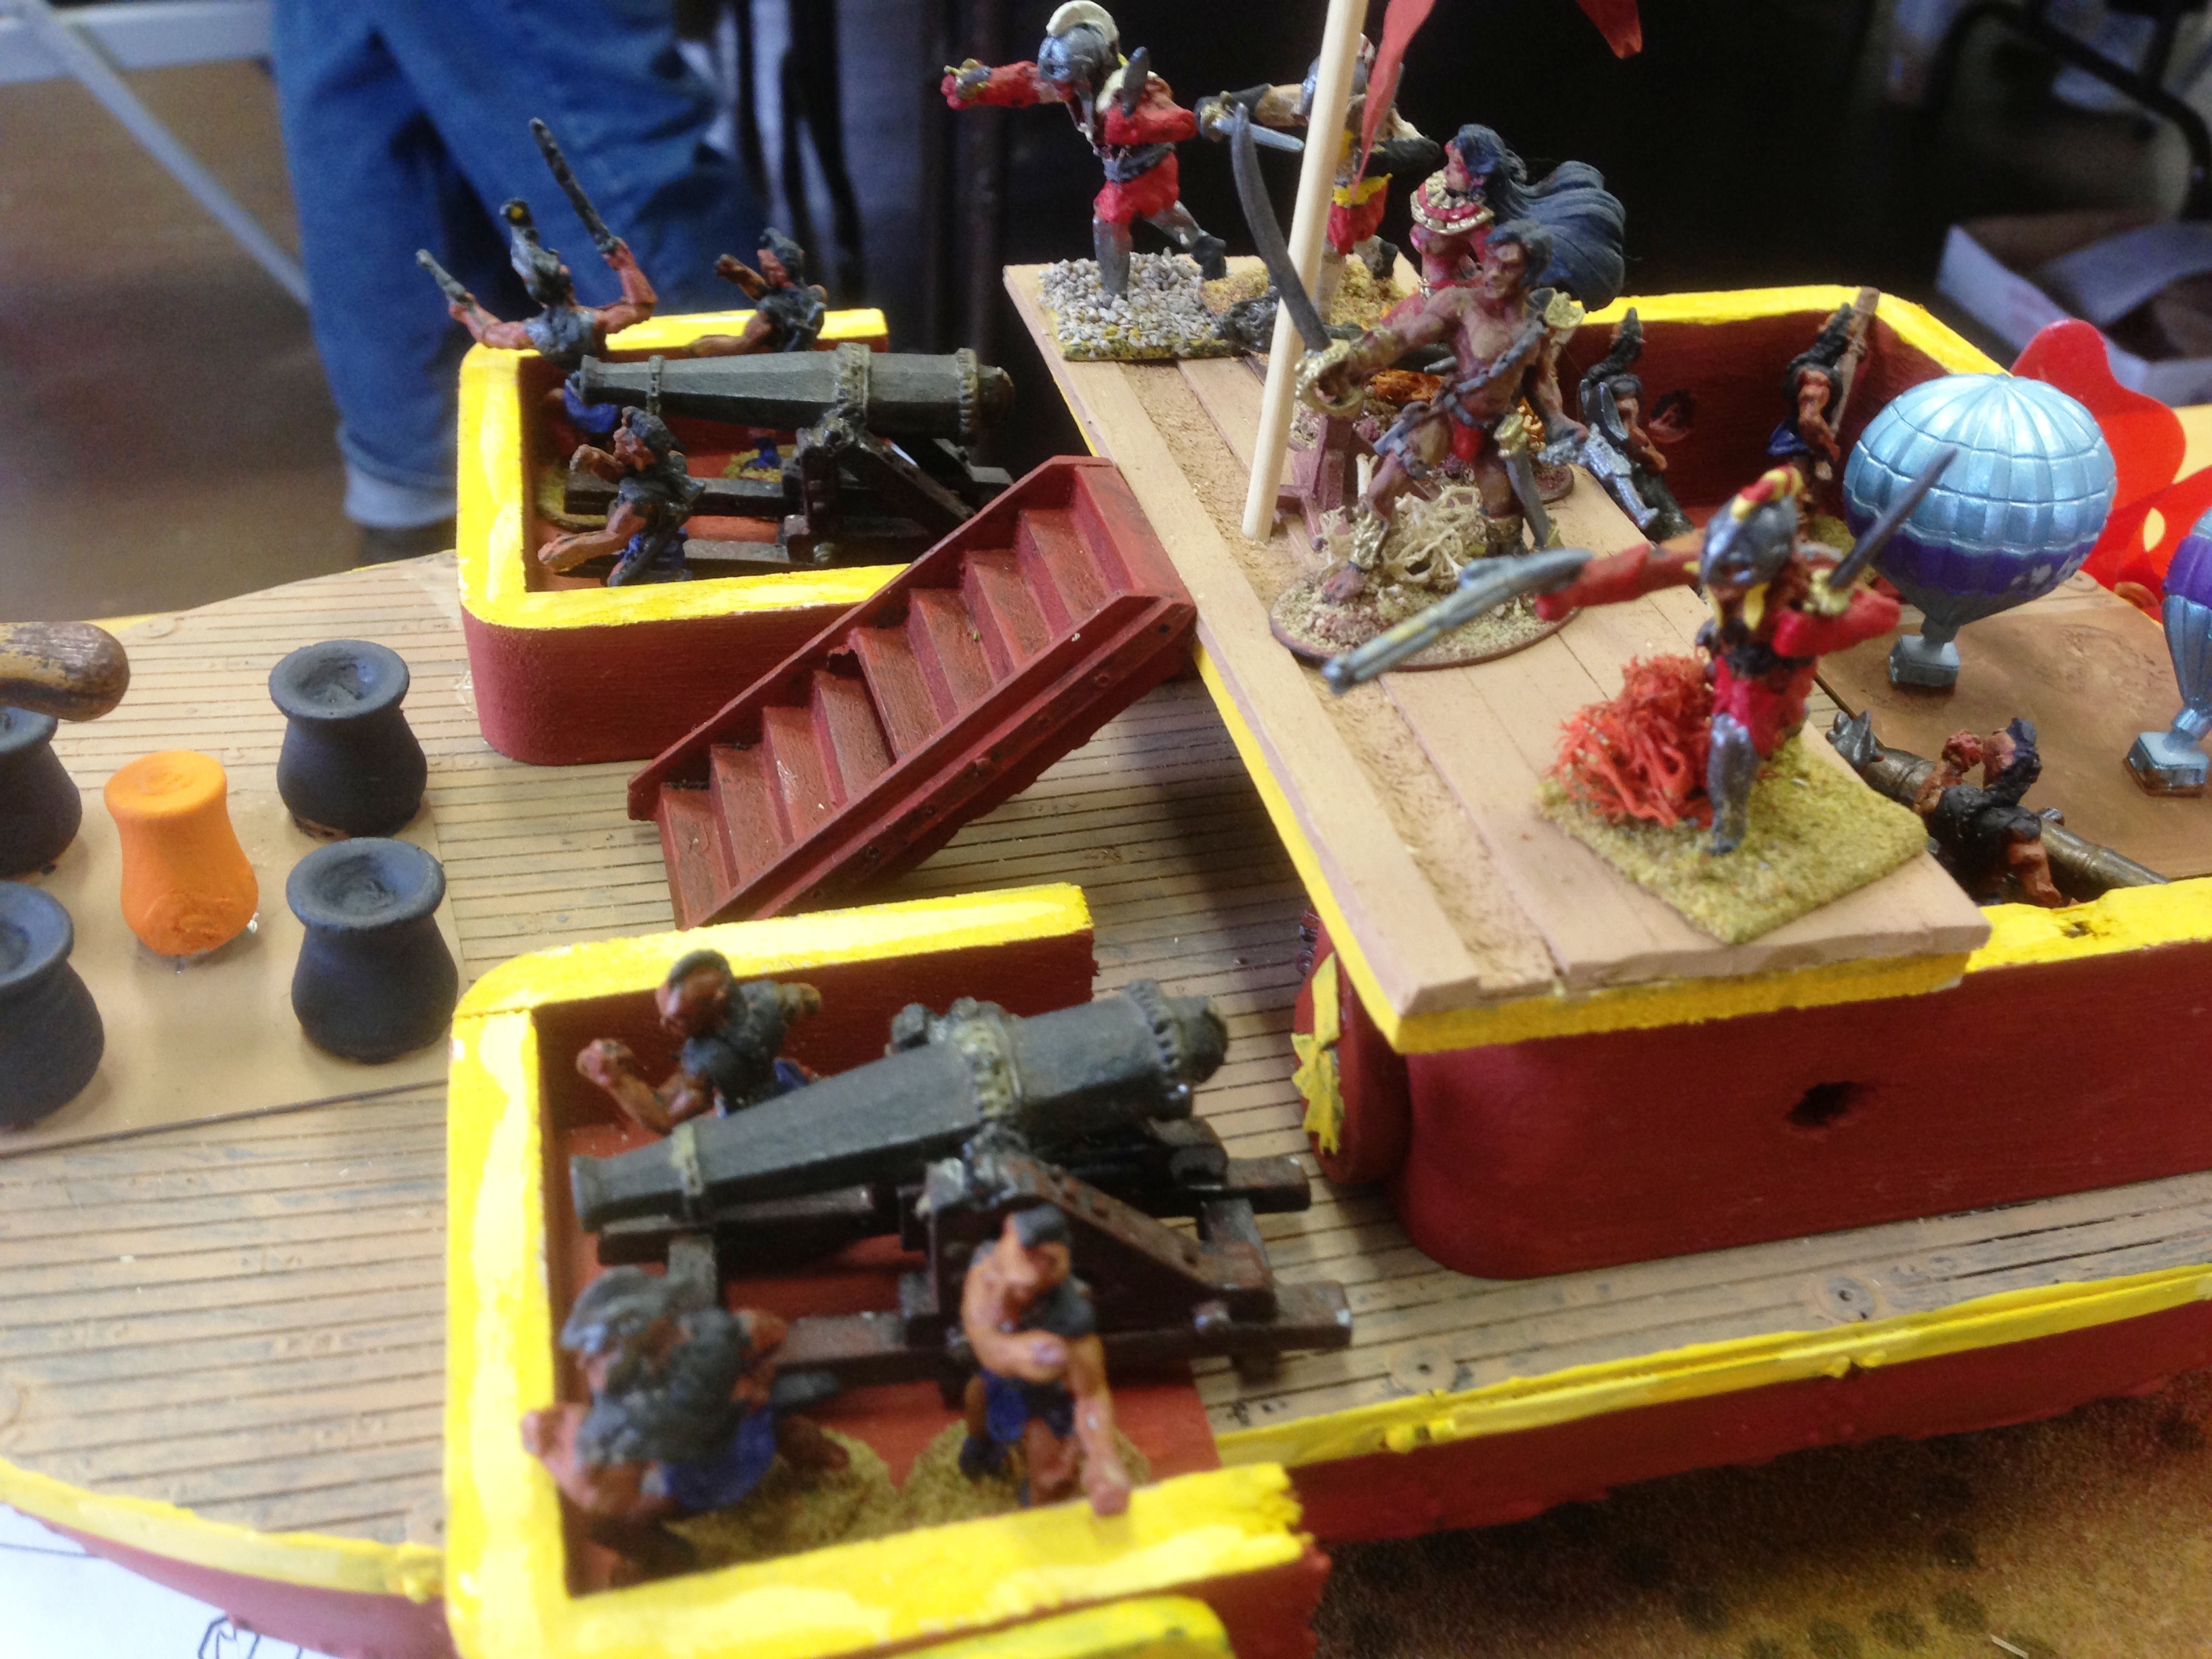
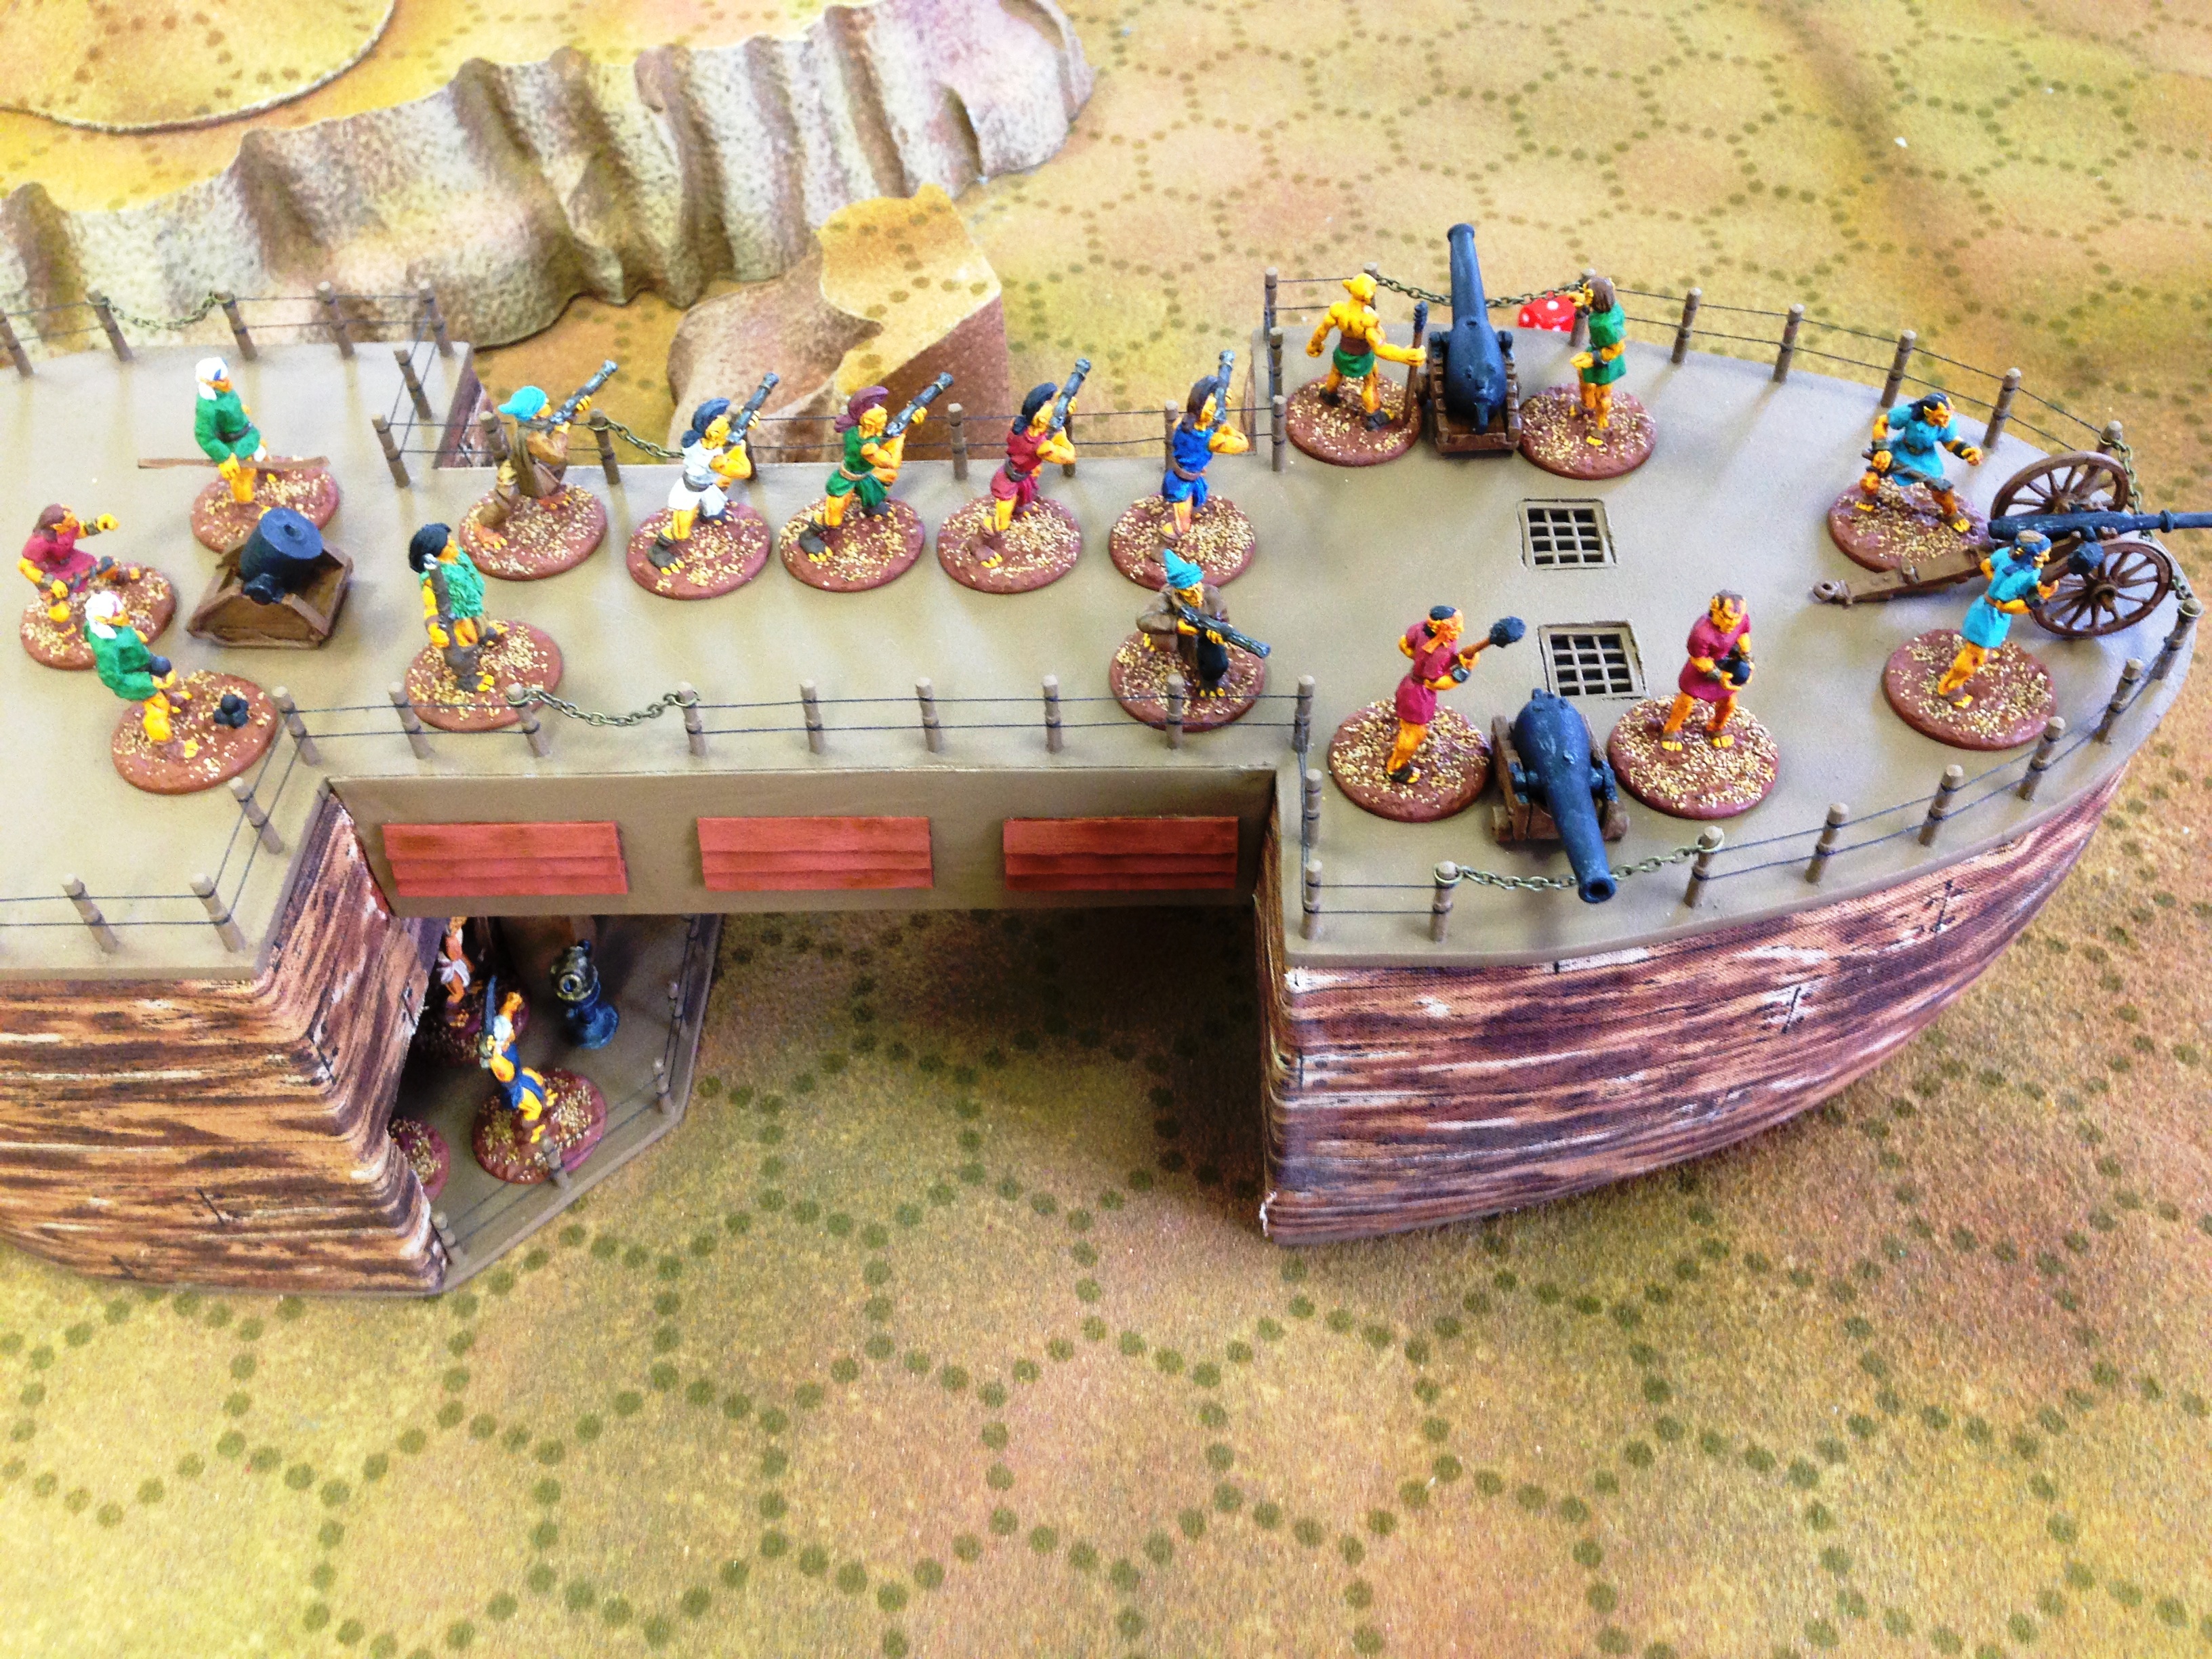
During the afternoon session I decided to play in Hugh Singh’s 28mm Sky Galleons of Mars game. I’m a sucker for SGoM, so it didn’t really take a lot to convince me to play.  Hugh converted  three Stonehouse Miniatures resin gunboats into flying vessels for Mars. He did a really nice job using some Houston’s Guns  and crew for the armament, as well as using some interesting bits for Martian tether mines and fire pots.  Very nice and very serviceable.

Hugh Sing's Austrian gunboat was quite a death dealer at Fix Bayonets

Hugh Sing’s Austrian gunboat was quite a death dealer at Fix Bayonets


I really liked the touches on Hugh's Martian sky galley.  The firepots fore and the tether mines aft are quite nice.

I really liked the touches on Hugh’s Martian sky galley. The firepots fore and the tether mines aft are quite nice.


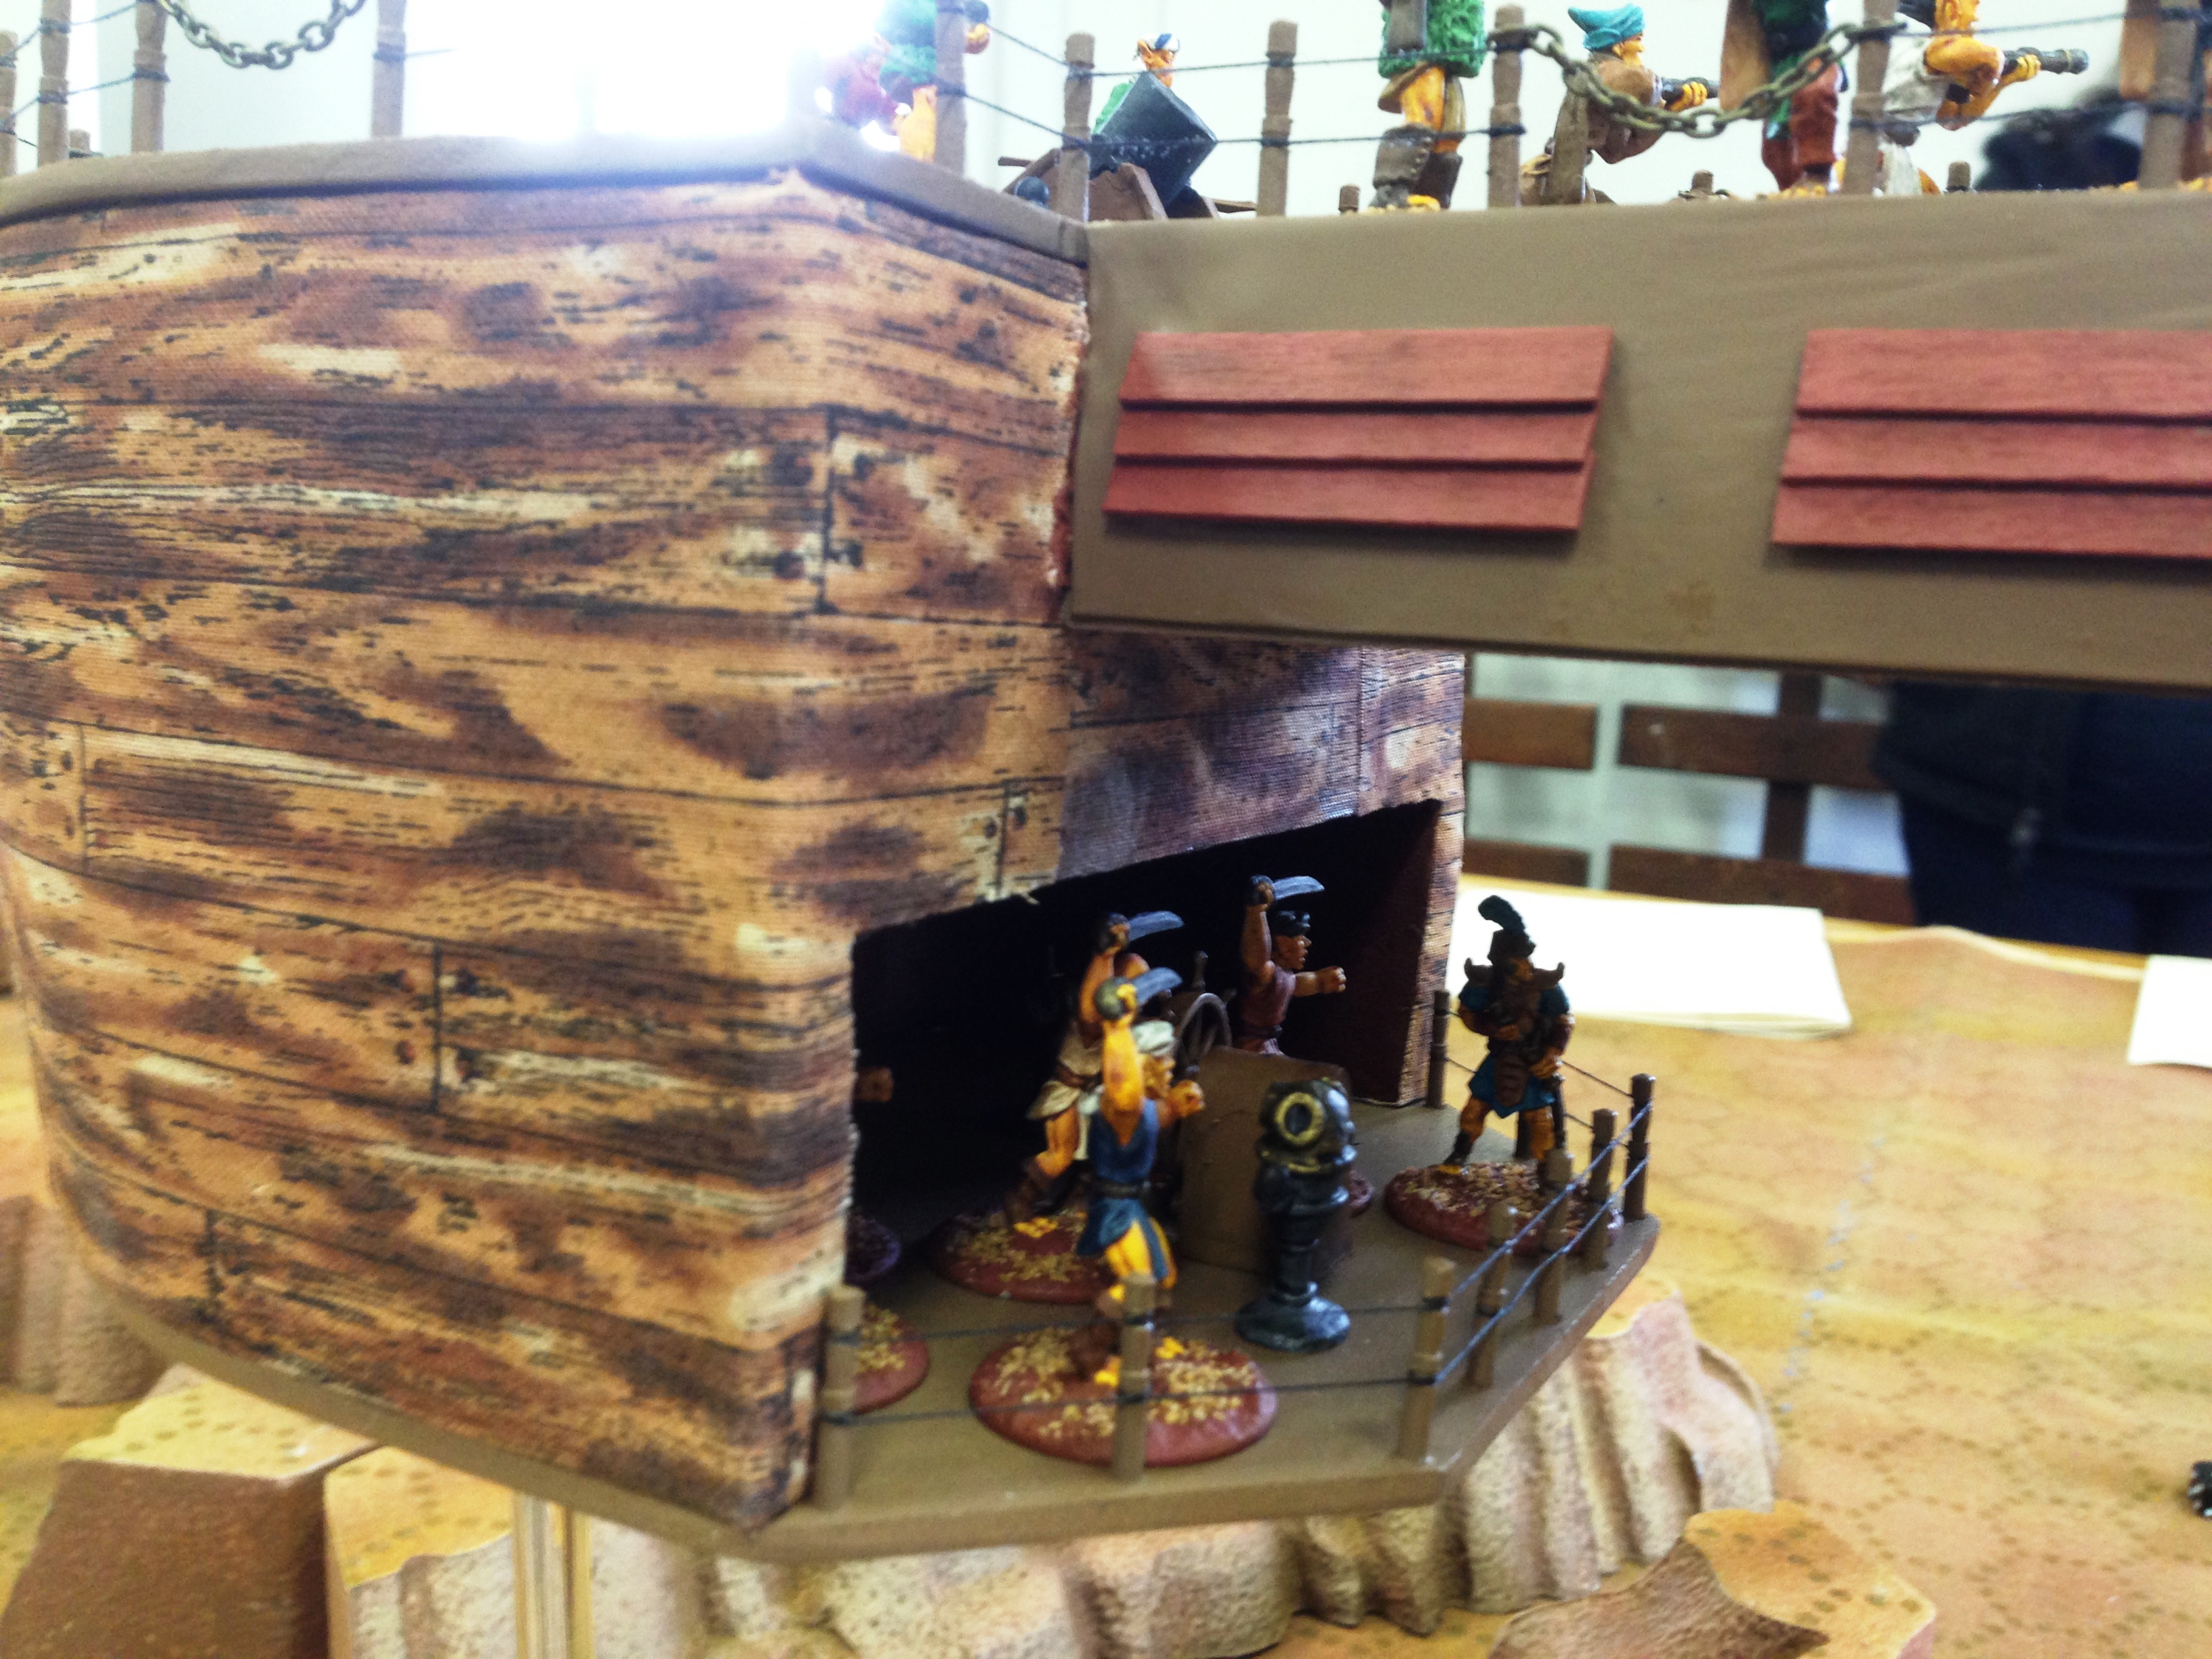
Gene Anderson brought up his vessel from Centralia, a gorgeous (and huge) Endtime screw galley.  Gene constructed the deck and skeleton from plans and covered the hull with planking fabric and coated it with liquid starch.  It looked amazing, and takes its place alongside Mark Waddington’s Aphid and Ranger as examples of superb modeling.

Gene Anderson's Endtime gunboat is an exquisite model.  Constructed using fabric coated with liquid starch, Gene was able to achieve the unique shape of the most common Martian ship.

Gene Anderson’s Endtime gunboat is an exquisite model. Constructed using fabric coated with liquid starch, Gene was able to achieve the unique shape of the most common Martian ship.

The nicest touch to the Endtime model is Gene's creation of the bridge in the lower hull.  Great work Gene.

The nicest touch to the Endtime model is Gene’s creation of the bridge in the lower hull. Great work Gene.


Unfortunately bad things often happen when a single Martian vessel takes on an Earth gunboat.  I commanded Hugh’s Austrian gunboat with two long 4″ guns.  It was fast enough to keep the bigger Martian craft from closing and with superior firepower, slowly began to pound the Endtime to pieces.  When we decided to call the game, the screw galley lost all but one of its guns and the crew was about 50%.  It was having difficulty maintaining altitude, and with about a third of its turncranks dead, was half the speed of my vessel.  I took only slight damage to my hull and crew.

Word is out that there are plans for a big 28mm Sky Galleons game at Enfilade. That would be pretty to see, but we sure need to plan how to run it. That will require quite a bit of room.

There were some other great games in the afternoon period too.  Chris B. hosted a Cold War armor battle.  Bruce ran a big Korea vs. Japan ancients game with some pretty smooth looking rules. Paul Grandstaff hosted a Check Your Six game.  Bruce Smith ran a very cool looking post-apocalyptic game in a very trashed city.

Everyone seemed to have a good time, and the organizers were pretty happy with the support.  It was an early in, early out kind of day, and I was able to be home by 3:30 to see most of the Huskies game.

The Ol’ Perfesser Explains His Project

One of my projects is the hypothetical conflict between the United States and Spain.  No, not the Spanish American War of 1898, the one that didn’t get fought between say 1795-1810.  Yes, I know, no blood was shed in this conflict, but it could have and nearly was on several occasions.  I shared this project on my old Blogger site (God rest its soul, and thank you Google,) but I took a break from it last year as I focused on other things.  However, as Bladensburg begins to wrap up and I can look forward to other plans, I am drawn back to this project.  I envision this post as one of several that explains a bit about this period, and my thinking around it as potential games using miniatures from the era, so bear with me.  But if you see something interesting here, or have some ideas of your own, let me know.  I’d love to hear about it.

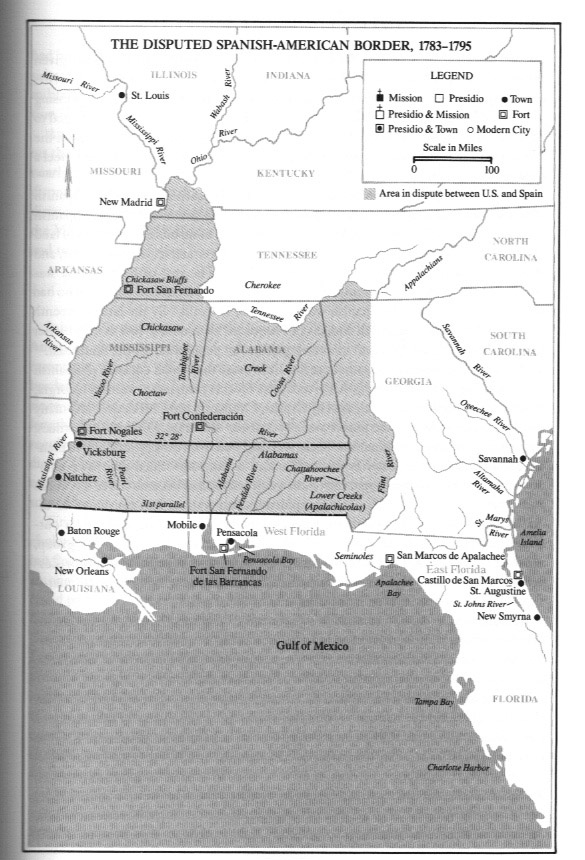
We all know the British, by the terms of the Treaty of Paris that ended the American Revolution ceded its territory south of the Canadas and west to the Mississippi River to the United States.  Unfortunately, that did not include all of the territory on the east side of the Mississippi.  There was still some prime real estate that remained in the hands of that sometime American ally, Spain.  The fortress of Pensacola, the excellent harbor of Mobile, and the real gem, New Orleans, were all controlled by Imperial Spain.

This map shows the disputed territory between the U.S. and Spain 1783-1795.  Map from The Spanish Frontier in North America by David Weber.

This map shows the disputed territory between the U.S. and Spain 1783-1795. Map from The Spanish Frontier in North America by David Weber.

By 1783 the Spanish Empire was more than a little bit rickety.  Unable to compete economically with France and Great Britain, many of the Spanish settlements in the borderlands were weak, and barely able to defend themselves against aggressive Native American tribes such as the Apaches and Comanches.  Spaniards were always a minority in their own provinces, had difficulty attracting settlers, and lacked the resources to entice colonists or adequately maintain defenses.  Though a series of reforms in the 1780’s allowed the Spanish to make peace with their native neighbors, by the late 1790’s the United States, having won their own peace with their northern native enemies, was knocking on the door of the Spanish borderlands.  Lacking a large professional army, Americans frontiersmen frequently penetrated and settled Spain’s frontier, challenging Spanish authority and threatening Spanish rule.

Though the Paris peace of 1783 awarded Spain, as a victorious American ally, the key strongpoint of Pensacola, as well as East and West Forida, they persisted in claims of land in upper Alabama and Mississippi. American settlement and economic development, well beyond the subsistence level in the Ohio River valley, required getting goods to market through Spanish New Orleans. It made that port city a target for war cries from the new west.  Historical face offs at places like Nacogadoches, Natchitoches, and the Burr plot to seize New Orleans, Louisiana and Mexico itself make a hypothetical conflict with Spain seem less like a historical maybe, and more a miracle war didn’t actually happen. Though Spain gradually retreated from its borderlands through a series of diplomatic negotiations until Mexico’s independence finally put an end to Spanish rule in America in 1821, a potential conflict with the United States makes for interesting game possibilities.

The Bladensburg Report: Three down, three to go

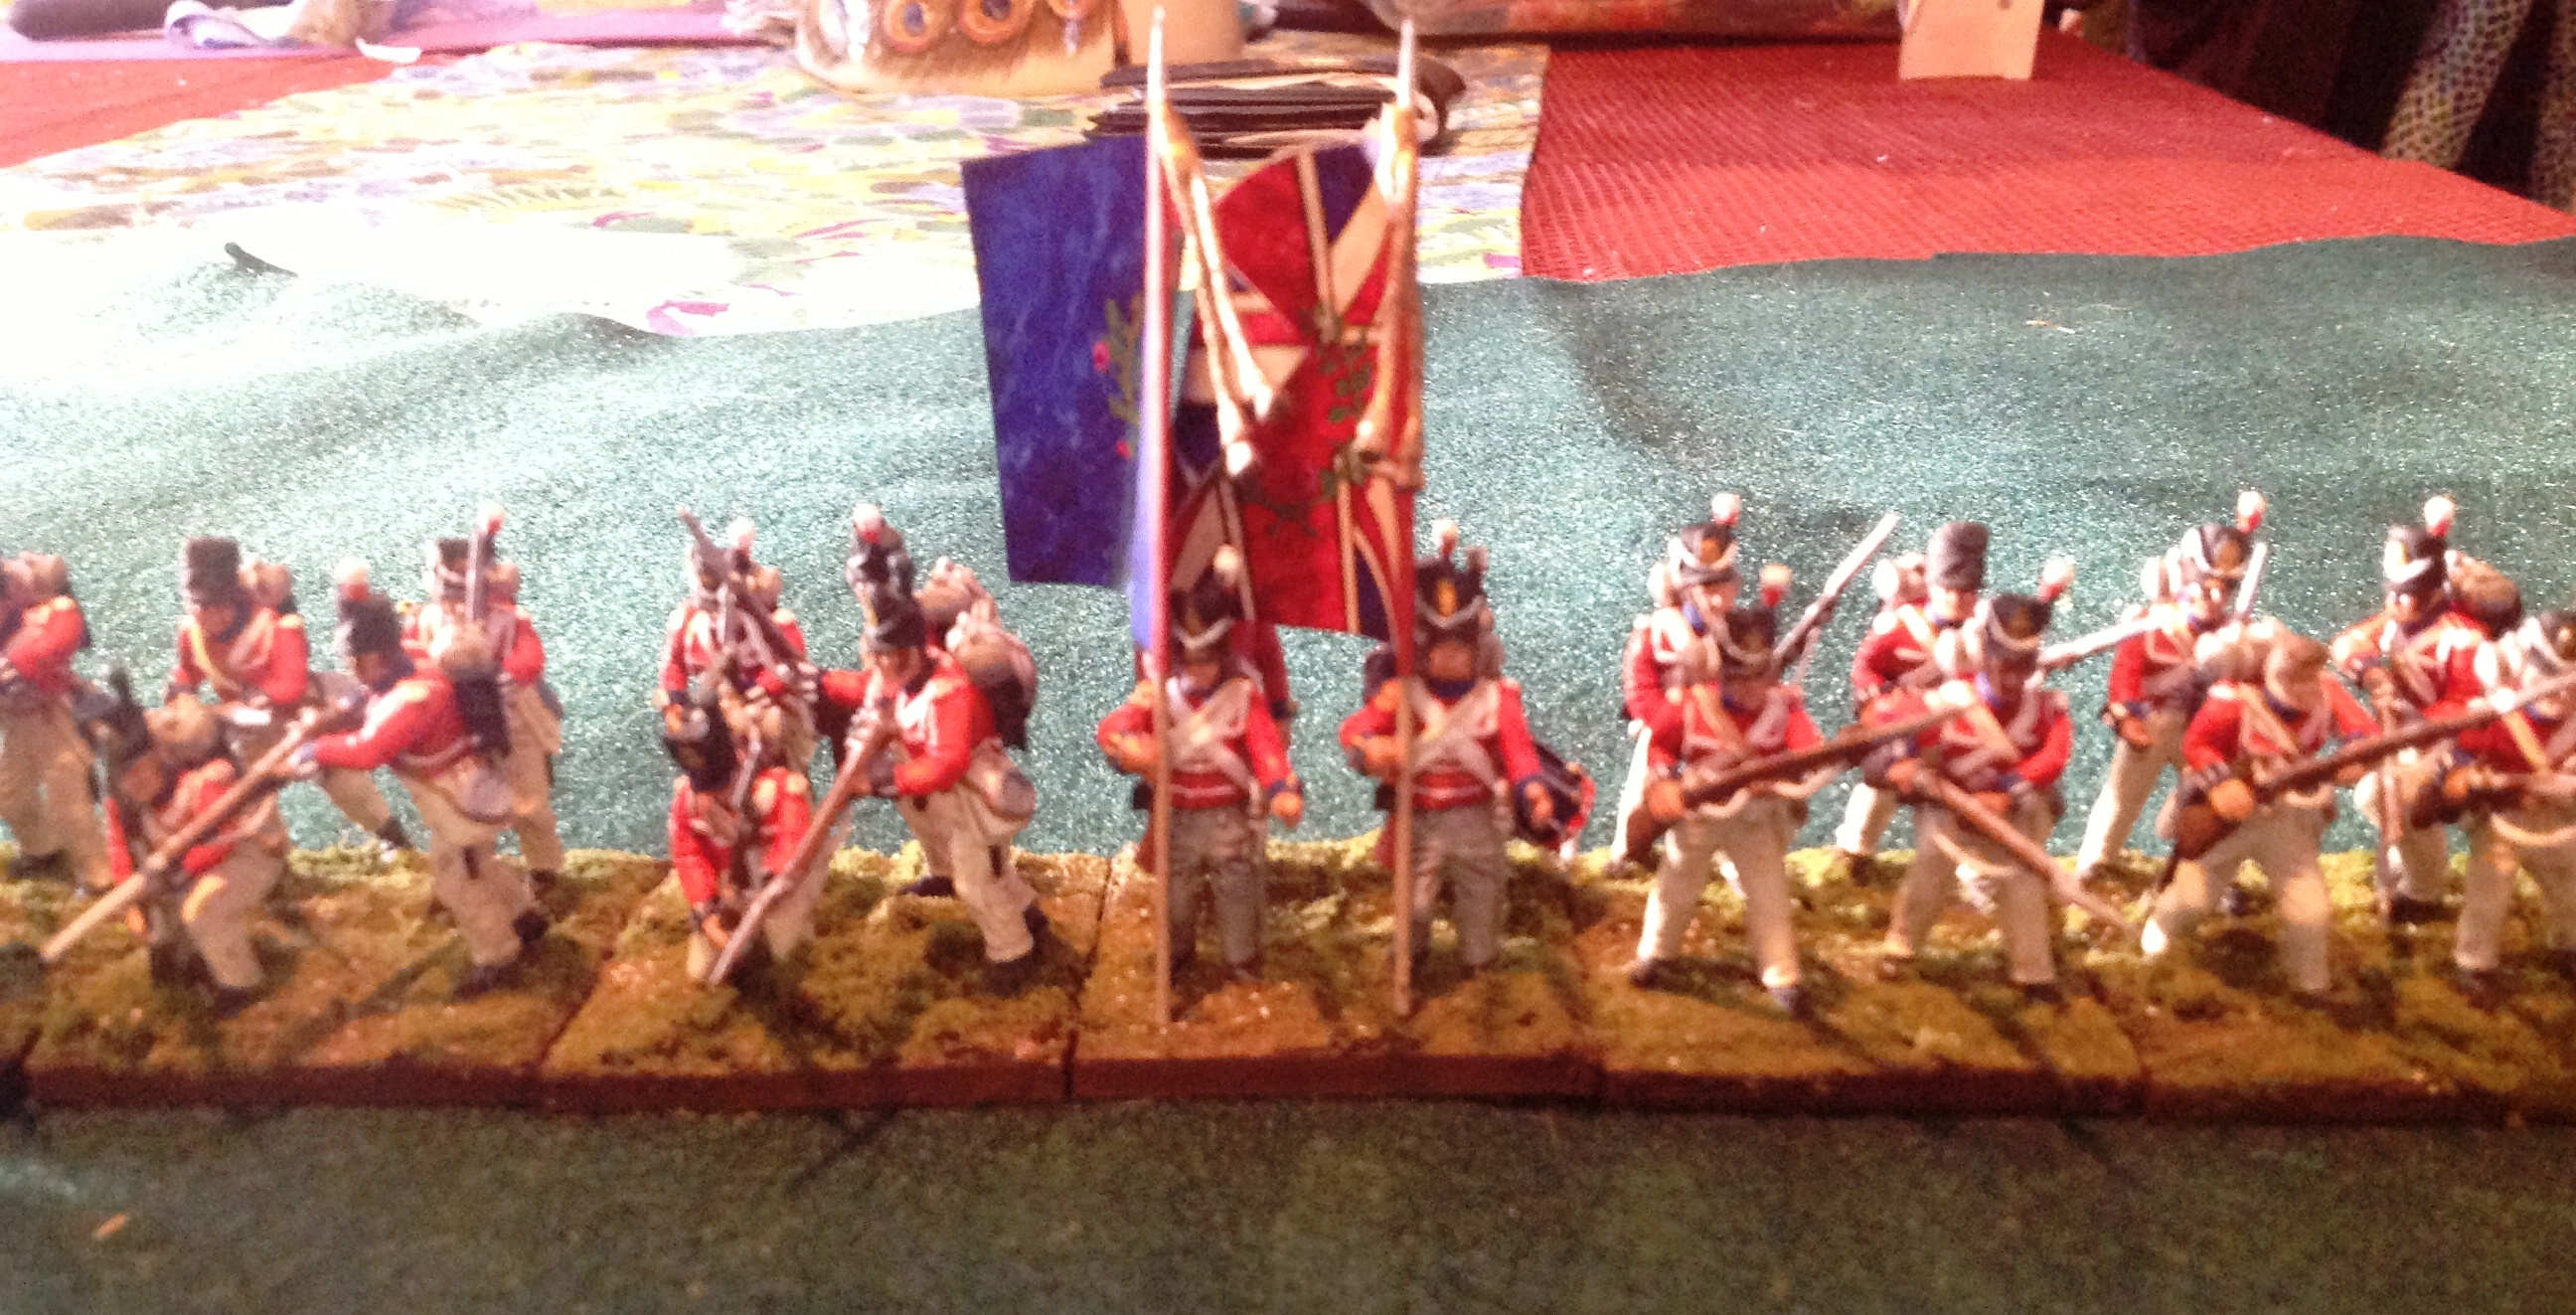
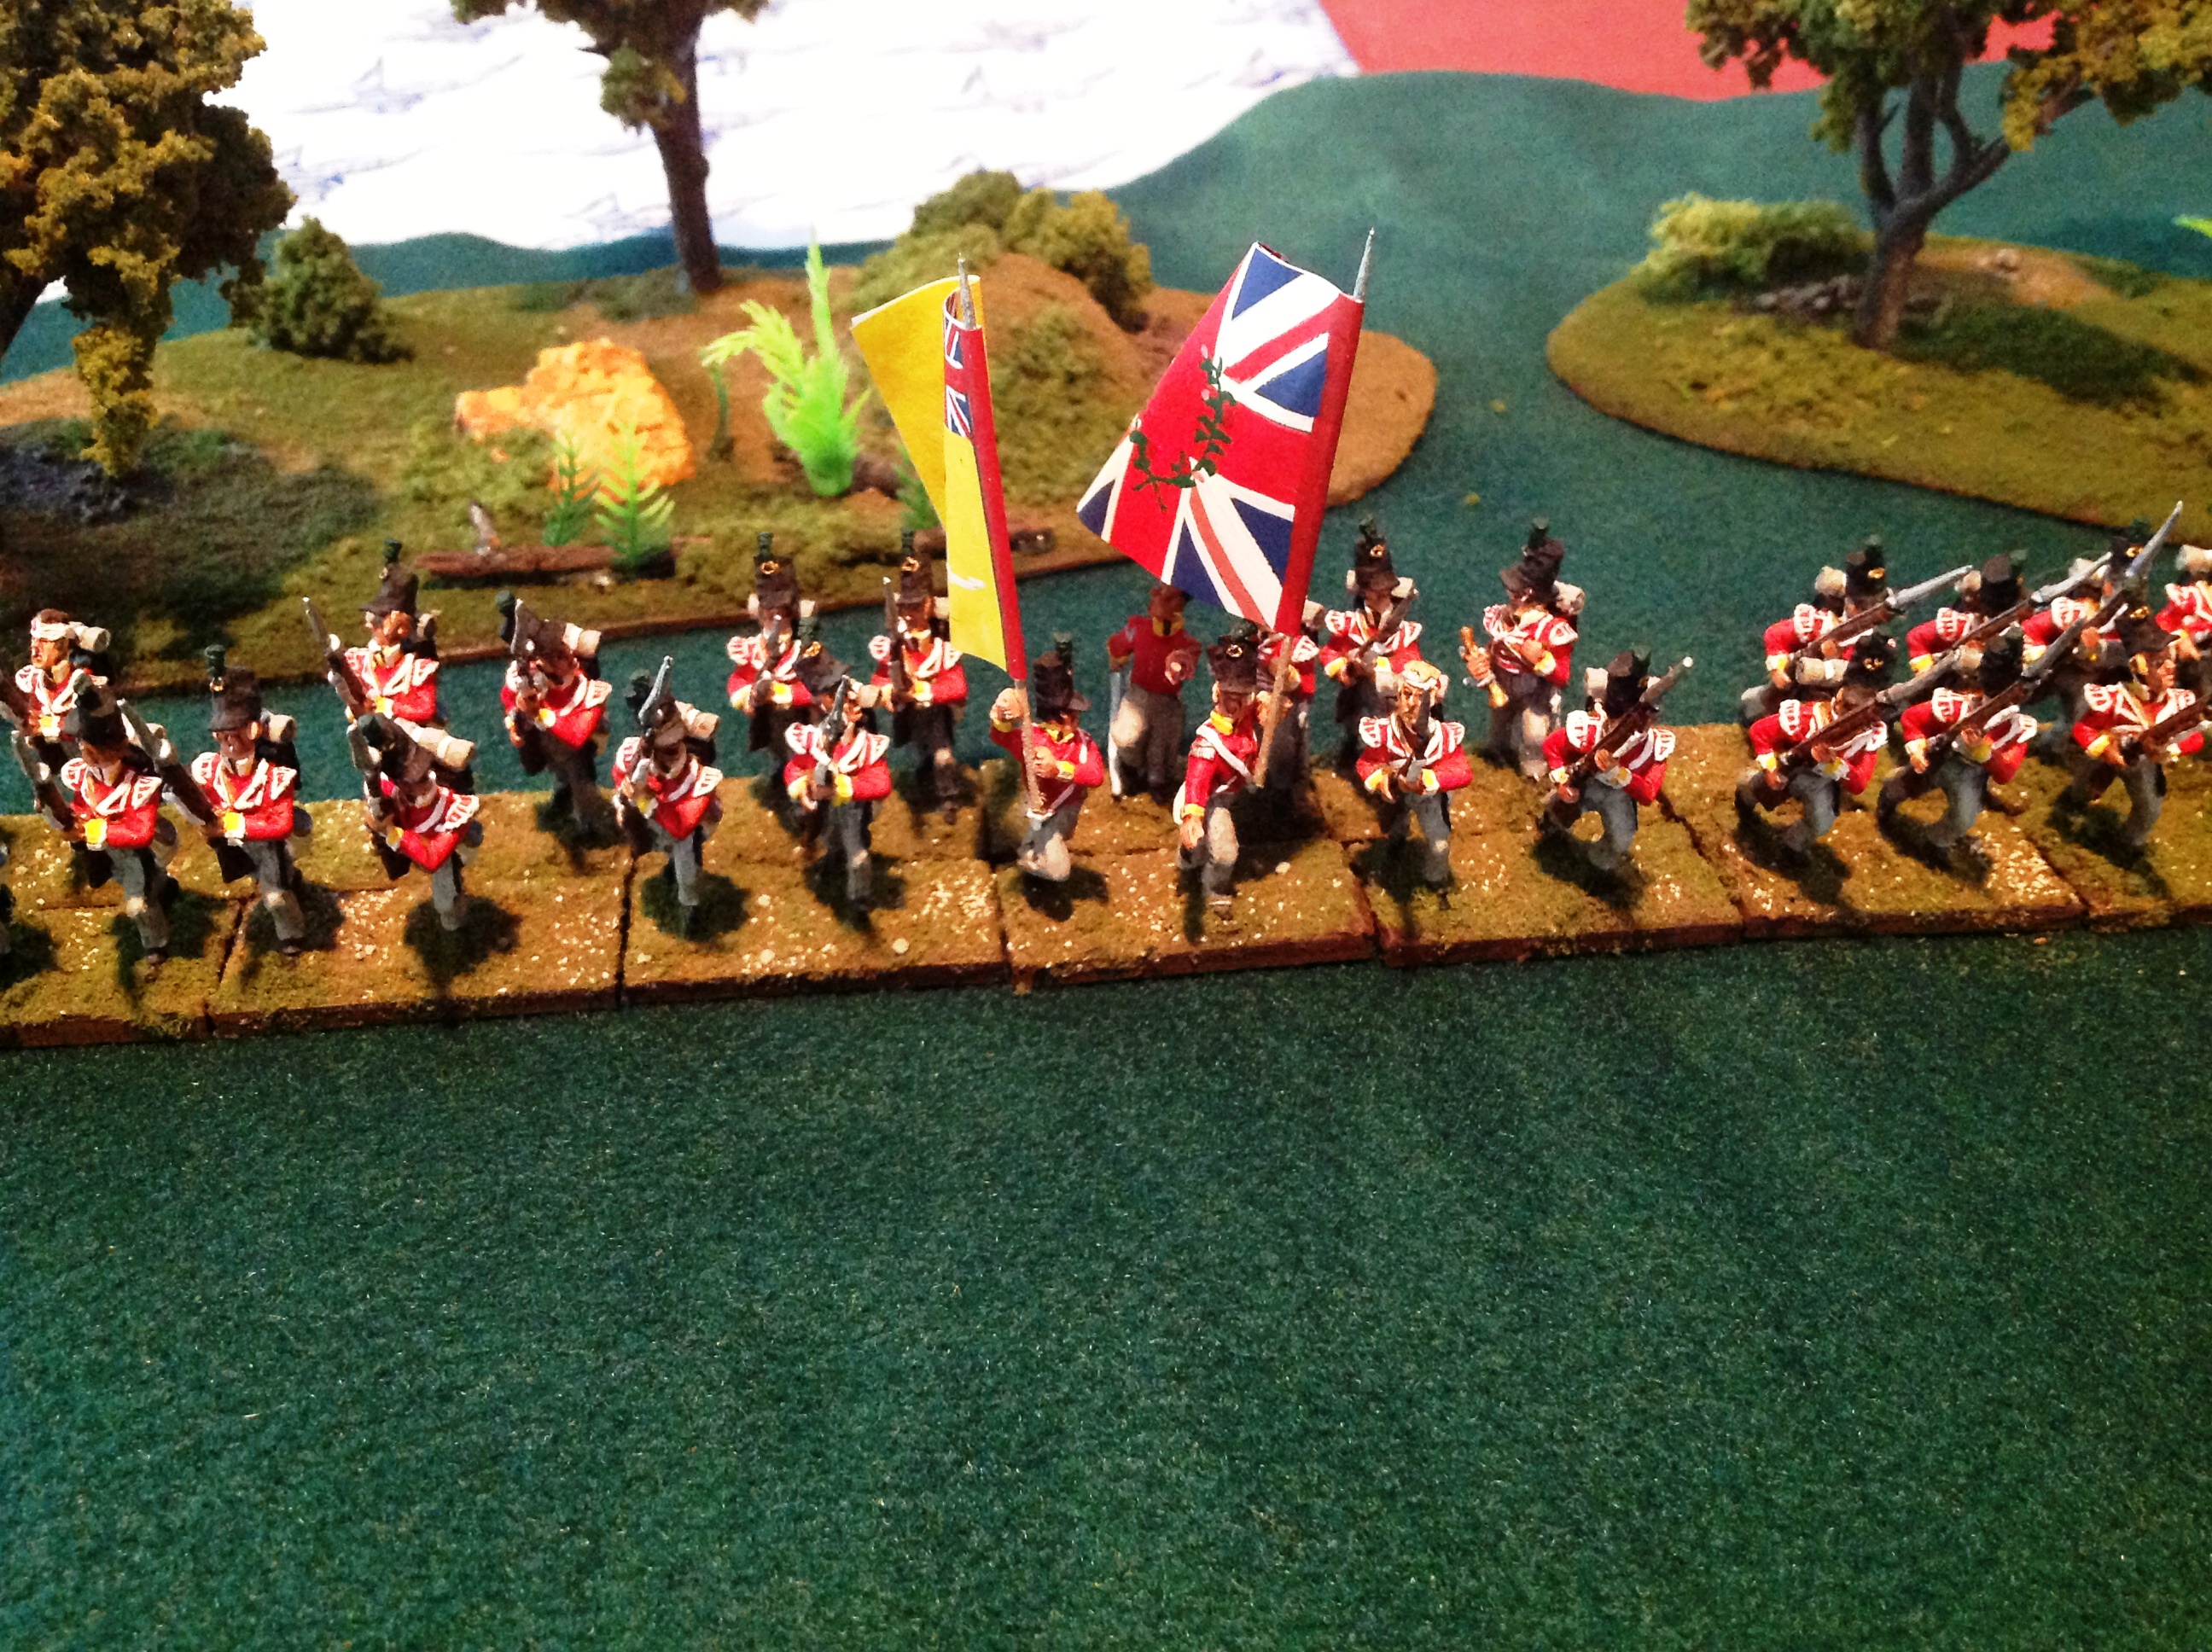
The 4th Regiment and the 21st Regiment are both blue-faced line infantry units that served at Bladensburg.

The 4th Regiment and the 21st Regiment are both blue-faced line infantry units that served at Bladensburg.

Today is the official beginning of school, though I’ve spent a lot of time at Emerald Ridge for the past couple of weeks.  It’s been a busy summer, with a month of solid preparation for J-camp and the week of camp itself, plus the time devoted to painting the house, moving furniture for the re-done flooring and all the silliness that goes with that.

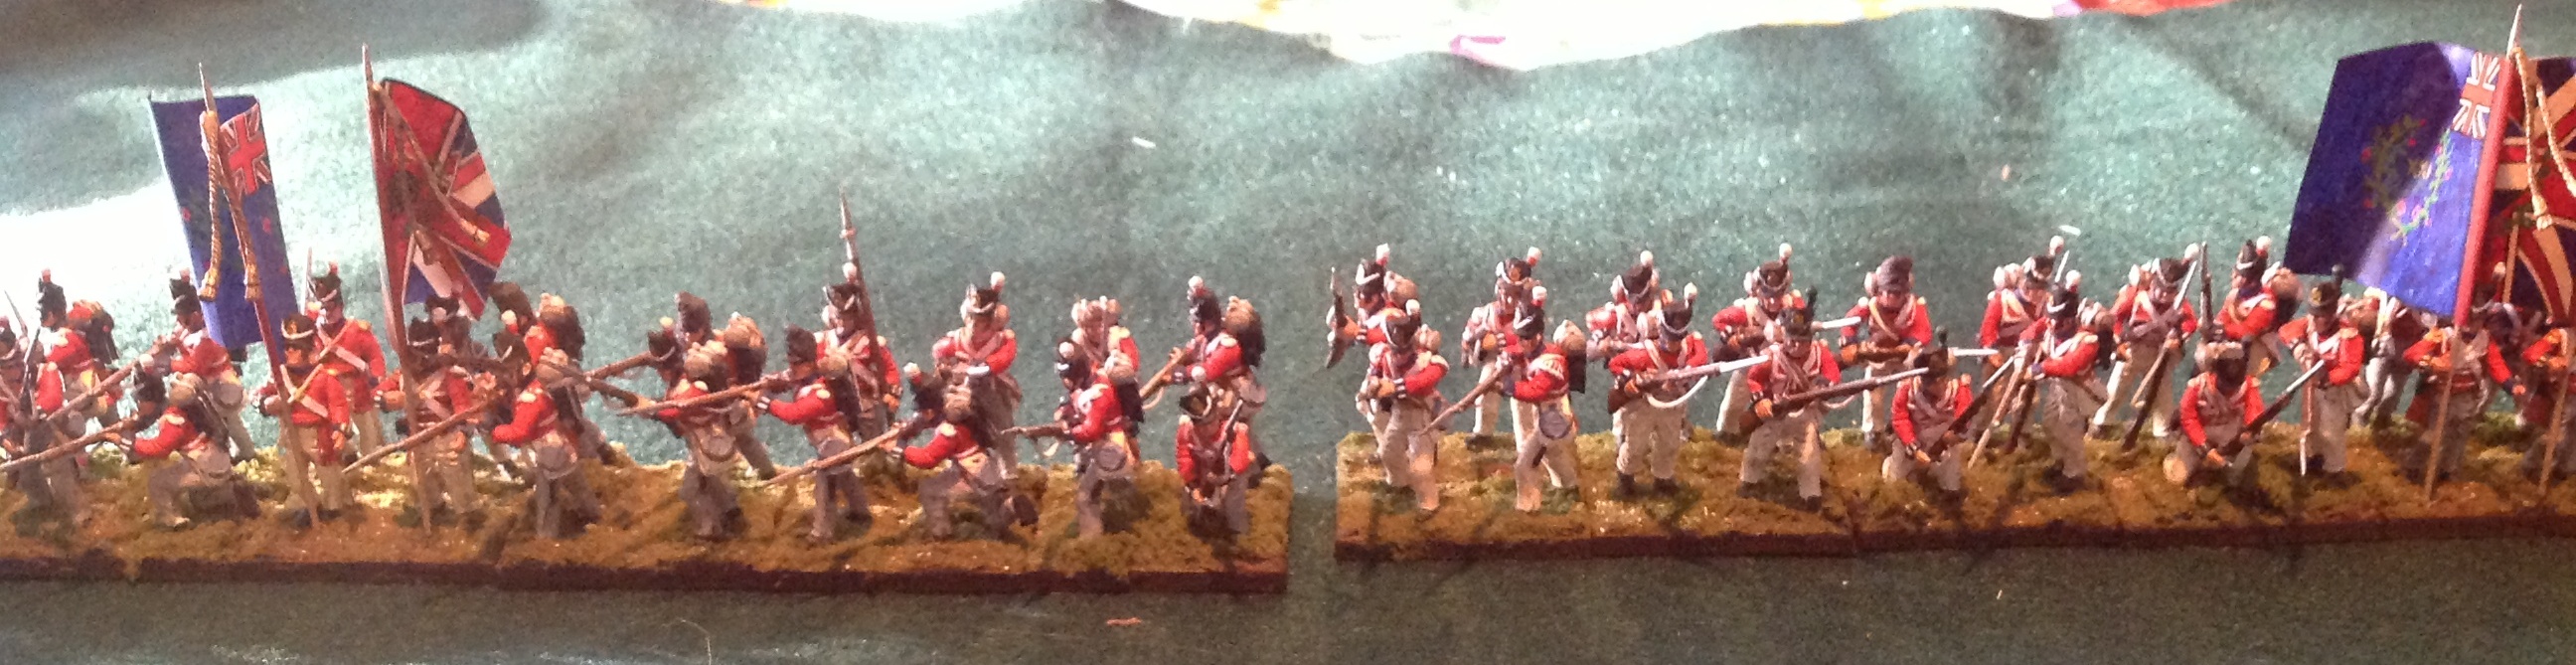
Even so, I made lots of time for painting figures.  My goal was to get the big light infantry battalion finished and at least two of the three line battalions at Bladensburg done.  Voila, I have accomplished that. Below are pictures of the 4th and 21st Regiments, each at 32 figures.

The 4th (Kings) Regiment.  Flag is from Warflags.  Staff is a North Star 200mm lance with the cords snatched from the Victrix standard bearer.

The 4th (Kings) Regiment. Flag is from Warflags. Staff is a North Star 200mm lance with the cords snatched from the Victrix standard bearer.

They are the two of four units created with Victrix figures for the battle.  I am working on the third, the 44th Regiment, also with 32 figures.  A smaller unit, a converged light infantry unit will follow.  The lights aren’t assembled yet, which I am sure will take most of an evening to do.

Just a final critique of the Victrix figs, and then I’ll shuddup about them already.  Basing them is not a pleasure.  I tried to arrange them on their little 40mm square piece of heaven so that they’d resemble a firing line, sort of.  Unfortunately, getting the firing figures to shoot sort of directly forward is impossible, so they are all facing about 22 degrees to their right, as though they were firing at a stag running directly across their front.  The bases, on pretty sizable rectangles, often have to be twisted a bit in order to get everyone moving in sort of the same direction.  The whole lot seems pretty disorganized for a well trained unit. Chalk it up to lessons learned.

21st (Royal North British Fusiliers) Regiment.  Had a difficult time with the lighting, which makes it see a bit like the lights of heaven are shining.

21st (Royal North British Fusiliers) Regiment. Had a difficult time with the lighting, which makes it see a bit like the lights of heaven are shining.

So I have two more British units to finish for the battle, and then one remaining unit, an American line infantry unit of 24 figures to complete for the battle.  After that it’s a few British generals and I want to re-do my rocket batteries before taking the winter to playtest a few times.  I’m shooting for no later than Thanksgiving to have the lot finished, perhaps much earlier.

My board game renaissance.

For the last 30 or so years I’ve stayed away from board games.  Don’t get the wrong idea, I like to play ’em, but I’ve generally stayed away from buying them. I always admired my friends, mostly named Dave, that had big collections of board games and were heavily into game design.  But I felt I needed to make a choice–board games or miniature games.  There’s a reason for the choice.  The first is cost.  If I was going to sink a lot of money into miniatures and all the paraphernalia that went with them, I’d have less money for board games.  The other big problem is storage.  Miniatures, books, records and assorted memorabilia really sucks up all the room I have for keeping stuff. Board games compete for that space too, and, I confess, I’m pretty much all full up.

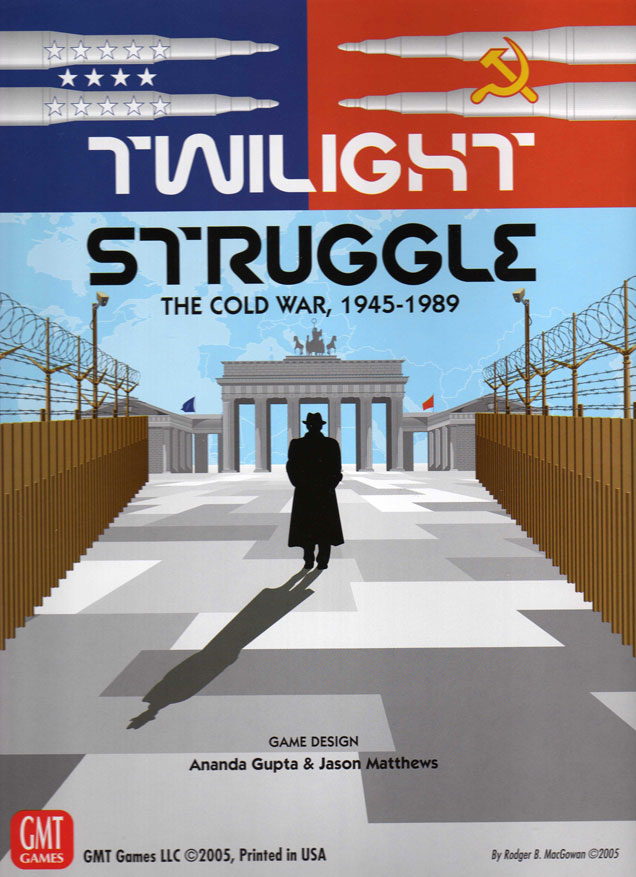
Twilight Struggle is a card driven game from GMT about the Cold War.  Two player game, relatively easy to play, but a fair amount of tension.  Very influential game system.

Twilight Struggle is a card driven game from GMT about the Cold War. Two player game, relatively easy to play, but a fair amount of tension. Very influential game system.

Nevertheless, I’ve played lots of wonderful games over the years, other peoples’ games mostly.  But in the last 18 months or so, I’ve taken more of an interest.  I’ve been sparked by our trips to Cafe Mox, and for whatever reason, I’ve just been intrigued with the topics of many historical board games.  I’ve probably bought or gotten as gifts one game a year over the past five or so years, But this summer II got some birthday cash, used some of my camp stipend and added a bit besides to pick up several board games the past two months.  To be truthful, I’ve played exactly none of them, but I have some plans to tackle them.

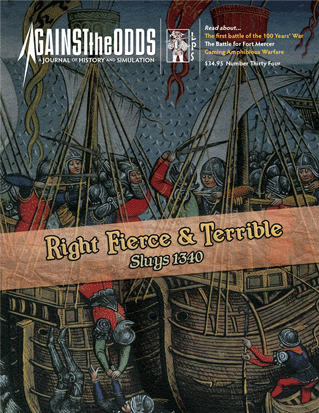
The first game I got was from a copy of the magazine Against the Odds # 34.  Right Fierce and Terrible is the name of the game and it is on the Battle of Sluys.  For those who know me, you realize I have a deep interest in battles of the Hundred Years War.  Sluys is a 1340 naval battle that greatly resembles a land battle of the era. It’s important because I also ran a miniatures game of the battle three years ago, and I wanted to see how the board game matched up with my game. So far I’ve read the article about the battle, but haven’t punched out the game or read the rules.

Right Fierce and Terrible is an Against the Odds magazine game on the naval battle of Sluys in 1340.  Ted Henkle brought this to my attention after I ran Sluys at Enfilade in 2011.

Right Fierce and Terrible is an Against the Odds magazine game on the naval battle of Sluys in 1340. Ted Henkle brought this to my attention after I ran Sluys at Enfilade in 2011.

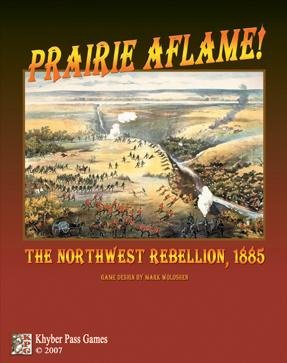
The second game I got was a birthday gift from a friend.  It is Prairie Aflame about the Riel Rebellion in Canada.  My friend and I have both been intrigued with this topic for years.  We both seem to have an abiding interest in hopeless rebellions, such as this campaign and the Spanish Civil War.  In any case, I haven’t had a chance to take a look at it all, and I feel greatly remiss.  I think tomorrow, Labor day is the perfect time to look inside and get an idea of what it will take to play it.

Prairie Aflame, designed by Mark Woloshen for Khyber Pass Games is now available as Northwest Rebellion from Legion Games.  Not many games published on the Riel Rebellion of 1885, but this looks interesting.

Prairie Aflame, designed by Mark Woloshen for Khyber Pass Games is now available as Northwest Rebellion from Legion Games. Not many games published on the Riel Rebellion of 1885, but this looks interesting.

One game I have that I’ve played a lot and really like is GMT’s Twilight Struggle about the Cold War.  It is a CDG or card driven game.  I’ve actually played several games that use this mechanism, including We the People, on the American Revolution, and Making of the President 1960 by Zman Games.  I love the mechanics.  Twilight Struggle and Making of President actually helped me learn a bit more about the period as well, so I found this kind of game to be fun and interesting .  I was at Game Matrix one day and saw 1989: Dawn of Freedom, a political game about the fall of Communism in Eastern Europe.  It uses the CDG system from Twilight Struggle, and is on a topic that really interests me.  I’ve looked through some of the rules, but haven’t punched it out yet.

1989: Year of Freedom uses the same system as Twilight Struggle.  The topic is just as fascinating as the Communist player tries to stay in power, while the forces of democracy try to speed the move to more representative government.

1989: Dawn of Freedom uses the same system as Twilight Struggle. The topic is just as fascinating as the Communist player tries to stay in power, while the forces of democracy try to speed the move to more representative government.

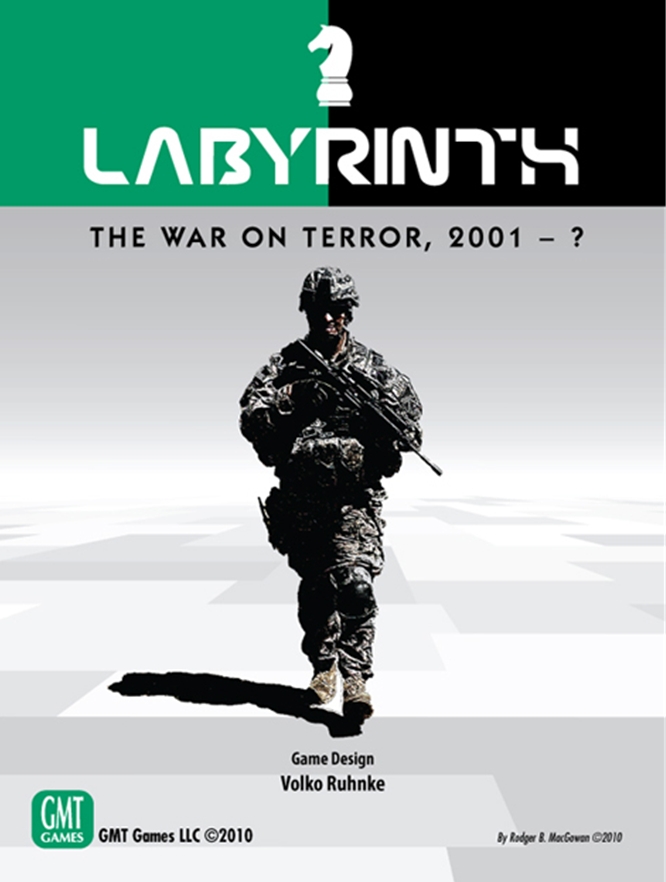
The last game that I got was GMT’s Labyrinth: The War on Terror.  This is another CDG game, an award winner from 2010 that is again derived from Twilight Struggle.  I read some reviews of the game and checked the ratings on Board Game Geek.  A real advantage of this game is that in addition to head to head gaming it is possible to play a solitaire game, though it is a tough game for the U.S. to win.

Labyrinth is another CDG game.  It has the virtue of being played solitaire.

Labyrinth is another CDG game. It has the virtue of being played solitaire.

While I won’t let board games take over my life, they are a nice distraction.  However, I will note my number of days painting for school year 2012-13 was down.  While I still paint most nights (I’d guess 250 or so days per year) that’s still less fewer days than the past. Most other nights I read quietly until bed time or spent too much time being unproductive on the computer.  This is one more evening activity I can take on instead of wasting untold hours Googling cures for male pattern baldness or Donald Trump’s birth certificate.    With our little home renovation, I now have a space big enough to play them.  I’m considering devoting one evening a week to working through a game at my dining room table, or getting together with someone to play a bit.

One big damn unit: The 85th Regiment

48 figures in 12 stands means a frontage of 18" . Double that when in extended order.

48 figures in 12 stands means a frontage of 18″ . Double that when in extended order.

In my Bladensburg summer I’ve focused on painting some British regiments.  First on the list was the 85th Regiment, (Buck’s Volunteers) light infantry.  For a Regimental Fire and Fury game it’s  enormous, with 12 bases to represent it’s thousand man stated strength.

These are Old Glory 28 mm British Light Infantry figures.  They are painted more or less straight out of bag.  The figures aren’t terribly imaginative, but they are relatively easy to paint.  The main color is Vallejo Vermillion, a color I like very much for it’s brightness, without getting too light or too orange. and then washed with Ceramcoat Moroccan Red.  I always add some Liquitex Matt medium to break the tension to the paint and water mixture.  I add just a tiny bit of Charcoal Gray to darken it and then wash it on with a big brush.  The trousers are Ceramcoat Quaker Gray, again, washed with Charcoal Gray.

If I have a complaint about the miniatures at all, it is that they are quite weak at the ankles.  It’s important to be careful as you’re straightening them out.  Otherwise they’re pretty easy cheesy.

The 85th was one of Wellington’s veteran units sent to America in 1814.  It was the chief unit in the leading light brigade at Bladensburg, along with a small battalion of converged light companies, and an even smaller battalion of Royal Marine Light Infantry.  Together the three units took the brunt of fire at Bladensburg while crossing the lower branch of the Potomac River in the face of entrenched cannon and militia.  They quickly moved to the flank of Pinckney’s Marylanders, setting them to flight before moving on to Stansbury’s Baltimore brigade. Absolutely one of the vandals that burned Washington, they were quite heroic on the battlefield.

My summer of figure gluttony

I’ve made a big deal of not falling into the gamer’s trap of amassing huge quantities of new minis to decorate my considerable pile of unpainted lead. I am not holier than thou, trust me,I have lots of unpainted miniatures. Thousands for sure. But I’ve made some rules for myself-no new projects, and buy ’em as you need ’em. My goal is to paint 400-600 28mm figures per year. Sometimes I’m successful and sometimes I’m not. My ultimate desire is to slowly reduce the number of figures I have stockpiled.

This summer I’ve failed. Yes, I’ve continued to paint. I’m still immersed in my Victrix nightmare, but making slow and steady progress. However, sometime in May, my common sense rapidly fled the reservation.

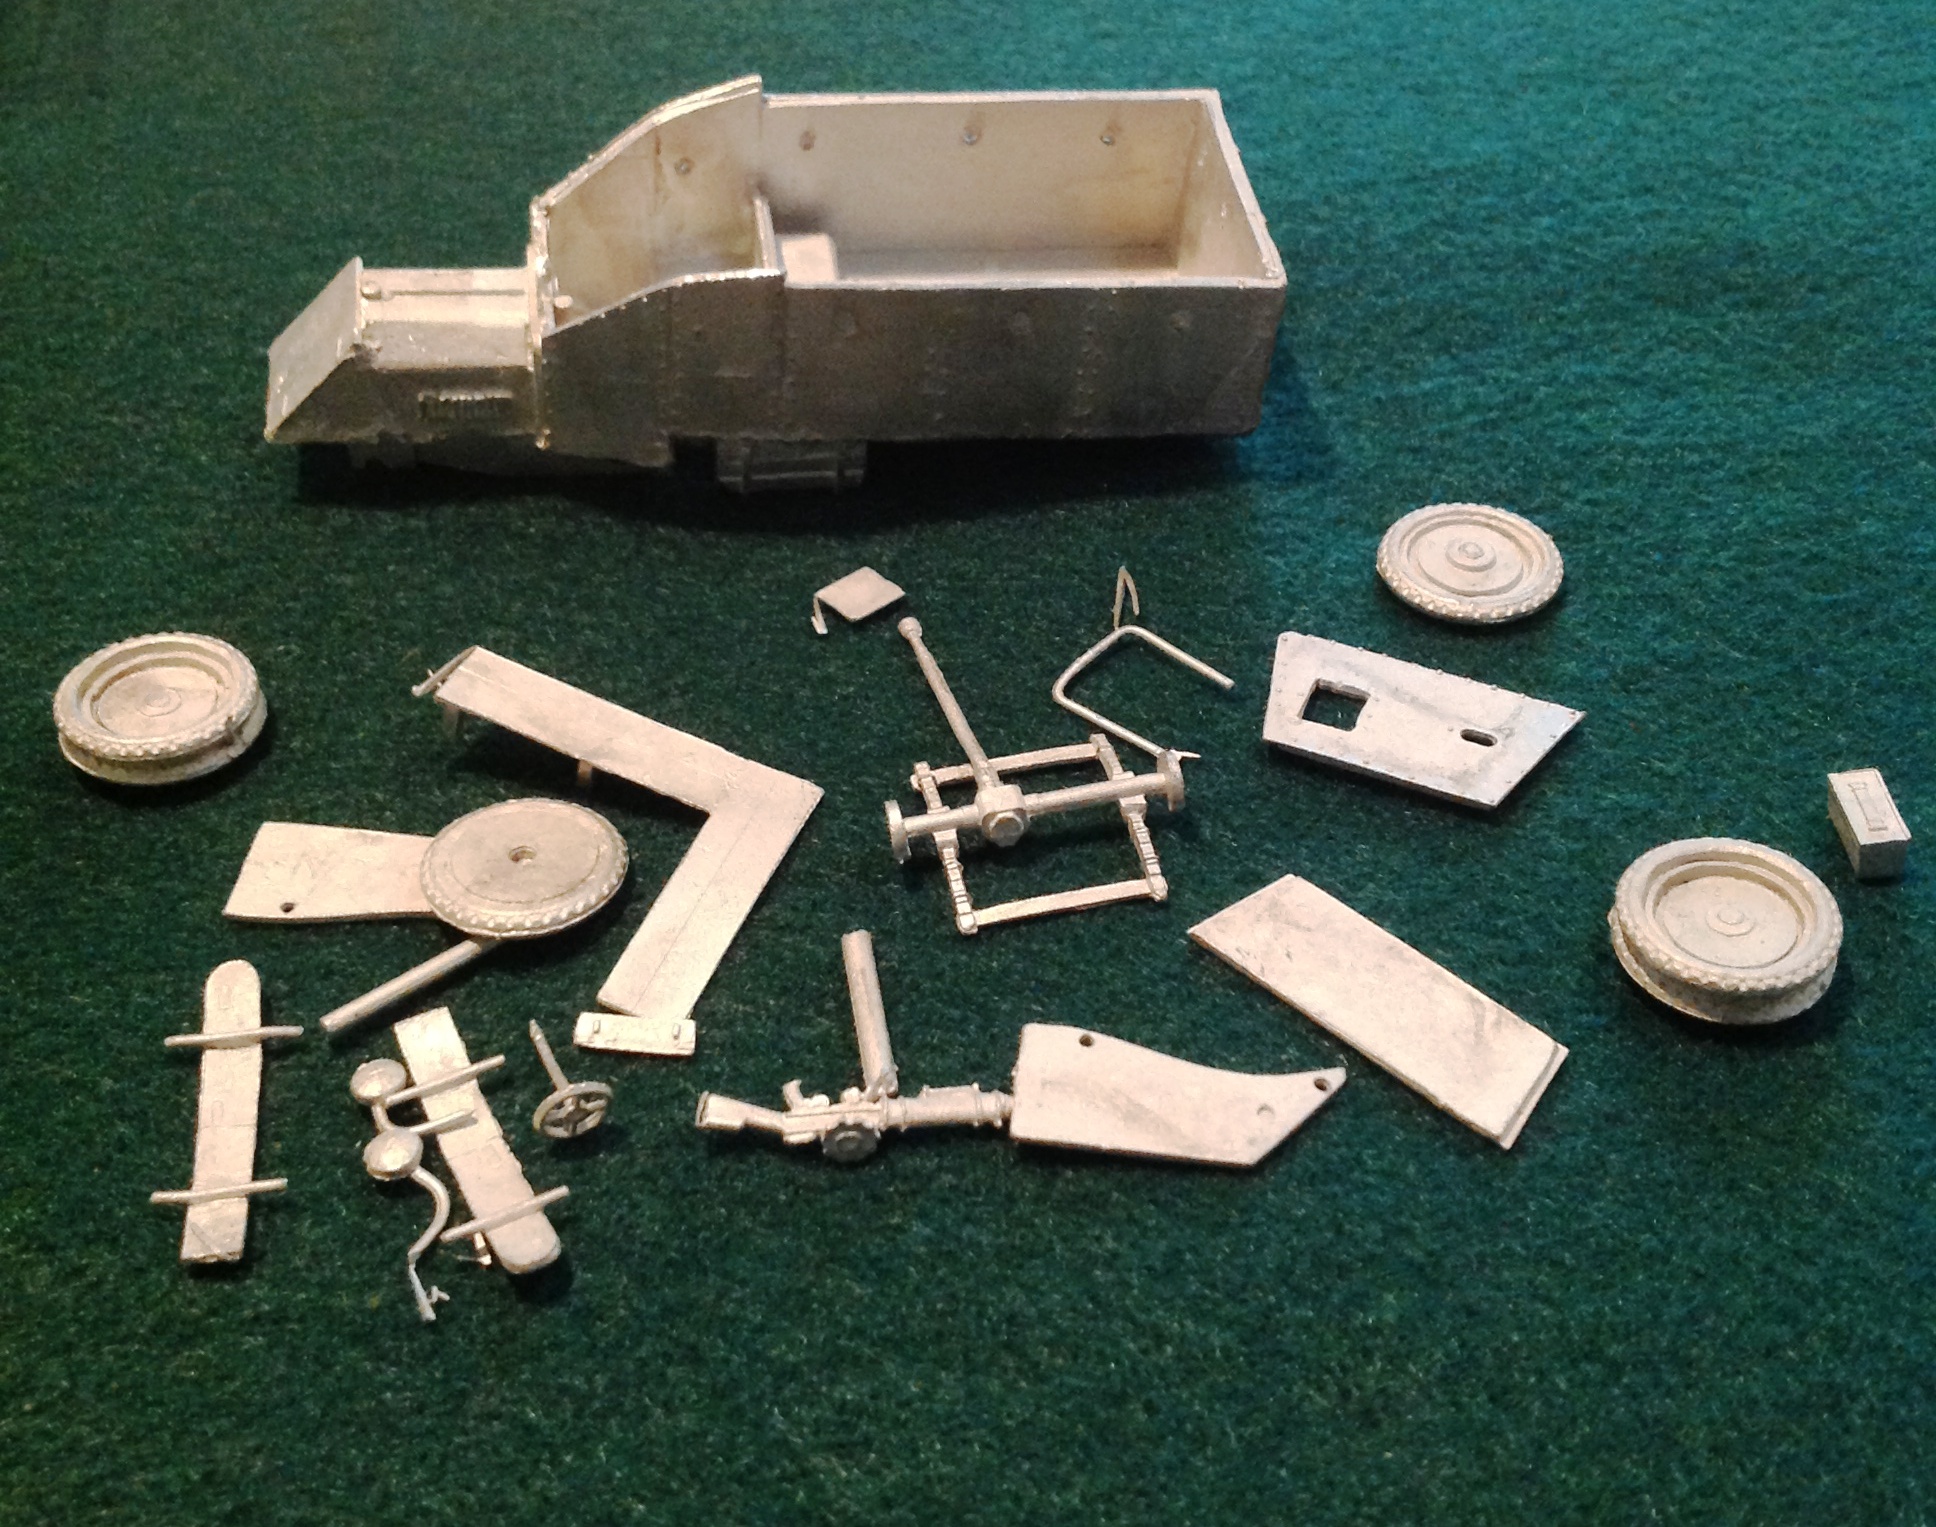
I’ve made several sizable figure purchases this summer. The first came in May when I purchased some of the very nice IRA range of miniatures from Musketeer Miniatures. I bought about 40 or so figures plus a beautiful Lancia armored lorry. I got all the different IRA minis, plus some of the Royal Irish Constabulary figures.

Though it is fairly fiddly, the Lancia Lorry by Musketeer Miniatures is a thing of beauty.

Though it is fairly fiddly, the Lancia Lorry by Musketeer Miniatures is a thing of beauty.

Musketeer offers a couple of nice packs of civilians for this range included in it's Uncivil War line.

Musketeer offers a couple of nice packs of civilians for this range included in it’s Uncivil War line.

The Musketeer IRA range is very nice.  The IRA with Shotguns figures are fairly fragile and I managed to break off a barrel.  The figures aren't cheap, so that's a disappointment.

The Musketeer IRA range is very nice. The IRA with Shotguns figures are fairly fragile and I managed to break off a barrel. The figures aren’t cheap, so that’s a disappointment.

When we knew Lorri was receiving a sizable severance package, she passed on a few bucks to me. One of the projects I’m really interested in broadening (once I’m finished with Bladensburg and escape my Victrix hell,) is giving attention to my hypothetical War With Spain 1797-1807. To that end, I picked up about 80 figures from the Dayton Painting Consortium. These are nicely proportioned miniatures, maybe a tish small by today’s standard. I picked up musketeers and grenadiers, as well as a unit of dragoons to balance out my growing numbers of American troops.

Though they're hardly state of the art, this range of Spanish figures by Dayton Painting Consortium are very serviceable and highly paint-worthy.

Though they’re hardly state of the art, this range of Spanish figures by Dayton Painting Consortium are very serviceable and highly paint-worthy.

After I worked at summer camp, as I do each summer, I invested some of my stipend in miniatures. I made two orders, one to the Warstore, the other to Old Glory 25’s. in the spring the Perry Brothers released the Loyalist Volunteers of Ireland for their AWI range. The VOI have a distinctive uniform with their funky bearskin headwear and their oddly laced tunic wit green Brandeburg knots. I ordered 24 figures of this unit which fought at Hobkirk’s Hill and Eutaw Springs, two of my battles.

Half my unit is backordered but, these Volunteeers of Ireland will make a nice addition to my American Revolution in the South project.

Half my unit is backordered but, these Volunteeers of Ireland will make a nice addition to my American Revolution in the South project.

The OG order was aimed at fleshing out a few of my projects. I need American line infantry and British commanders to wrap up Bladensburg. I ordered French mounted commanders for the Hundred Years War. I also added more Americans to the War With Spain project.

Lots more unpainted figures. Kind of embarrassing. The good news is I continue to paint regularly. I’ll have a painting update on my War of 1812 Brits in the next week. My goal, which I believe is quite achievable, is to have two finished Victrix line battalions, plus my completed 85th light infantry by the first day of school, September 4th.